
» Arduino sketches on RPi JeeLabs. In AVR, Linux, Software on Jan 17, 2013 at 00:01 There’s an arduino-mk package which makes it simple to build and upload sketches on a Raspberry Pi.

Raspberry Pi How to: Learning Linux Commands. So you have a Raspberry Pi but you’re not a Linux expert?
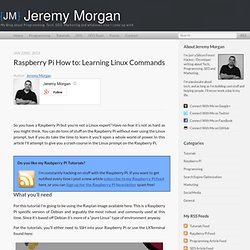
Have no fear it’s not as hard as you might think. You can do tons of stuff on the Raspberry Pi without ever using the Linux prompt, but if you do take the time to learn it you’ll open a whole world of power. In this article I’ll attempt to give you a crash course in the Linux prompt on the Raspberry Pi. Distributed Network Data If you want to create a network of multi-sensor Arduino modules that share information, this book delivers.
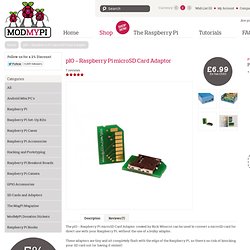
The authors' extensive "hands on" experience produces a practical recipe for success. Beginners through intermediate users will appreciate the clarity of steps building from parts to a working network of sensor modules. The authors break down this task into three major chunks: pIO - Raspberry Pi microSD Card Adaptor. Jose The announced feature "Fits perfectly in the ModMyPi Raspberry Pi Case" is actually not exact, since the adaptor prevents the Pi Board to correctly sit on the plastic pins of the case base.
My Digital Life: My SenseBoard Kit : Kits. <div id="productImageCaption"><a href=" target="PopupImage"> view larger image </a></div> Product Details The SenseBoard is a powerful, flexible and yet simple-to-use hardware kit that can be used as the heart of a thousand different projects.
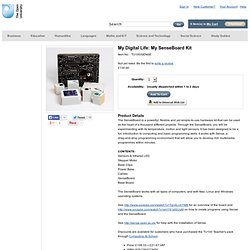
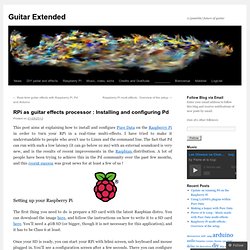
Through the SenseBoard, you will be experimenting with its temperature, motion and light sensors. It has been designed to be a fun introduction to computing and basic programming skills. Py/pyext - Python scripting objects. RPi as guitar effects processor : Installing and configuring Pd. This post aims at explaining how to install and configure Pure Data on the Raspberry Pi in order to turn your RPi in a real-time multi-effects.
I have tried to make it understandable to people who aren’t use to Linux and the command line. LED Painter. Building on the success of our popular 16 Ch.
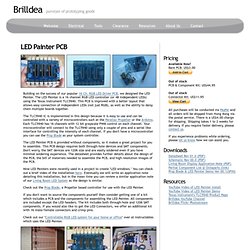
RGB LED Driver PCB, we designed the LED Painter. The LED Painter is a 16 channel RGB LED controller (or 48 independent LEDs) using the Texas Instrument TLC5940. This PCB is improved with a better layout that allows easy connection of independent LEDs (not just RGB), as well as the ability to daisy chain multiple boards together. The TLC5940 IC is implemented in this design because it is easy to use and can be controlled with a variety of microcontrollers such at the Parallax Propeller or the Arduino. Each TLC5940 has 16 channels with 12 bit grayscale PWM control on each channel. Slow-change visualization of audio signal. Alex Bradbury. Book/ GPIO Examples 1 - A single LED. Before we even get started with the GPIO, lets make an LED light up by simply wiring it to the +3.3v supply and 0v.
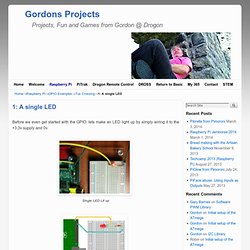
Single LED Lit up One LED on the 3.3v supply So… We have a yellow wire from the Pi’s +3.3v supply to the breadboard and this connects to an LED then via a 270Ω (ohm) resistor to 0v. The green wire connects back to the Pi. Adding a Bluetooth serial terminal to Raspberry Pi. Sometimes you find a computer component that’s so cheap, that works so well, that you’re amazed you managed to live without it for so long.
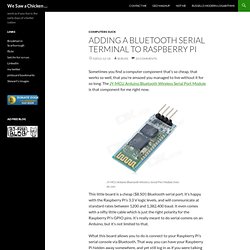
The JY-MCU Arduino Bluetooth Wireless Serial Port Module is that component for me right now. JY-MCU Arduino Bluetooth Wireless Serial Port Module from dx.com This little board is a cheap ($8.50!) Bluetooth serial port. It’s happy with the Raspberry Pi’s 3.3 V logic levels, and will communicate at standard rates between 1200 and 1,382,400 baud. Reading USB microphone input. @BlackJack.
Converting Computer ATX Power Supply to Lab Bench Power Supply. 800 node self-organized wireless sensor network. On Aug. 27, 2001 researchers from the University of California, Berkeley and the Intel Berkeley Research Lab demonstrated a self-organzing wireless sensor network consisting of over 800 tiny low-power sensor nodes. This demonstration highlights work at Berkeley that is funded, in part, by the Defense Advanced Research Project Agency (DARPA) Network Embedded Softrware Technology program and is a leading component of the CITRIS research agenda, as well as the collaboration with Intel.
The demonstration was live, involving most of the audience attending the kickoff keynote of the Intel Developers Forum given by Dr. David Tennenhouse, Intel VP and Director of Research. A sensor network application. Pywws - Python software for USB Wireless WeatherStations. Young Professionals' Event - history - IET Conferences. Bluetooth RF Silicon and Software Solutions. Make easy to use Bluetooth® wireless connectivity a reality with Broadcom's Bluetooth-based RF silicon and software solutions. Broadcom's Blutonium® RF silicon offer customers significant cost, performance and integration advantages. Broadcom's Widcomm® software offers customers the most proven, easy porting, broad application support and the most proven Bluetooth stack available.
Broadcom makes it easy and cost effective to integrate Bluetooth capabilities into mobile handsets, wireless headsets, personal computers, computer mouse and keyboard devices, PDAs, game controllers, automobile and industrial equipment. Software Updates and Support Broadcom does not sell products directly to consumers. RaspiHub. The Web framework for perfectionists with deadlines. Raspberry Pi by Benedict Allen on Prezi. PalmOrb: Use your PalmOS PDA as a LCD status display via serial, USB, BlueTooth or IR.
The Tricorder project. A bit of a story, and then a lot of pictures — by far the most interesting class I’ve ever taken was Advanced Brain Imaging in grad school. As a hands on lab class, each week we’d have a bit of a lecture on a new imaging technique, and then head off to the imaging lab where one of the grad students would often end up in the Magnetic Resonance Imager (MRI) and we’d see the technique we’d just learned about demonstrated.
Before the class I was only aware of the structural images that most folks think of when they think of an MRI, as well as the functional MRI (or fMRI) scans that measure blood oxygenation levels correlated with brain activity and are often used in cognitive neuroscience experiments. But after learning about Diffusion Tensor Imaging, spin-labeling, and half a dozen other techniques, I decided that the MRI is probably one of the most amazing machines that humans have ever built. And I really wanted to build one. The Python Tutorial — Python v3.2.3 documentation. Python is an easy to learn, powerful programming language. It has efficient high-level data structures and a simple but effective approach to object-oriented programming.
Python’s elegant syntax and dynamic typing, together with its interpreted nature, make it an ideal language for scripting and rapid application development in many areas on most platforms. The Python interpreter and the extensive standard library are freely available in source or binary form for all major platforms from the Python web site, and may be freely distributed.
The same site also contains distributions of and pointers to many free third party Python modules, programs and tools, and additional documentation. Python Programming Language – Official Website. Python. Intro. By Pete Shinners pete@shinners.org This article is an introduction to the Pygame library for Python programmers. The original version appeared in the Py Zine, volume 1 issue 3. This version contains minor revisions, to create an all around better article. Mini Wifi Wireless USB Neteork LAN WLAN Adapter IEEE 802.11 N/G/B 150Mbps Dongle. Basic Resistor Sensor Reading on Raspberry Pi. We've already covered how to use an Analog-to-Digital Converter chip with a Pi. Build a $35 Media Center with Raspbmc and Raspberry Pi. Sensors - Proto-PIC.
The Raspberry Pi User Guide. The magazine work has been, you may have noticed, slow of late. Raspberry Pi. TRENDnet TEW-647GA TRENDnet TEW-647GA Wireless N Gaming Adapter NSPEED WIRELESS GAMING ADAPTER 300MBPS F/WII XBOX 360 PLAYSTATION from mwave.com. Airborne Enterprise 802.11b/g Wireless Ethernet Bridges by Quatech. Camera module – first pictures! Raspberry Pi Map. Register here to express an interest in Raspberry Pi.
Want an Extra Slice of Pi? The BBC Micro 2 - Look what's coming back to the classroom. Published on 13th February 2012 03:25 PM. BBC Micro 2.0 #ictcurric. Frambozenbier: RasPi Forums. Sony's Bravia Applicast. Meet Pebble. Supermechanical : objects that connect us.
液晶テレビ BRAVIA 〈ブラビア〉 Hardware Expansions/Additions/Peripherals. Raspberry Pi.