
D.I.Y FRIDAY. Recipe Card Maker. Welcome to Skip to my Lou As seen in the new book "Hand in Hand" Recipe Card Maker Create your own recipe cards using this free online recipe card maker.

Recipe card maker help » Step 1 — Select a recipe card size Select Size » Add Recipes » Print What size card would you like? This setting gives you two cards per page. This setting gives you three cards per page. Will you be adding multiple recipes? Skip to my Lou Features Craft, Create, Celebrate… Skip To My Lou is a place to fulfill the passion for sharing the best in life. Skip to my Lou. Kumihimo H e a r t tutorial by =Gex78 on deviantART. DIY Paper Popsicle Memory Game. As a kid I adored the game 'Memory'.
The truth is, I still do. Sure, it's not exactly what you would define as 'challenging' but there's something charming about it's simplicity. So, for a bit of cute fun I decided to re-create the game with a slight twist. I've replaced the cards with paper popsicles. Who doesn't love popsicles, right? Scatter these at a summer ice-cream social, bbq or picnic for a bit of interactive fun for guests! Smooth white A4 card (x2)Popsicle sticks (x12)ScalpelRulerCutting boardScissorsDouble-sided tapeColour printer Download and print out 2 pages of your popsicle designs. Use a scalpel and ruler to gently score along the dotted lines. Before you start cutting out your popsicles, keep in mind that you should be as precise as possible with your cutting as you want all your popsicles to look as identical as possible from the back.
Cut out around the straight edges of your popsicles using the scalpel and ruler. { all images by Amy Moss } How to fold an origami star. The Madeleine Mini Bloomers. Hello!
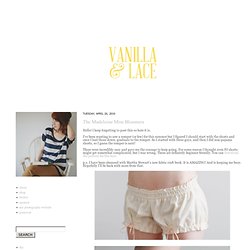
I keep forgetting to post this so here it is. I've been wanting to sew a romper (or few) for this summer but I figured I should start with the shorts and once I had those down, graduate to the romper. So I started with these guys, and then I did non-pajama shorts, so I guess the romper is next! These were incredibly easy and gave me the courage to keep going. For some reason I thought even PJ shorts might get somewhat complicated, but I was wrong. P.s. How to make cute bookmarks. Cindy with Skip to my Lou is hosting a month of sewing ideas for a handmade holiday season.
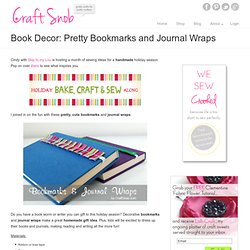
Pop on over there to see what inspires you. I joined in on the fun with these pretty, cute bookmarks and journal wraps. Do you have a book worm or writer you can gift to this holiday season? Decorative bookmarks and journal wraps make a great homemade gift idea. Plus, kids will be excited to dress up their books and journals, making reading and writing all the more fun! Materials: Ribbon or bias tapeScissorsNeedle and thread¼” ElasticBook or journal Ribbon Option: Create a rolled ruffle about 2 inches longer than the book or journal. Fold under each end of the ribbon. Cut a piece of elastic to fit the book or journal. Insert the decorative bookmark in your favorite book or wrap it around your journal.
Tutorial Tuesday: Easy Button Magnets. These cute little buttons may just be the easiest craft project ever.

They use minimal supplies and only take 5 minutes to make. Suddbar tavla – Craft of the Day, erasable board. Det här är ett enkelt pyssel som går att variera i det oändliga.
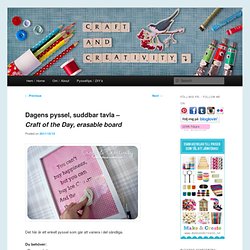
Du behöver: - Ram med glas - Möstrade eller enfärgade papper - Whiteboard-penna - Snöre - Tavelkrok eller spik Gör så här: Klipp till pappersarket så det passar ramen, måtta gärna med hjälp av glaset eller ramens baksida. Om du vill så klipper du till flera ark med olika färger och mönster för variation när andan faller på. Förslut ramen på baksidan och häng upp din tavla på väggen. Fäst ett lagom långt snöre på whiteboard-pennan och låt den också hänga på tavelkroken. This is really easy to do and can be varied in so many ways. Inredning, inspiration, pyssel, fotografering.
Äntligen kan jag berätta om årets version av vår kreativa adventskalender!
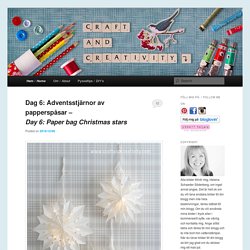
I år har The Creative Collective Sweden bjudit in fantastiska gästbloggare för att fira att det här är vår tredje adventskalender i rad! Varje dag i december presenteras ett nytt inspirerande projekt – något att skapa, baka eller bara göra i förberedelse för julen. Det ska bli så spännande att se vad våra gäster The House that Lars Built, Sweet Paul, Mokkasin, Kreativa Karin, Babes in Boyland, Det Gröna Skafferiet, Musqot Design, @mycasa och Kriis Kitchen hittar på! Glowing jar project – varázslat a lakásban (EN/HU) Craftgawker - StumbleUpon.
Pouch Tutorial Part I (Bottom) by ~nimuae on deviantART. DIY: MAKEUP BRUSH ROLL. Photos/post/design: Kristin Ess This is by far the most ambitious tutorial we’ve ever done on TBD, but we think you guys might be ready for something a little bit more challenging. This DIY dip-dye brush roll is such a good gift and you can do it in any color you want.
I picked white + teal, which is probably not the smartest for makeup brushes but it looks the prettiest! Besides, I’ll probably use it for hair combs, scissors and clips. In order to do this little project you must have/use a sewing machine. (TOTAL TIME: It took about 2 hours to make this and photograph the process, so it should only take you about an hour. Using a sturdy fabric of your choice (I used white denim), cut an 18″ wide x 41″ panel.Fold the bottom 5 inches up.Use “Stitch Witchery” fusible bonding tape to help keep that piece in place temporarily.Once you’ve laid your bonding tape under, go over it with an iron. Fill one bowl with 5 cups of ice cold water. Ruffled Tube Top DIY. If one is good then two is better.
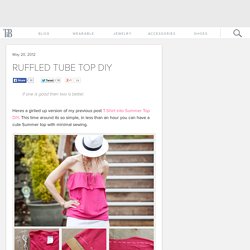
Heres a girlied up version of my previous post T-Shirt into Summer Top DIY. This time around its so simple, in less than an hour you can have a cute Summer top with minimal sewing. To see the step by step instructions and photos click here. No Sew Tutu. 5 Minute Microwave Mug Brownies.