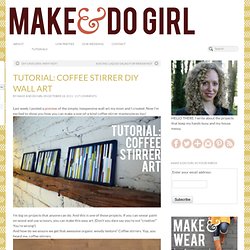

Craft Ideas - Easy Crafts for Kids, DIY Crafts and Knitting Patterns -... TUTORIAL: Coffee Stirrer DIY Wall Art - makeanddogirl.com - StumbleUpon. Last week, I posted a preview of the simple, inexpensive wall art my mom and I created.

Now I’m excited to show you how you can make a one-of-a-kind coffee stirrer masterpieces too! I’m big on projects that anyone can do. And this is one of those projects. If you can smear paint on wood and use scissors, you can make this easy art. (Don’t you dare say you’re not “creative!” Here’s all you need to get started: 1. Additional Supplies: 5.
Okay, first things first. So, once you’ve got your palette, it’s time to paint your frames and your coffee stirrers! My mom and I did our painting as the sun was setting, which is always a questionable decision. I was going for the reclaimed driftwood sort of look. Once your coffee stirrers are painted, it’s time to trim them to fit into the frame(s) you’ve chosen. I found the quickest way to do this is to measure one stick to be the length you need it and then use it as the guide for trimming all the others. What’s left? Small Favors Catalog - artwork by Lawrence Yang - StumbleUpon. Here are the pieces I'm showing at the Giant Robot NY Small Favors show, up from March 27th to April 14th, 2010. Each piece is $150.
For purchase inquiries please contact Giant Robot NY: (212) 674-4769 | grny.net "Island Tree" - watercolor and gouache on paper, mounted on board - 5" x 5" (tabletop background saturation bumped back in Photoshop) "River Tree" - watercolor and gouache on paper, mounted on board - 5" x 5" (tabletop background saturation bumped back in Photoshop) "Mountain Tree" - watercolor and gouache on paper, mounted on board - 5" x 5" (tabletop background saturation bumped back in Photoshop) "Volcano Tree" - watercolor and gouache on paper, mounted on board - 5" x 5" (tabletop background saturation bumped back in Photoshop) "Blue Launch" - watercolor and gouache on paper, mounted on board - 5" x 5" (tabletop background saturation bumped back in Photoshop) Artwork © Lawrence Yang 2010 my blog | my site | purchase inquiries.
The Technique Zone: Acrylic Paint Transfer - StumbleUpon. Supplies needed: Acrylic dabbers, photocopy of an image, water spritzer bottle, paintbrush, card stock, craft sheet and heat tool (optional) Take the lid off the dabbers and brush the paint onto the card stock, ensure you get a good coverage Take your photocopied image ( remember that you will get a reverse of the image, so don't use bold words), flip it over and place it in the acrylic.

Lightly press it down making sure it's smooth and not wrinkled Leave to air dry for at least 15 minutes and then if you wish give it a blast with the heat tool Only move onto this step when you are sure your paint is completely dryTake your water filled spritzer bottle, spray the back of the paper no more than two squirts, you don't want it too wet Next start to rub the paper very gently with your finger Keep rubbing and extra spritzing if you need too Eventually you will get rid of all the paper, but it does take a bit of patience as you have to be careful not to wet it too much and rub the image away.