
How to Turn a Raspberry Pi into a Low-Power Network Storage Device. Mix together one Raspberry Pi and a sprinkle of cheap external hard drives and you have the recipe for an ultra-low-power and always-on network storage device.
Read on as we show you how to set up your own Pi-based NAS. Why Do I Want to Do This? The benefit of having an always-on network storage device is that it’s extremely convenient to have your data (or backup destination) always accessible to the computers both inside and outside your network. The downside, in most instances, is that you’re consuming a fair amount of power for the convenience. Our office server, for example, runs 24/7 and consumes almost $200 worth of power a year. Lifehacker. MagicMirror² DIY Raspberry Pi Torrentbox: Quickly Turn your Raspberry Pi into a Always-on TorrentBox. Downloading and seeding Torrents from the computer or any other dedicated server consumes a very fair amount of energy, if you are seeding it 24x7.

And it’s also not justified to put the laptop on all the time to just download the Torrent. So here our Pocket sized computer comes into picture: Raspberry Pi. It is a perfect choice for Torrent box as it consumes very little amount of power and can be remained on for long time. So you can have a cheap Torrent Box running all the time in a negligible running cost, downloading torrents for you. You can also run some other programs which require Raspberry Pi to be on for long time, like you can use it as Motion capture surveillance camera and can download the torrent at the same time. There are mainly two most popular solutions for downloading Torrents in Linux System (Raspberry Pi): Transmission and Deluge. Transmission vs Deluge: As mentioned earlier that Transmission is simple and light weight torrent client in comparison with Deluge. . #! Petrockblog/OwncloudPie. WtsxDev/Raspberry-Pi: Raspberry Pi A to Z List. Thibmaek/awesome-raspberry-pi: A curated list of awesome Raspberry Pi tools, projects, images and resources.
Raspberrypi/documentation. The Top 10 Raspberry Pi Blogs - Raspberry Pi Blog. Do you love the Raspberry Pi as much as I do?

Ever since I first heard of it I’ve been trying to keep up on all the latest happenings with this device. Raspberry Pi Owncloud (dropbox clone) Now we have download the software we need to configor it. First off we need to install PHP apc $ sudo pecl install apc After that is done we need to create the apc.ini $ sudo nano /etc/php5/cgi/conf.d/apc.ini In to that file we need to add the following extension=apc.so apc.enabled=1 apc.shm_size=30 Once added the file needs saving Next up we have to change the PHP.ini to change the max upload file so we can add large file and add the APC externsion to PHP $ sudo nano /etc/php5/apache2/php.ini In this file we need to find upload_max_filesize and then change the value to 1024M which will allow files of upto 1GB to be uploaded The we need to find post_max_size and then chaged the value to 1200m which will allow files to upto 1 gb to be uploaded We need to find externsion= section and add in the extension=apc.so After we have done that save and exit.
Tutorial: How to Set Up a Raspberry Pi Web Server - source Blog. People are doing a lot of cool things with the Raspberry Pi.

One of the first things I thought to do was to see if I could make a Raspberry Pi web server. Being a web developer and overall geek I figured it might be kind of fun to do, and as I found out it’s really easy. My New Course: Hands on Internet of Things with the Raspberry Pi I have just released my new course titled ”Hands on Internet of Things” which is intended to be a course for people who want to get started with IoT.
I’ll take you through blinking lights and reading sensors to creating YOUR own IoT endpoint and dashboard. Like my IoT projects? Getting Started Setting up a Web Server on this device really isn’t much different from any other Linux machine, but there are a couple things you’ll want to do in order to get it working right. The first thing you want to do is get the Raspian Wheezy Image from here. Lifehacker. Hackmypi. By MWAGNER Posted on March 3, 2017 at 11:30 PM Home NAS storage with the Raspberry Pi NAS stands for Network Attached Storage.

Raspberry Pi Print Server: Setup a Network Printer. In this tutorial, I will be going through the steps on how to setup a Raspberry Pi Print Server.
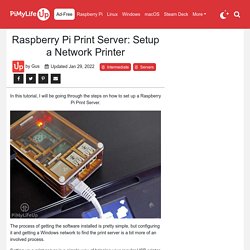
The process of getting the software installed is pretty simple, but configuring it and getting a Windows network to find the print server is a bit more of an involved process. Setting up a print server is a simple way of bringing your regular USB printer to more modern standards without you having to shell out hundreds of dollars. It allows you to move the printer to wherever you want and have it accessible by multiple computers rather than having it connected straight into a singular computer. It’s also a great way to share a printer without needing a costly tower computer running all the time. To make this all work, we will be making use of a piece of software called CUPS. If you want to make sure your printer is supported by the CUPS printing software, then go to their website at open printing and look up your specific model number. Equipment List Recommended: