
Jeffmillies/radiopi. LiFePO4wered/Pi from Silicognition LLC on Tindie. I was one of those kids that knew what I wanted to do when I grew up, before I was even out of grade school.
No, not a fire fighter or a movie star: I wanted to be an electronics engineer.Fast forward about 30 years, through college, various positions at a chip company, a MEMS startup and a major OEM, and here I am, trying it on my own. Having gained experience in everything from system and circuit design, chip and PCB layout, and software development for everything from microcontrollers with tiny amounts of ROM to big cloud systems, I am now ready to apply all that experience to both my own designs and yours.Contact me for all your electronics needs from system and circuit design to layout to custom firmware and software development. Partial outsourcing or turnkey. Simple or hard. Standard stuff or something that never has been done before.
Transformer son Raspberry Pi en serveur de fichiers. Crédit photo : Le Raspberry a tout pour plaire : peu onéreux, économe en énergie et silencieux.
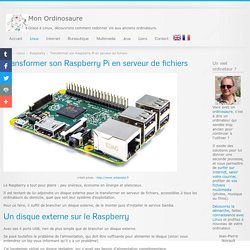
Il est tentant de lui adjoindre un disque externe pour le transformer en serveur de fichiers, accessibles à tous les ordinateurs du domicile, quel que soit leur système d'exploitation. Pour ce faire, il suffit de brancher un disque externe, de le monter puis d'installer le service Samba. Avec ses 4 ports USB, rien de plus simple que de brancher un disque externe. Monter un disque dur externe partagé sur un Raspberry Pi.
Raspberry Pi Auto-Reboot Using Watchdog Board. For this tutorial, we’ll be using Watchdog board for Raspberry Pi Model B+.
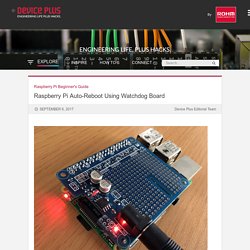
That’s right, it’s a watchdog board that can be mounted onto a Raspberry Pi! Watchdog – Webopedia A watchdog is a device used to protect a system from specific software or hardware failures that may cause the system to stop responding. The application is first registered with the watchdog device. Once the watchdog is running on your system, the application must periodically send information to the watchdog device. A Rasp Pi Print Server » Raspberry Pi Geek. A chunky, multifunction printer with a USB connection is no feast for the eyes, especially when it is sitting next to your up-market laptop or tablet.

On the other hand, a network printer can disappear unobtrusively into a corner of the room and serve multiple users on the LAN. The convenience, flexibility, and invisibility of network printers is one reason why they have replaced their USB counterparts in many offices. However, that's still no reason to drag your old USB printer down to the nearest recycling center. The Raspberry Pi can connect the USB world with the Internet, providing a print server service for your old USB clunker thanks to CUPS. With a wireless adapter plugged into your Rasp Pi, the location of your printer depends only on wireless reception and a suitable power supply. Shopping List Because USB-only printers are no longer in vogue, you can find used equipment at very reasonable prices. Configuring the Network #/etc/resolv.conf nameserver 192.168.0.1. Raspberry Pi Print Server: Setup a Network Printer.
In this tutorial, I will be going through the steps on how to setup a Raspberry Pi Print Server.
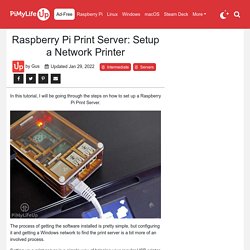
The process of getting the software installed is pretty simple, but configuring it and getting a Windows network to find the print server is a bit more of an involved process. Un afficheur LCD piloté en USB - Framboise 314, le Raspberry Pi à la sauce française.... Dominique de McHOBBY me signale la disponibilité d’un afficheur LCD qui devrait faciliter la vie de tous ceux qui ont besoin de gérer un affichage.
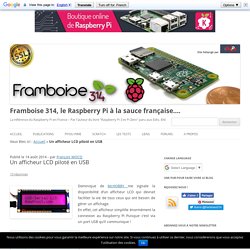
En effet, cet afficheur simplifie énormément la connexion au Raspberry Pi Puisque c’est via un port USB qu’il communique ! La sortie d’un “backpack USB et/ou TTL série” par Adafruit simplifie énormément l’intégration d’un afficheur LCD sur vos projets à base de microcontrôleur, Raspberry Pi ou même PC. Ce backpack est une carte spécialement réalisé par AdaFruit. Il vient se placer à l’arrière d’un afficheur LCD ‘standard’ (16×2 ou 20×4) et réalise toutes les opérations dont vous avez besoin : afficher du texte, réaliser un défilement automatique (scrolling), activer et configurer le rétro-éclairage, ajuster le contraste, gérer des caractères personnalisés, activer ou désactiver le curseur, etc.
Raspberry Pi Serial Shift Register LCD Display. By Lewis Loflin Here we connect my serial LCD display circuit to the Raspberry Pi.

This saves the use of GPIO pins for other uses. The routines are as follows: pulseCLK() used to clock data into the Sn74164. pulseE() shifts the parallel data in the display. SsrWrite(int) uses a "for" loop with pulsCLK() to shift 8-data into the SN74164. initLCD(), clearLCD(), and Home() are used to setup the operation of the LCD display. GotoLocation(address) inputs an address in the internal ram of the display at a select location for display. 0x80 is column 0, line 0 (first character line 1) and 0xC0 is column 0 line 1 (first character line 2). wrtiteString(text-string) is used with the above functions to write an ASCII string to the display.
ConvBinary(value) is used to convert an 8-bit number to an ASCII string of 1s and 0s. Click for picture RPi 2 GPIO pin connections.