
Blog : Flashback: Woven Map Basket. Maps can be amazing design elements, with all their intricately drawn lines and minute details.
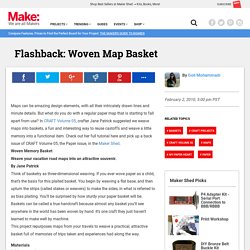
But what do you do with a regular paper map that is starting to fall apart from use? In CRAFT Volume 05, crafter Jane Patrick suggested we weave maps into baskets, a fun and interesting way to reuse castoffs and weave a little memory into a functional item. Check out her full tutorial here and pick up a back issue of CRAFT Volume 05, the Paper issue, in the Maker Shed.Woven Memory Basket Weave your vacation road maps into an attractive souvenir. By Jane Patrick Think of basketry as three-dimensional weaving.
If you ever wove paper as a child, that’s the basis for this plaited basket. Materials 2-3 large road maps Contrasting string or thread Clothespins Cutting mat Rotary cutter Awl or tapestry needle Scissors Small tweezers White glue (optional) to further stiffen the basket Directions Step 1: Prepare the strips. Fold each strip in half lengthwise. Splitcoaststampers Tutorials: Alcohol Ink by Cindy Lyles: Card Making Techniques. Dominos are non-porous too!
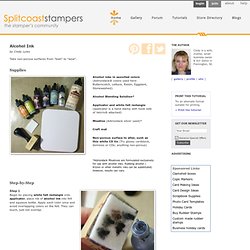
The application for this techique is endless. Glossy paper, buttons, CDs, and so forth. Origami club. Untitled. Scrapbooking / Paper. Paper Flowers – Anyone Can Do That. Japanese Kusudama, this tutorial is featured on Craftuts Anyone can do that, I assure you.

The proof: I can, just take a quick look at my result below. And, believe me, I am neither meticulous nor particularly patient. Craft Calendar 0010 - Craft type - 2010 - CalendarsCanon CREATIVE PARK. Easy Origami Envelope. If you’d like to make these cute little “Flap Lock” Origami Envelopes–all you’ll need is a piece of square paper…any size. I used Christmas scrapbook paper. 1. Fold the paper in half to form a triangle. Make sure your edges are even. 2. 3. fold the right corner about 1/3 of the way to the left. Origami roses. The sight of these classy chocolate roses got me into a serious mood to make roses, paperwise that is.
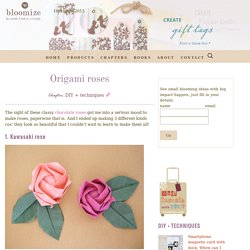
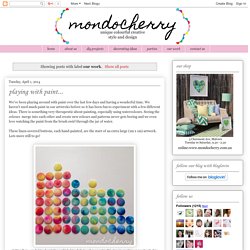
And I ended up making 3 different kinds cos’ they look so beautiful that I couldn’t wait to learn to make them all! 1. Kawasaki rose. Paint chip greeting cards. Like most of you, I’m sure, I tend to go through a lot of paint chips when trying to decide on a color to paint a room.

And when the project is done, I toss the paint chips into a box I keep in my craft room. They are the perfect “I’ll use these one day” items, right? Well I stumbled upon the box a few days ago and realized just how many I’d collected over the years. Oh the memories this pile brings back! There are the numerous shades of tan that I went through when painting the kitchen. Bubble Wrap Calendar. Crayon Hearts and more creative crafts projects, templates, tips, clip-art, patterns, and ideas on marthastewart.com. Tea Light Lamps (an Easy Last-Second Gift) With a paper band, mark and measure the upper and lower diameters, and the height of the glass.
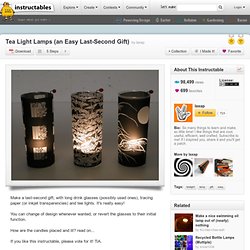
Add 5mm to each length. In your favorite drawing software (e.g. OpenOffice Draw), create a trapeze of measured sizes to mark the borders, and import a picture of your choice. Size it to fit into the trapeze. Personally, since I only had tracing paper on hand, and after some trials, I choose some black/white Japaneses patterns: Wipe Off Weekly Menu Board.
I am a meal planner.
I refuse to go grocery shopping without my week’s worth of meals planned out and list made. (It’s either that or wander aimlessly around the grocery store for two hours and then make ten more trips back during the week to get things I forgot.) Once I get the groceries unloaded, I usually forget what I planned for, so I put together this super easy wipe-off menu board to keep track of what’s for dinner each night! Wipe-Off Menu Board Tutorial. Paper patterns. "Sugar and spice and all things nice, that's what little girls are made of".
So goes the old rhyme and while we are not sure how accurate it is (although Joy did have cravings for fruit tingles while pregnant with her daughter!) , we certainly know that little girls love pretty things. The Ultimate Girly Giveaway hosted by Tout Mon Amour, is chock-a-block full of prizes perfect for the little sweetheart in your life, including gorgeous tutus, a play house, fairy door, stylish clothes, room decor and lots, lots more. We've included this pink blossom artwork in the giveaway too. Covered notebook. This tutorial has instructions to make any sized notebook cover and a matching pen.

All of my measurements and what not will be in red. Supplies Notebook – I used a spiral bound Fat lil’ Notebook by Mead Fabric (see your measurements to determine the amount needed) Fusible interfacing ( use appropriate interfacing for the weight of fabric you choose) Adult hair elastic/ponytail holder Button. Pop up flower - Arte e Creazione.