
Colette Patterns. .. Mrs Depew Vintage by Mrsdepew. Meet Miss Mona on Craftsy. Vintage Sewing Patterns. How to Resize a Pattern. No matter how well designed a pattern may be, it cannot fit each individual perfectly.

Each human body has its own quirks, and each person has different fitting needs. You may find that you need to enlarge a pattern beyond the sizes available on the sheet, or you might need to shrink it. Perhaps you would like to reduce a woman’s pattern to fit a little girl. Or maybe you found an out-of-print pattern you’d love to make … but the sizes are too small for you. Anything is possible once you know how to resize a pattern! The method for shrinking or enlarging the pattern pieces is similar for each piece.
The Tools of the Trade Before you begin, I recommend that you have the following tools at hand: Getting Started: The Bodice First, let’s start with a bodice front. Notice that you are splitting down the center of the underarm, the center of the shoulder and the center of the neckline/bust. Now trace around it so you have your first piece “set in stone.” Adding to the neckline looks like this: Sew Serendipity: Making Bags: What in the heck is buckram? When I started working on bag designs last year, I thought about what makes a bag useful.
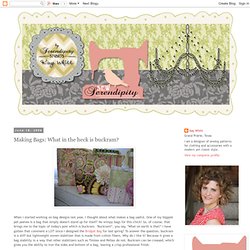
One of my biggest pet peeves is a bag that simply doesn't stand up for itself! No wimpy bags for this chick! So, of course, that brings me to the topic of today's post which is buckram. "Buckram? ", you say, "What on earth is that? " "What is the story behind buckram? " Where can it be purchased? One other thing about buckram. Things to keep in mind when making bags: It is advisable that you should spray your finished bag with something like Scotchgard, as buckram should be dry cleaned only. I also use a machine needle suitable for denim when making my bags as I usually have several layers to penetrate and hate it when the needle breaks. Since buckram is not a fusible product, use a temporary spray adhesive such as Sulky's KK2000 or 505 to layer fabrics.
Be sure to check out all of the bags in the Boutique Chic line that use buckram. Insatiable need. A few weeks ago, I went to Dallas for the wedding of a friend of mine from college, and unsurprisingly, the reception ended up doubling as a mini college reunion.
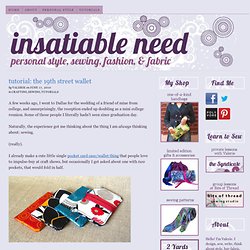
Some of those people I literally hadn’t seen since graduation day. Naturally, the experience got me thinking about the thing I am always thinking about: sewing. (really). I already make a cute little single pocket card case/wallet thing that people love to impulse-buy at craft shows, but occasionally I get asked about one with two pockets, that would fold in half. why 19th street? Remembering our 19th street adventures made me think of that critical accessory (nobody carried purses when we went out), and how a handmade version would be pretty cute, and super useful. I also used lightweight fusible interfacing, but that’s also optional, especially if you use something a bit heavier for the outside. the pattern…is really just two rectangles.
Time to start sewing! 2. Ikat bag. Vintage Vogue. Fashion, Sewing Patterns, Inspiration, Community, and Learning. Design and Sew an A-Line Skirt: An Online Sewing Class on Craftsy. Class Description An accomplished author, Deborah Moebes guides you through designing an a-line skirt tailored to your exact measurements and sewing your garment in a style that equally suits you.

Gain an understanding of ease, dart design and pocket creation, while learning techniques to create skirt volume and support. You'll also want to take plenty of video notes in this information-rich course as Deborah shows you multiple variations on this classic look. Don’t walk the line of skirt patterning; create your own by enrolling today in Design & Sew an A-Line Skirt! Lesson Plan Lesson 1. Meet Deborah and get prepared to make an a-line skirt!
Lesson 2. Get a look at everything you'll need to make your skirt. Lesson 3. Understand the importance of accuracy with Deborah's help. Lesson 4. Learn to draft your pattern with Deborah's step-by-step instructions. Lesson 5. Prepare the fabric, assemble the muslin, explore the invisible zipper and tackle fitting changes - all with Deborah's help.