DIY Embellished Friendship Bracelets. The weather is warming up and my wrists are feeling rather lonely and bare after hiding under long sleeves all season long.
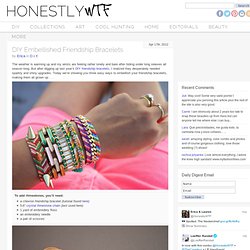
But after digging up last year’s DIY friendship bracelets, I realized they desperately needed sparkly and shiny upgrades. Today we’re showing you three easy ways to embellish your friendship bracelets, making them all grown up . . . To add rhinestones, you’ll need:a chevron friendship bracelet (tutorial found here)5-6” crystal rhinestone chain (last used here)1 yard of embroidery flossan embroidery needlea pair of scissors Thread the needle with embroidery floss and tie the end into a double knot.
Push the needle through the back of bracelet. Stitch the floss between the first two rhinestone links, pushing needle out the middle of the bracelet. Continue stitching between the rhinestone links. Your friendship bracelet is sparkling and finished! Use a Sharpie or marker to make 5 evenly spaced marks along the middle of the friendship bracelet. Keep stitching. DIY Gold Tube Bracelets. I have very vivid memories of walking into a bead store for the first time, almost 15 years ago, and being overwhelmed by the million and ten ideas that filled my mind.
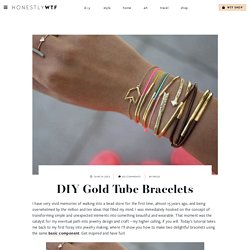
I was immediately hooked on the concept of transforming simple and unexpected elements into something beautiful and wearable. That moment was the catalyst for my eventual path into jewelry design and craft – my higher calling, if you will. Today’s tutorial takes me back to my first foray into jewelry making, where I’ll show you how to make two delightful bracelets using the same basic component. Get inspired and have fun! For single, adjustable gold tube bracelets, you’ll need: Start by cutting the knotting cord into 2 12 inch pieces. DIY Anklet. These days we’re all for reincorporating the anklet back into our accessory repertoire.
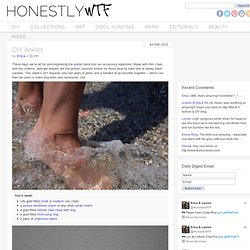
Made with thin chain and tiny charms, delicate anklets are the perfect summer trinket for those beachy bare feet or barely there sandals. This week’s DIY requires only two pairs of pliers and a handful of accessible supplies – which can then be used to make bracelets and necklaces, too! Cut the chain to length by measuring it around the ankle. Using the pliers in a back and forth motion, open the jump ring that is attached to the lobster clasp. Thread one end of the chain onto the ring. Thread the wishbone charm onto the chain. Honestly, that’s it! DIY Sliding Knot Bracelet. After visiting the Mediterranean twice this past year, I’ve come to embrace the ubiquity that is the evil eye symbol and have since integrated it into the jewelry repertoire.

Today I’ll be showing you how to make a sliding knot bracelet with an evil eye charm, which is thought to protect against negative energy and evil powers. And whether you’re superstitious or not, this is a super simple method which can be applied to any connector or charm! You’ll need: Thread 4 inches of cord through one side of the charm. Fold 2 inches of cord back on itself and then again to create a zig zag. Fold an inch of the tip down over the parallel cords.
DIY Marbled Glassware. When graphic designer and artist Joanna Bean Martin shared with us her technique for marbling the bottoms of glassware with nail polish, we couldn’t wait to try it ourselves.
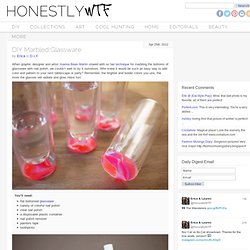
Who knew it would be such an easy way to add color and pattern to your next tablescape or party? Remember, the brighter and bolder colors you use, the more the glasses will radiate and glow. Have fun! You’ll need:flat bottomed glasswarevariety of colorful nail polishclear nail polisha disposable plastic containernail polish removerpainters tapetoothpicks Mask off the bottom of the glass with painters tape. Fill a disposable, plastic container with water. Layer the colors one on top of the other. Submerge the bottom of the glass into the polish. Allow to dry completely before applying a layer of clear polish. Once everything has dried, remove the painters tape and touch up with nail polish remover and a cotton swab.
Your glowing glasses are finished! - StumbleUpon. 64yourself(beta) How To Mix Chalkboard Paint in Any Color. We love using chalkboards as backdrops for displays and parties (like this one here!).

So we were super excited to learn that you can create your own custom colors-and it's really easy! We first learned how from Martha Stewart whose tutorial you can read here. She recommends that you use latex paint, but we tried it out with acrylic paints with much success. Here's how you too can create your own chalkboard paint... Supplies: 1/2 cup acrylic paint (choose any color you like, or mix colors together to make the perfect shade!) 1. 2. Once your chalkboard has fully dried be sure to slate the surface before using it for the first time. Have fun creating any color combination you like!!
Everyones Mixtape. Simple Ideas That Are Borderline Crafty (35 Pics) Click Here For More Amazing Ideas.