
Make fancy buttons using CSS sliding doors technique. This article will show you how to create fancy buttons using CSS sliding doors technique.
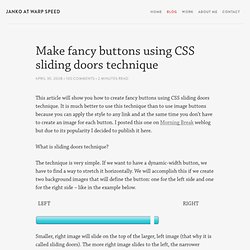
It is much better to use this technique than to use image buttons because you can apply the style to any link and at the same time you don’t have to create an image for each button. I posted this one on Morning Break weblog but due to its popularity I decided to publish it here. What is sliding doors technique? The technique is very simple. If we want to have a dynamic-width button, we have to find a way to stretch it horizontally. Smaller, right image will slide on the top of the larger, left image (that why it is called sliding doors).
Styling the button First, let’s take a look at the HTML elements that will simulate button. <a class="button" href="#"><span>Submit</span></a> Now let’s take a look at the CSS code. The result will look like the examples below. CSS2/DOM - Styling an input type="file" Page last changed today Credits wholly go to Michael McGrady, who invented this technique.
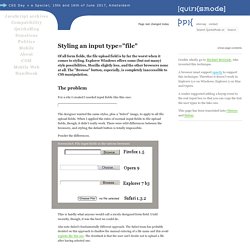
A browser must support opacity to support this technique. Therefore it doesn't work in Explorer 5.0 on Windows, Explorer 5 on Mac and Opera. A reader suggested adding a keyup event to the real input box so that you can copy the text the user types to the fake one. This page has been translated into Chinese and Italian. Of all form fields, the file upload field is by far the worst when it comes to styling. For a site I created I needed input fields like this one: The designer wanted the same styles, plus a "Select" image, to apply to all file upload fields.
Ponder the differences. Screenshot: File input fields in the various browsers This is hardly what anyone would call a nicely designed form field. Also note Safari's fundamentally different approach. Fortunately, reader Michael McGrady invented a very neat trick that allows us to (more or less) style file upload fields. Below is a pure CSS solution: Learn CSS Positioning in Ten Steps: position static relative absolute float.
1. position:static The default positioning for all elements is position:static, which means the element is not positioned and occurs where it normally would in the document.
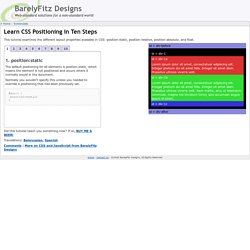
Normally you wouldn't specify this unless you needed to override a positioning that had been previously set. 2. position:relative If you specify position:relative, then you can use top or bottom, and left or right to move the element relative to where it would normally occur in the document. Let's move div-1 down 20 pixels, and to the left 40 pixels: Notice the space where div-1 normally would have been if we had not moved it: now it is an empty space. It appears that position:relative is not very useful, but it will perform an important task later in this tutorial. 3. position:absolute When you specify position:absolute, the element is removed from the document and placed exactly where you tell it to go. Let's move div-1a to the top right of the page: What I really want is to position div-1a relative to div-1.
Footnotes 10.