
Little Red Infinity Dress Tutorial. February 14, 2011 I’m always searching for a beautiful, well-fitting, versatile dress, and I finally found it.
Bedsheet to Ruffled Pillow Tutorial. Lace Up Your Shorts! I know it’s winter and wearing shorts is probably one of the last things on your mind. Here in Los Angeles, however, girls are still strutting their stuff in their short shorts, with degrees staying in the 60s during the day and dropping to the mid 40s at night. With lace shorts becoming the up-and-coming hot trend, I figured it’d be fun to post a few inspiration photos on what you can do with a little bit of time, some old jean shorts, and some lace. These shorts are by far my favorite. Cutting a dangerously high slit becomes elegant, not trashy, when adding some beautifully intricate lace. Tooth Fairy Bags. We thought we'd try to make the whole Tooth Fairy ritual a little more fun by making a colorful bag complete with a special tooth-shaped pocket for the baby tooth.
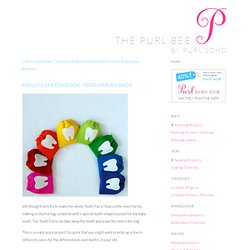
The Tooth Fairy can take away the tooth and leave the loot in the bag. This is a really quick project. So quick that you might want to whip up a few in different colors for the different kids (and teeth!) In your life. Materials. Turn a T-Shirt into a Halter Top. Rostitchery: convertible/infinity dress. (this post was originally published on 29 june, 2006, with the title "one seam convertible dress".) have a question?

Please visit the convertible dress FAQ's. have you made a convertible dress? Do you want to see other convertible dresses, share ideas on how to make them, and find ways to make your convertible dress even better? Then hop over to flikr and join the convertible dress group! PLEASE NOTE: the instructions for making this dress are available for free but are not to be used for commercial purposes. please do not sell dresses made using these instructions, and do not make copies of the instructions without asking my permission first. thank you! Make It and Love It: Women's Corsage Shirt. Embellish Knit Month: Day 6. A lot of you expressed questions about resizing sweaters.
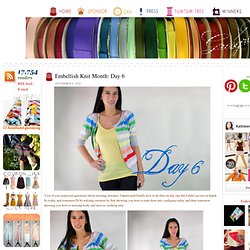
I mentioned briefly how to do that on day one but I didn't go too in depth. So today and tomorrow I'll be redoing sweaters by first showing you how to turn them into cardigans today and then tomorrow showing you how to resizing body and sleeves, nothing else. Today I found this Wet Seal sweater for $1.50 at Community Aid. I liked the stripes and the colors used. One Pearl Button: Tutorial: Silk Shirt Refashion.
Anthropologie inspired knotted bedding part 2 (putting it all together) Before we get started piecing a PILE of knotted squares together, do you want the backstory on this little Anthro-inspired gem?

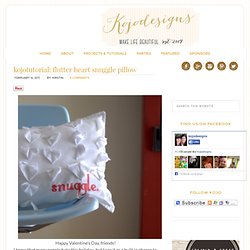
First, you should know that I’m a bedding junkie. I LOVE wandering through Pottery Barn, Restoration Hardware, Crate and Barrel, Anthropologie (at Park Meadows in Denver, those stores are all conveniently located near each other as well) to see their bedroom displays. Flutter heart snuggle pillow. Happy Valentine’s Day, friends!
I know that many people hate this holiday- but I see it as a built in chance to tell my hot hubbie, my kiddos (well, mostly Burke since Piper Jane doesn’t quite ‘get it’ yet) and my fantastic family that I love them. Oooh, and Valentine’s Day is the perfect holiday for giving little gifts. And, y’all, I love little gifts! Adam is getting a watch I ordered from nomorerack for $8, some mini-butterfingers and a couple of kitchen gadgets, Burke is getting a new set of Cars cars and one of those Grow-An-Animal packs and Piper Jane is getting the sweetest little outfit (the only handmade gift of the bunch).
…and a great day to share the tutorial for the “snuggle” pillow. Sunburst Pillow Tutorial from Guest Anna of Noodlehead. Ohhhhhh, i love me a good pillow!

I especially love me a pillow when it's anna of the addictive & oh, so inspiring blog noodlehead. anna is a pillow addict, a kick ass sewer, a busy mom, and another one of my fave bloggy pals. here's an example of what is usually a regular email from me to anna: Hi anna, You are ahhhmmmmaaaaaaazing!!!!!!!!!!!! Sewing 101: making a pouf. Add a burst of color to your room with this crafty pouf!

At 17” wide and 10” deep, it’s large enough to serve as floor seating or a foot stool. (And if you have pets, I have a feeling they may want to make this their new favorite spot!) This project is a little challenging to sew, but it’s not too difficult, so if you’re comfortable with the basics of sewing, give it a try. Tutorial: how to sew a simple maxi dress. The Plan.
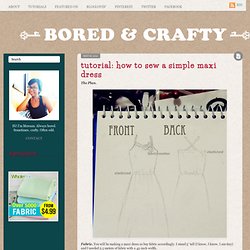
Fabric. You will be making a maxi dress so buy fabric accordingly. I stand 5′ tall (I know, I know, I am tiny) and I needed 2.5 meters of fabric with a 45-inch width. Preparation and Cutting. Sewing. Don’t forget the banana. Top 100 Tutorials of 2010. Craftaholics Anonymous: Tutorials. Tutorial: how to sew a simple maxi dress. Sew. Free Clothes Patterns. Posted on | October 9, 2008 | 7 Comments I originally became interested in patternless sewing, many years ago, because I had a hard time finding patterns in my size.

Nowadays, patterns in large sizes abound. Nonetheless, I still love my pattern free sewing. These patterns generally of three types. One type requires you to take your measurements and draw up the pattern yourself. Skirts are very easy to make without a pattern. I came across a few patterns that didn’t fit into any other category, so I gave them their own. We normally assume underwear is too complicated or to time consuming to sew ourselves. Aprons can usually be whipped up in less than an hour. Shirts and dresses are much more complicated to make than skirts.
Coats can easily be the most expensive piece of clothing in your wardrobe. Click on the first link to get inspiration. Rostitchery: convertible/infinity dress. Baby Gifts: Pretty Bird Binky 'Leash' & Carry Bag. Summer seems like the prefect time to pull up some projects that will make the most of all those pretty pieces in your scrap bag, bin or box. This week's ScrapBusters Series brings you five great little-bit-o-fabric ideas, starting with today's perfect baby gift bundle of two binkys on their own little leashes and a matching drawstring carry bag.
This project is at the very Tip-Top of the Cutie-Pie Ranking & Rave Scale. For those of you unfamiliar with the C.P.R.R.S., a project's ranking consists of the combined number and volume of "Ahhhhhhhhhhhhhs" generated at baby showers. It's an independent ranking, so don't even try to find it on Google.
Our thanks to our pals at Michael Miller Fabrics for originally providing us with this absolutely wonderful Pretty Bird from Pillow & Maxfield. Any Sewing Machine (we recommend the Janome DC2011) Supplies for TWO Binky Leashes and ONE matching Bag Binky Leash. 1920s - Vintage Sewing Patterns. Sewing tutorials. Using Up That Sweater. So I had some leftover sweater material from the pumpkins I made. The sweater did not felt like I thought it would when I washed it because it wasn’t all wool. But it still was really soft so I thought why not a pillow.
I had a bed pillow I wasn’t using so I just cut it down and used it as the insert. Then I cut the body of the sweater from armhole to armhole. I had already cut the sleeves off since that is what the pumpkins are made out of. Then just a straight stitch across the top with my machine and stuff the insert inside. Top 100 Tutorials of 2010. Sewing. Tutorial: how to sew a simple maxi dress. HANDKERCHIEF SKIRT. A handkerchief pointed-hem skirt is flattering to all, but especially for short-legged people because the points break up that horizontal hemline. No pattern is needed to make this skirt style. It is a simple block layout. One easy way to get that effect is to hem two squares of fashion fabric, each having four points (called a “handkerchief” hem) and layer them for an eight-pointed look.
Experiment with swatches of opaque and transparent fabrics as you design and discover what happens when you overlap two layers of the same colour or harmonizing colours. The top layer could be trimmed shorter than the under layer for a tiered look and the hemline could be decorated with flat braid trim or fringe, if desired. You will need: 2 ½ yds. of fashion fabric, 45″ wide1 yd. of waist band elastic, 1″ wideCoordinating thread10 yds. of flat ribbon braid (optional) The size of the circular opening should be just big enough to pull over your hips, and can then be tightened with elastic. Stamped Washer Necklaces.