
Arduino to Android IO on the cheap (aka Poor Man's NFC) Summary: This article describes how to implement a very low bandwidth one way communication channel between an Arduino (or any other microcontroller) and an Android device using nothing more than about a meter of magnet wire, a resistor and diode.

Links to a software sketch for the Arduino and the Android source code is included. A cheap and simple way of communication between a microcontroller (eg Arduino) and an Android device is surprisingly difficult to achieve. The most practical means of accomplishing this is to use a Bluetooth or WiFi module adding significantly to the cost of a project (in the order of $30 - $60).
This is a little hack that allows very low bandwidth communications in one direction for practically no cost. It's not practical for most applications, but I thought the idea was sufficiently interesting to explore and write up in a blog post. You'll need the following: An Android phone or device which features a magnetometer (electronic compass).
Potential improvements. Arduino Sample Code - NFC/RFID Forum - Low Power RF & Wireless Connectivity. Hi Eddie, I am back from vacation and just spent time with the Arduino code again to use the NFC chip via I2C.

I am still at the point where it activates the antenna but the NDEF url on the chip is the ti.com/nfc url. Right now, when the arduino fires up, I write the NDEF and then I turn on the RF. writeNDEF(data); reset(); Data is defined like this: This byte array was created using the excel file you gave me (thx a lot again!). Then the actual code to send the data: void writeNDEF(byte data[]){ int address = 0x0000; Wire.beginTransmission(I2C_SLAVE); // (0x28) Wire.write(address >> 8); Wire.write(address & 0xFF); for (int i = 0; i < sizeof(data); i++) { delay(10); Wire.write(data[i]); } //Wire.write(data2, sizeof(data2)); Wire.endTransmission();} Can you maybe spot an issue there?
One the writing has finished, I turn on the RF. Please let me know if you can spot an issue there.... Cheers Sven. Maker Faire New York 2013 Electronics Stage: Arduino NFC. RFID With An Arduino - Let's Make It - Episode 15. What is NFC? How to use NFC Tags? Compatibility Issues? - All You Need to Know! Adafruit PN532 NFC/RFID Shield. NFC Tags. NFC Shield V2.0. [中文] Introduction Near Field Communication, NFC is a widely used technology around us.

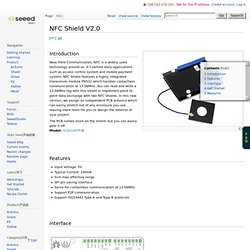
It's behind daily applications such as access control system and mobile payment system. NFC Shield features a highly integrated transceiver module PN532 which handles contactless communication at 13.56MHz. You can read and write a 13.56MHz tag with this shield or implement point to point data exchange with two NFC Shields. The PCB comes stuck on the shield, but you can easily peel it off.Model: SLD01097P Features Input Voltage: 5V Typical Current: 100mA 5cm max effective range SPI pin saving interface Serve for contactless communication at 13.56MHz Support P2P communication Support ISO14443 Type A and Type B protocols Interface U1: 74VHC125PW IC, Quad Buffer with 3-STATE Outputs.U2: PN532 IC, Near Field Communication(NFC)Controller.
SPI Interface: Used for Arduino communicates with NFC shield. Pins usage on Arduino: D10 : SPI chip selectD11 : SPI MOSI pinD12: SPI MISO pinD13: SPI serial clock pin.