

I Have a Lot of Fridge Magnets. Crepe paper flowers. Custom cork trivets. Shadow box vintage kitchen display. I enjoy displaying vintage items in my home…especially my kitchen.
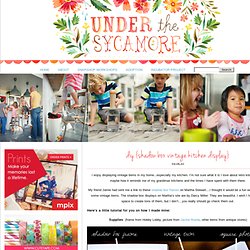
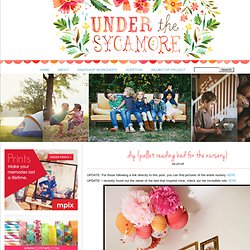
I’m not sure what it is I love about retro kitchen stuff, maybe how it reminds me of my grandmas kitchens and the times I have spent with them there. My friend Jamie had sent me a link to these shadow box frames on Martha Stewart….I thought it would be a fun way to display some vintage items. The shadow box displays on Martha’s site are by Darcy Miller. They are beautiful. Pallet reading bed for the nursery. UPDATE: For those following a link directly to this post, you can find pictures of the entire nursery HERE UPDATE: I recently found out the owner of the bed that inspired mine, check out her incredible site HERE.
Doily table runner. After posting pictures of the kitchen remodel, I had several emails about the doily table runner I made.
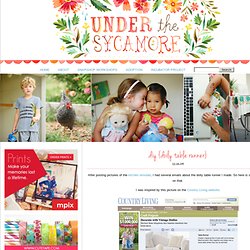
So here is a little tutorial on that. I was inspired by this picture on the Country Living website: I liked that it looked fresh, but a bit vintage at the same time. I had a few big doilies and my mom had several more she passed along to me. I still needed some small ones though. Step 1: Lay out your largest doilies first Step 2: Fill in with smaller doilies. Step 3: Overlap the edges of the big and small doiles so that the small ones aren’t always on top. Step 4: Tack the doilies together using string on the UNDERSIDE. Painting on ceramic and porcelain. I have a file box full of tear sheets of projects I’d like to try.
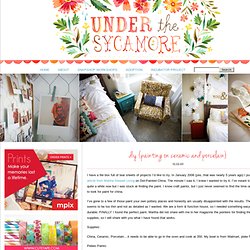
In January 2006 (yes, that was nearly 5 years ago) I pulled out an article from Martha Stewart Living on Dot-Painted China. Squint Limited. 3d Planner : Design your home in realistic 3d. How to Make Leaf Skeletons. I wanted to share with you a project from one of my readers who shares with us how to make leaf skeletons.

I LOVE this! I have several leafs in various forms displayed in my home and knew I needed to make some of her leaf skeletons to add to my decor. I love how a pattern of leaves can enhance the beauty in your home. So I asked Heather if she would mind sharing her project with you. You can find more great projects from Heather at her blog The Other White House. I have spent hours and tried various ways of making these. You need washing soda, not baking soda! Gather your leaves. Washing soda is a strong base so you may want to wear gloves when handling the leaves. You will add 3/4 cup of washing soda and 4 cups of water to your pot of leaves. Keep going, you will need to add more water so your pan doesn’t dry out. When 1.75 hours are up fill a glass baking dish with cool water. I carefully removed them and rinsed with water and added clean water to the pan.
Shadow Box Photo Display for Photographers. Need help turning your post-vacation keepsake clutter into a divine display?
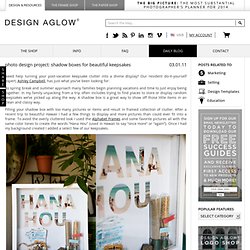
Our resident do-it-yourself expert, Ashley Campbell, has just what you’ve been looking for: As spring break and summer approach many families begin planning vacations and time to just enjoy being together. In my family unpacking from a trip often includes trying to find places to store or display random keepsakes we’ve picked up along the way. A shadow box is a great way to show off those little items in an clean and classy way. Filling your shadow box with too many pictures or items and result in framed collection of clutter. Supplies: 12×12 Shadow Box 12×12 print a select few of your keepsakes double sided tape craft supplies (clothespins, masking tape, decorative labels, hot glue gun, etc.) Step 1: Create your background using the Alphabet Frames templates. Step 2: Remove the label inside the shadow box and attach your 12×12 print using the double sided tape.
Tiny Polaroid Magnets. Hi there!
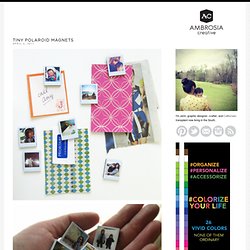
It’s felt like forever since I’ve last blogged, and has felt like an eternity since I’ve done anything crafty and nifty. Since my morning sickness has gone into full speed (yes, we’re expecting our third this fall!) I haven’t felt like myself. But nothing like inspiration to wake one out of a reverie — or nightmare, in my constantly sick state. I came across these DIY Pantone chip magnets on How About Orange and wanted to do something similar. You will need: Cardboard (mine was the backing of a sketchbook — much thicker than the back of a regular spiral bound notebook) or 2-3 sheets of white cardstock or poster board spray-mounted together to use as a sturdy backing to the magnetsOpaque white marker (necessary only if your cardboard is not white) Craft knife Metal straight edge/ruler Clear packing tape or frisk film.
Step 1: Download a Photoshop file of the Polaroid frames below. Step 2: Print out photos onto photo paper. Step 4: Trim out photos with craft knife. 487 Comments. Pom-Poms and Luminarias How-To. Joyous bursts of color dance above a table, imparting a cheerful radiance to a rehearsal dinner or casual reception.
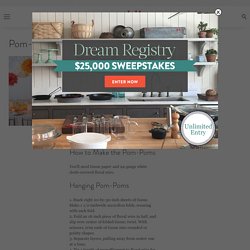
The dahlialike pom-poms appear to float in the air; in reality they are hung from the ceiling with monofilament. Echoing the vibrant hanging puffs, pom-pom napkin rings in citrus shades adorn each place setting. Square glass vessels in various sizes line tables. Covered in sunset-hued tissue (cut to size and secured with double-sided tape), they cast a soft glow. How to Make the Pom-PomsYou'll need tissue paper and 24-gauge white cloth-covered floral wire. Hanging Pom-Poms1. 2. 3. 4. Napkin RingsWith just a few changes, these follow the same steps as the hanging pom-poms. 1. “block” printed duvet. I love bedding!
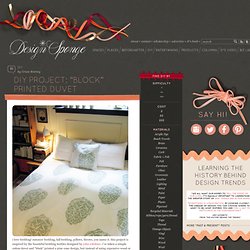
Summer bedding, fall bedding, pillows, throws, you name it. this project is inspired by the beautiful bedding textiles designed by john robshaw. i’ve taken a simple cotton duvet and “block” printed a pine cone design, but instead of using expensive wood or linoleum blocks, i made a makeshift block from scrap cardboard (free!). This project takes a little more time and patience then the last textile makeover, but the results are really beautiful and this can be a very inexpensive bedding update for whenever you need it. have fun! – kate CLICK HERE for the full project after the jump! Handmade Tissue Paper Flowers and Pompom Garland. You'd think after making hundreds of these for my wedding, I'd be completely sick of them.
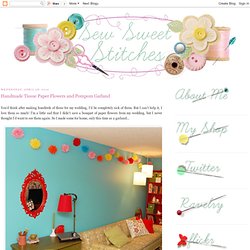
But I can't help it, I love them so much! I'm a little sad that I didn't save a bouquet of paper flowers from my wedding, but I never thought I'd want to see them again. So I made some for home, only this time as a garland... ...And as bedroom decor... Heartland Paper: Handmade Chandelier's on Studio 5. Swarming Butterfly Chandelier Ingredients you will need: Butterfly punch, die-cut or Silhouette Digital Craft Cutter for cutting images (We used the Silhouette to cut a 2 ½” butterfly.)- this is also a QuicKutz die that can be used in your Revolution or Cuttlebug.
Paper in desired colors- you will need enough paper to cut 136 images (we used white cardstock and clear vellum for our butterflies)
Paper Flower Key Holder / Mark Montano. Glass Etching. Have you ever done any glass etching? Well, neither had I before today. But wow. Such an easy, yet sweet little touch that you can add to any glass. Check out my new and improved etched Trifle Bowl. The perfect bowl for desserts of all kinds…..and even a great place for fresh fruit on the counter. Glass etching is also a great way to stamp your name on your pyrex dishes, to make sure they come back to you. And how about adding a little extra detail, just because…… (Edited to Add: The font used here is called Smiley Monster and I downloaded the font for free here.)
Sweet in every way. How to make roses from maple leaves.