
The Difference Between ABS and PLA for 3D Printing - ProtoParadigm. Don't forget to check out our 3D Printer Filament!
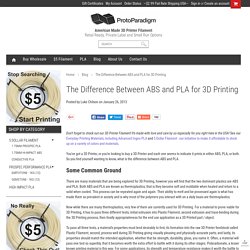
It's made with love and care by us especially for you right here in the USA! See our Everyday Printing Materials, including Advanced Ingeo PLA and 5 Dollar Filament - our initiative to make it affordable to stock up on a variety of colors and materials. You've got a 3D Printer, or you're looking to buy a 3D Printer and each one seems to indicate it prints in either ABS, PLA, or both. So you find yourself wanting to know, what is the difference between ABS and PLA. Some Common Ground There are many materials that are being explored for 3D Printing, however you will find that the two dominant plastics are ABS and PLA. Now while there are many thermoplastics, very few of them are currently used for 3D Printing.
The first test, that of production from base plastic resin into top-notch Plastic Filament such as what we carry is a strict and carefully monitored process. Storage Smell Part Accuracy ABS and PLA General Material Properties In Summary. G-code/fr. Cette page tente de décrire le 'G-code' que les firmwares Reprap utilisent et comment ils fonctionnent.
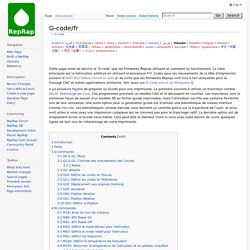
La cible principale est la fabrication additive en utilisant le processus FFF. Codes pour les mouvements de la tête d'impression suivent le NIST RS274NGC norme G-code, de sorte que les firmwares Reprap sont tout à fait utilisables pour le fraisage CNC et autres applications similaires. Voir aussi sur G-Code article de Wikipedia. Il ya plusieurs façons de préparer un Gcode pour une imprimante. La première consiste à utiliser un trancheur comme Slic3r, Skeinforge ou Cura. Introduction Un morceau de fichier Gcode d'une imprimante 3D Reprap peut ressembler à ça: Le Gcode peut être stocké dans un fichier sur une carte SD, votre disque dur ou tout autre support.
La signification de tous ces symboles et chiffres (et plus) est expliquée ci-dessous. Légende: {{yes}} Le Gcode est complètement supporté par le firmware. {{partial}} or {{experimental}} Achats en ligne de gadgets, hélicoptère et quadricopter RC, téléphones portable, mode sur Banggood.com. Home Built CNC Laser Build Log. Home Built 40W CNC Laser Project Overview Note: This design has been superceded by the 2.x Laser.
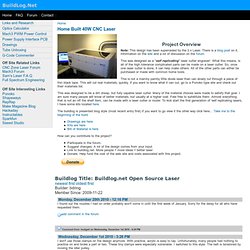
There is a blog post on it, information on the wiki and a lot of discussion on the forum. This was designed as a "self replicating" laser cutter engraver'. What this means, is all of the high tolerance complicated parts can be made on a laser cutter. This is not a mamby pamby little diode laser than can slowly cut through a piece of thin black tape. This was designed to be a dirt cheap, but fully capable laser cutter. The buildlog is presented blog style (most recent entry first) if you want to go view it the other way click here... How can you contribute to the project? Participate in the forum. Builder: bdring Member Since: 2009-11-22 Monday, December 20th 2010 - 12:16 PM I found out the nozzles I had on order probably won't come in until the first week of January. Add comment in the forum Wednesday, December 1st 2010 - 3:26 PM I don't use those clamps on the design anymore. ...
A tiny Arduino laser cutter. The MicroSlice uses Grbl v0.8 for motion control.
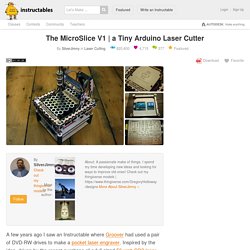
Grbl converts G-Code into commands that the EasyDriver stepper motor controllers understand. We need another program to send the G-Code to Grbl, for this I'll be using Zapmaker's Grbl Controller v3.0. Before you can begin you will need the Arduino IDE, available from the Arduino website. Make sure your Laser Diode is not connected to the power lines while you are configuring your MicroSlice. The Laser will power on & off during the setup & configuration process if it is connected.
Grbl's wiki shows you how to flash the pre-compiled Grbl hex file onto your Arduino. For those of you who have a Raspberry Pi, as I do, you'll be pleased to know that you can control the MicroSlice using your Pi! We'll need to generate some G-Code. Before we can use our new G-Code we'll need to configure Grbl to use the stepper motors and end-stops. You can use either the Arduino IDE Serial Terminal (CTRL + Shift + M) to send commands to Grbl. You should also set; Description de la soufflerie - Aerotrash.
Samedi 26 novembre 2011 6 26 /11 /Nov /2011 15:19 Certes, il faut une bonne dose de folie pour construire une soufflerie dans son grenier !
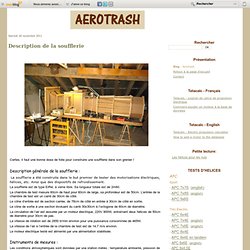
Description générale de la soufflerie : La soufflerie a été construite dans le but premier de tester des motorisations électriques, hélices, etc. Ainsi que des dispositifs de refroidissement. La soufflerie est de type Eiffel, à veine libre. La chambre de test mesure 60cm de haut pour 60cm de large, sa profondeur est de 50cm.