
How to turn handwritten recipes into tea towels - Spoonflower blog. This week guest author Emma Jeffery from the blog Hello Beautiful shows us how she turned her grandmother's handwritten recipes into tea towels for her own kitchen.
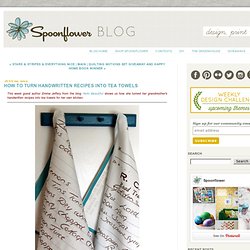
For a woman who keeps a newspaper from the day she was born, my mum has surprisingly few keepsakes or handwritten memorabilia from her own mother who passed away in 1999. When I asked her to trawl through her old papers and files, she managed to find three handwritten recipes from my grandmother. They appear to be the only remaining examples of her handwriting left in the world, and they are therefore as precious as they are priceless. Build Your Own Timey-Wimey Tardis Bookcase. Do you need to pass the time as you anxiously anticipate the upcoming seventh series of Doctor Who?
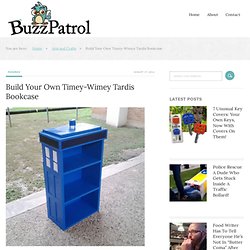
What better way to put that time to good use than to make a Tardis bookcase of your own? It may seem like a hefty project to tackle, but lucky for you the Alantronics Tumblr has provided detailed instructions on how to go about building yourself one of these puppies that even the most novice craftsman can follow. Not only will it make you feel accomplished and give you a sense of pride, but it’s sure to make any room of your house far more Fantastic, Brilliant, and Cool, as the Doctor would say.
The creator, Alan Kwok, makes sure to go into great detail about the quantity of supplies you will need, the purpose of every item, and exactly what attaches to where. 101 Simple Handmade Gift Tutorials. These simple handmade gift tutorials will make any crafty person’s heart sing with joy!

You don’t need special skills or a bunch of time because these can all be done super fast! Simple and cute…that works for me! PHOTOS: Stunning Mason Jar Crafts - Earth911.com. DIY Découpage Floral Bag - Honestly WTF. When H&M asked us to DIY a boho-inspired item for their summer issue, découpage was the first thing that came to mind.
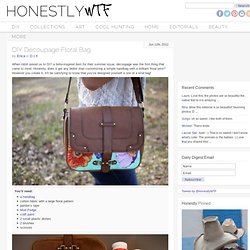
Honestly, does it get any better than customizing a simple handbag with a brilliant floral print? However you create it, it’ll be satisfying to know that you’ve designed yourself a one of a kind bag! You’ll need:a handbagcotton fabric with a large floral patternpainter’s tapeMod Podgecraft paint2 small plastic dishes2 brushesscissors Start by taping off the edges and hardware of the handbag. Squeeze a dollop of colored craft paint into a small disposable container. Allow the first layer to dry completely. While the paint dries, carefully cut out a handful of flowers from the fabric. Arrange them onto the painted section of the bag. Remove the painter’s tape when the Mod Podge has dried clear and your floral handbag is complete!
31 Insanely Easy And Clever DIY Projects. 20 Awesome Do It Yourself Projects. Thursday, June 14, 2012 4:30 am, Posted by Chris Groves | Internet 20 Awesome Do It Yourself Projects Topics: At Home Project Ideas , Creative DIY Home Projects , Do It Yourself Projects for 2012 , Fun How To Projects , What to Do with Extra Stuff.
Chic & Cheap Nursery™ - StumbleUpon. The Can-Do Updo. DIY Bow Tie. A couple of weeks ago, we celebrated FNO by DIYing bow ties and neckties from scraps of denim at Madewell – because honestly, who isn’t borrowing a bit of inspiration from the boys this season?

Today we’ll be showing you, who may have missed the event, how to DIY a bow tie with luxurious, Dolce & Gabbana-inspired velvet. Before you know it, you’ll be well suited and ready to channel your inner Marlene Dietrich! You’ll need:a 6″ x 3.5″ piece of velveta 0.75″ x 2.5″ piece of velveta 1″ pin backa glue guna rulera pen Start by drawing a vertical line and a horizontal line, dividing the rectangle into 4 equal quarters. Pinch the intersecting lines and pick up the velvet. Flip the piece over, while still pinching the backside, and place a drop of hot glue in the center. Place another drop of glue on the front side and fold the fabric closed. Turn the bow on its backside and glue the tip of the velvet strip to the center. Salvaged cupboard door = serving tray.
I noticed this stash of cupboard doors at my local salvage yard.
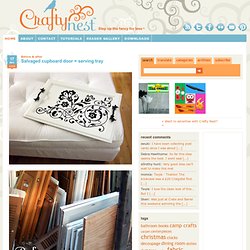
The white one was the perfect size to make a serving tray. The old drawer pulls—also found at the salvage yard—made ideal handles. Their swirly shape gave me the inspiration for the pattern I painted. Make it a kitsch stitch. DIY $5 Flower Vase! So, I finally just changed all the burnt out light bulbs in my house.
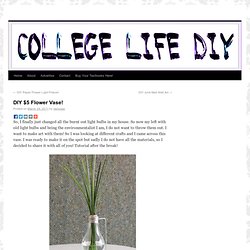
So now my left with old light bulbs and being the environmentalist I am, I do not want to throw them out. Tile Coaster Tutorial. A Subtle Revelry. How to cut glass. I posted a picture about 1 week ago on Instagram, Facebook and Twitter of me cutting glass using just string.

DIY: Wine Bottle Art. If any of you winos out there are anything like me, you’ve probably got a few, er, *cough* many empty wine bottles clogging up the recycling bin.
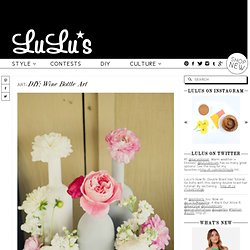
Well, no more!