
HOW TO: Create a Home Made Wax Seal (16 Pics) Do-it-Yourself DIY String Wedding Lanterns Yarn Chandeliers. Jessica of Wednesday Inc shows us how to make those gorgeous twine chandeliers from the inspiration shoot she shared with us this morning.

Using balloons, glue and twine, you can also make these lanterns for your wedding – and then bring it home and use it as your very own mid century lampshade. What you will need are: balloons, glue, yarn, tray for glue, corn starch 1/2 cup of Corn starch, 1/4 cup of Warm water, clear fast drying spray paint, hanging lamp cord or fishing line (depending on your desired final product), and a lighting kit if you’re looking for a fully functional lantern. Jessica recommends using a sharpie to mark on the inflated balloon how much room you need to leave for the lighting cord. Silk-Dyed Eggs {aka TIE-Dyed!}
I posted this tutorial a few years ago and it has become somewhat of a tradition to bring it back every year!

One of our family Easter traditions is dying eggs with pieces of silk. I saw a cute lady show Martha how to do it a few years ago and I ran upstairs right then to steal a tie! It’s way cooler than those cups of neon liquid that end up all over your clothes, your furniture and your hands plus it gives you an excuse to rid a man’s closet of ugly ties. Here’s the run-down: You need 100% silk for this to work. I try to find an assortment of colors and patterns. Usually it will tell you if it’s 100% silk right on the main label of the tie, but a lot of them don’t, and if that’s the case, check that little tiny end, it’s usually hiding there. The first step is to deconstruct the tie. Next you cut a piece large enough to cover an egg.
Now, notice how I tied the eggs in the above photo- with the tie on the top of the long side of the egg. I wish eggs came like this at the grocery store. The Adventures of an Urban Socialite™ Top two images from Honestly… WTF (total cost about $5)/ Bottom image from Oak– retail $372.00 Love this clever project from Erica and Lauren of Honestly… WTF… so much so I might even attempt it– I love these bracelets!

The best part is, there are tons of options in terms of hex nuts (they have bronze, steel, etc.) and twine color, size, etc. and the project is super straight-forward. We Heart This - DIY of the Month: Braided T-shirt Bracelet. How To: Give your old t-shirts a second life.

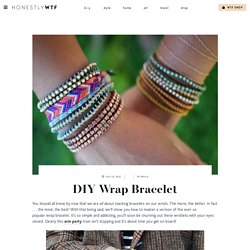
Sorry dust rag pile! Photos: kirsten for we heart this I love using simple materials to make something fun and innovative. Braided Headband DIY from A Beautiful Mess. DIY Wrap Bracelet - Honestly WTF. You should all know by now that we are all about stacking bracelets on our wrists.

The more, the better. In fact . . . the most, the best! With that being said, we’ll show you how to master a version of the ever so popular wrap bracelet. It’s so simple and addicting, you’ll soon be churning out these wristlets with your eyes closed. Clearly this arm party train isn’t stopping and it’s about time you get on board! You’ll need (for a double wrapped bracelet) :* Lengths will vary depending on the size of your wrist (see comments for suggestions). Fold the length of leather cording in half to form a loop. Place the ball chain along the leather cording with the end of the chain meeting the end of the wrap. Continue wrapping while checking it for fit around the wrist. When you have reached the end of the ball chain wrap the linen cording around the leather strands 2-3 more times. Thread the hex nut through the strands and tie a second knot. Trim with scissors and your wrap bracelet is finished!! Stuffed animal - Wall to Watch - StumbleUpon.
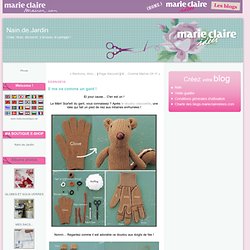
Il me va comme un gant ! : Nain.de.Jardin. Et pour cause...

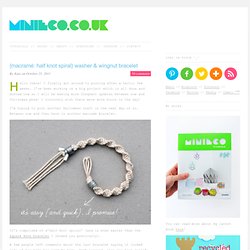
C'en est un ! Le Mâm' Sca'lett du gant, vous connaissez ? Après le doudou chaussette, une idée qui fait un pied de nez aux mitaines enrhumées ! Nonnn... Regardez comme il est adorable ce doudou aux doigts de fée ! {macramé: half knot spiral} washer & wingnut bracelet. By Kate on October 25, 2011 Hello there!

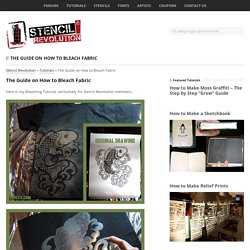
I finally got around to posting after a hectic few weeks. Simple Pop-Ups You Can Make! Bleach on fabric tutorial - Stencil Revolution. Here is my Bleaching Tutorial, exclusively for Stencil Revolution members.

In 2002, I was hired by a small clothing company to invent a process by which we could produce images on garments that would be more “tattooed” into the fabric than screened on. I immediately thought about bleach and began two years of research and testing. I worked with chemists, fabric manufacturers, and artists. I wrecked my studio, my clothes, and my lungs. I wasn’t paid nearly enough for this. Chemically, to achieve different values, I worked with retardants to slow the process of the chemical’s effects, I watered down mixtures, I used “stop-baths”, dehydrated bleach crystals… you name it.
So, here is the big secret, just for S.R. members. Contributed by Phelyx. I have finally completed this simple tutorial and am pleased with the results. This Japanese Koi design was created specifically for this tutorial. Rolled paper flowers {tutorial} Welcome to flower week – five days of simple and delightful flower projects.

I could probably do three weeks of flowers because there are so many different ways to create them, but I’ve limited it to five of my current favorites.