

25 clever ideas to make life easier. Via: amy-newnostalgia.blogspot.com Why didn’t I think of that?!
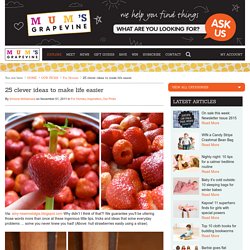
We guarantee you’ll be uttering those words more than once at these ingenious little tips, tricks and ideas that solve everyday problems … some you never knew you had! (Above: hull strawberries easily using a straw). Via: apartmenttherapy.com Rubbing a walnut over scratches in your furniture will disguise dings and scrapes. 25 Handmade Gifts Under $5. If your gift list is long and your budget is small here are some great Handmade Gifts that you can make.
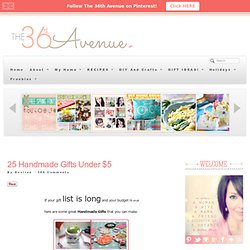
Keep in mind that handmade items are not just beautiful but special… I love to give them and I love to receive them. In my opinion they are the best! Jersey Knit Bracelet. Everyday Mom Ideas: Scrap Paper Tree Centerpiece Tutorial (Featured guest blogger) Hi there! I'm Sharon from Two Girls Being Crafty, and I am so delighted to be today's guest blogger on Everyday Mom Ideas! Thank you so much, Julia, for having us. My co-blogger, Tristin, and I create fun and inexpensive crafts that anyone could do. Our goal is to inspire. So come check us out! Today I would like to share with you all our newest craft. This simple project uses scrapbook paper leaves to create a bright and cheery Spring ambiance for your home.
Planting A Pineapple. Did y’all know that you can take this and turn it into… This?

And that this will eventually produce… Table of Contents. Page corner bookmarks. This project comes to you at the request of Twitterer @GCcapitalM.
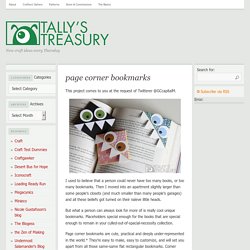
I used to believe that a person could never have too many books, or too many bookmarks. Then I moved into an apartment slightly larger than some people’s closets (and much smaller than many people’s garages) and all these beliefs got turned on their naïeve little heads. But what a person can always look for more of is really cool unique bookmarks. Placeholders special enough for the books that are special enough to remain in your culled-out-of-spacial-necessity collection. Page corner bookmarks are cute, practical and deeply under-represented in the world.* They’re easy to make, easy to customize, and will set you apart from all those same-same flat rectangular bookmarks. If you like this tutorial, here are a couple others that might be up your alley.
For the monster-loving adults in the room, try some googly-eyed paper monster wine charms. What you’ll need: Putting it all together: Coin Banks, Desk Sculptures, Piggy Banks. DIY Wrap Bracelet. You should all know by now that we are all about stacking bracelets on our wrists.
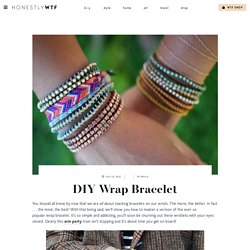
The more, the better. In fact . . . the most, the best! With that being said, we’ll show you how to master a version of the ever so popular wrap bracelet. It’s so simple and addicting, you’ll soon be churning out these wristlets with your eyes closed. Clearly this arm party train isn’t stopping and it’s about time you get on board! You’ll need (for a double wrapped bracelet) :* Lengths will vary depending on the size of your wrist (see comments for suggestions). Fold the length of leather cording in half to form a loop. Place the ball chain along the leather cording with the end of the chain meeting the end of the wrap. Continue wrapping while checking it for fit around the wrist. When you have reached the end of the ball chain wrap the linen cording around the leather strands 2-3 more times.
Thread the hex nut through the strands and tie a second knot. Trim with scissors and your wrap bracelet is finished!! Maze-1.png (PNG Image, 782x1024 pixels) - Scaled (48%) Gift Box. Gift Box This box made from two bills. The bills/box can be the gift itself, but it is also just about the right size for a ring box. (Perhaps a dollar-bill ring?) Get yourself two fairly new, crisp bills. Older "soggier" bills are much harder to work with. Lay the bill on a flat surface, face up. Fold the note top-to-bottom just to the right of the portrait, then unfold. Starting at the top left corner (as illustrated), close the top third fold to about 90 degrees. Inside this corner will be a remaining portion that you will crease along the natural 45 degree line to complete the corner. Complete the previous step for the other three corners.
You knew i was going to make one. They are all over pinterest....
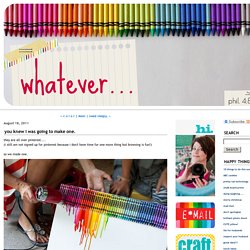
(i still am not signed up for pinterest because i don't have time for one more thing but browsing is fun!) So we made one. i took a box of 64 crayons and took out the blacks and browns.i used another small box and doubled up on the good colors i liked and hot glued them to the top of our canvas. then we turned our blow dryer to hot on high. not long after you set the hair dryer by the crayons they get shiny and then the wax starts to melt! Most favorited all-time.