
MARCONI UNION - WEIGHTLESS by Just Music label. Everyones Mixtape. Art 1. Optical Design. Draw a Stickman. STICKY SITUATION. Photos + design by Kristin Ess It’s really hard to get clean lines when it comes to putting stripes on manicures. I’m going to share a little DIY secret– nail polish on scotch tape. You can cut a perfect line or triangle and get a fun geometric mani. Here’s how it’s done: You’ll need polish, scissors + scotch tape.Apply polish to your tape.
When you’re done, apply them to a pre-polished nail with the sticky side down. Tags: DIY, do it yourself, geometric, how to, kristin ess, mani, mani monday, manicure, nail, neon, stickers, the beauty department, thebeautydepartment.com Related posts: Homemade Hair Treatments - At Home DIY Hair Treatments - Womans Day. Eggs, yogurt and honey are, at first glance, all components of a tasty breakfast—but they also happen to be hair treatment ingredients, and affordable, all-natural ones at that.

And they're not the only ones. Did you know, for instance, that the oils in avocados more closely resemble our own skin's oils than any product in the beauty aisle does? Or that the mild acidity in lemon is an effective—and gentler—alternative to chemical-laden products? Next time your locks need a lift, save money by using one of these kitchen fixes. For All Hair Types "The [raw] egg is really the best of all worlds," says Janice Cox, author of Natural Beauty at Home. To Use: For normal hair, use the entire egg to condition hair; use egg whites only to treat oily hair; use egg yolks only to moisturize dry, brittle hair, Cox says. Photo by Shutterstock. For Dull Hair To Use: Massage 1/2 cup sour cream or plain yogurt into damp hair and let sit for 20 minutes.
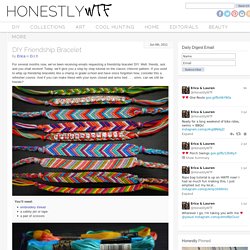
For Itchy Scalp For Limp or Fine Hair For Frizzy Hair. What Do You Look for in Relationships? DIY Friendship Bracelet - Honestly WTF. For several months now, we’ve been receiving emails requesting a friendship bracelet DIY.

Well, friends, ask and you shall receive! Today, we’ll give you a step by step tutorial on the classic chevron pattern. If you used to whip up friendship bracelets like a champ in grade school and have since forgotten how, consider this a refresher course. And if you can make these with your eyes closed and arms tied . . . umm, can we still be friends? You’ll need:embroidery threada safety pin or tapea pair of scissors Start by cutting several strands of embroidery thread at about 24 inches each. Start on the left side with the outermost color (shown here in red) and make a forward knot by creating a 4-shape over the 2nd color, loop it under and back through the opening.
Pull up and to the right to tighten. Now pick up the outermost color on the right side (show here in red) and make a backward knot, creating a reverse 4-shape over the 2nd color, loop it under and back through the opening. 18,000+ listens. Emil Ludwig Quotes.