
Nikon. Photoshop. Homepages. Photojournalism. Frames. Mexico. Photographic Solutions, Inc. - Digital & Photographic Cleani. Digital Exposure. By: Anon By setting correct exposure & white balance when you do your shooting it can dramatically reduce the time needed to adjust your images in Photoshop afterwards, therefore increasing productivity & providing a more predictable result. I found in the early days of ownership of my Canon D30 that a lot of my shooting was sometimes described as �estimated best guess when it came to exposure & white balance. Sometimes I wasn't quite confident that I had got the shot quite right, so I would take a lot of extra exposures, bracketing the exposure just to be sure.
Unfortunately in some cases it meant that I would spend hours in Photoshop fine tuning images to get a result exactly the way I wanted them to appear. Since most of my work is portrait work I also had terrible trouble getting accurate skin tones, and this was mainly due to inaccurate white balance. To do this you will need: Step 1 Measure Initial Starting Exposure Step 2 Set White Balance Step 3 Fine Tune Exposure. Streams of dusty light Photoshop tutorial. Streams of dusty light tutorial by Battle Farm We will use this picture that I took in the Arlington Cemetary for the tutorial.
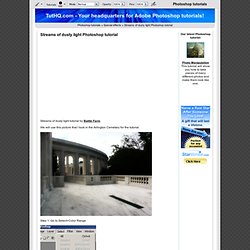
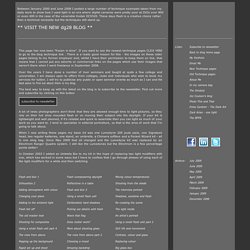
Step 1: Go to Select>Color Range Step 2: Make sure you have the Selection Radio button selected, select the sampled colors box, and choose highlights. Click ok Step 3: Hit Ctrl + J (This will make a new layer by grabbing only what was selected in the previous layer) Step 4: Hit Ctrl + J again or just duplicate the top layer. Step 5: With the top layer selected, go to Filter>Radial Blur. Step 6: Take the amount all the way to 100, select Zoom, and select Best quality. Step 7: Now hit Ctrl + F (This is a shortcut that applies the last filter to the layer) 2 more time, or simply repeat the previous step 2 more times.
Step 8: With the top layer still selected, Hit Ctrl + J 2 more times, or simply duplicate the top layer 2 more times. Step 9: Merge all of the 3 zoomed layers into one. Step 11: Select a radius of 1.5 and click ok That’s it, you are done. Hyperfocal Distance and Depth of Field Calculator - DOFMaster. Photography Composition Articles Library. About THIAPS - Film is not dead it just smells funny. Photoshop Articles. Photographer education. A lot of news photographers don't think that they are allowed enough time to light pictures, so they rely on their hot shoe mounted flash or on moving their subject into the daylight.
If your kit is lightweight and well planned, if it's reliable and quick to assemble then you can light as much of your work as you want to. I tend to specialize in editorial portraiture, so that is the area of work that I'm going to talk about. When I was writing these pages my basic kit was one Lumedyne 200 joule pack, one Signature head, two regular batteries, one stand, an umbrella, a Chimera softbox and a Pocket Wizard kit - all in one sling bag. Since May 2009 that all changed and the Lumedyne kit was replaced by an Elinchrom Ranger Quadra system. I still like the Lumedynes but the Elinchrom is a few percentage points better! Digital Camera Cleaning Techniques and Products.