
DIY studded denim collar. Sunday, 5 February 2012 DIY studded denim collar This really is such an easy thing to do that it doesn't really require a huge long-winded explanation; to be honest I just wanted to show you all my new favourite item of clothing!

You will need: a denim jacket (or any item for that matter) of the style/size you desire some press studs (I buy mine here) a surface/tool to press the backs of the studs down - I recommend the edge of an old table (bearing in mind it may get chipped) or a flat butter knife (be careful!) As I said this is SO SIMPLE that I don't really feel the need to explain in detail - you just need to push the studs through the denim in the pattern/design you want and flatten down the backs so that the studs stay firmly in place and you don't get poked.
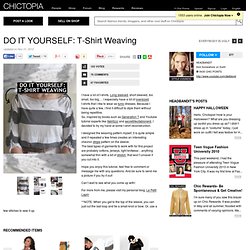
I decided to do this little pattern with some large and small studs on the collar tips, however I may well decide to add some more in the future - perhaps on the pocket flap too. Labels: denim, DIY, studs, vintage 13 comments: DO IT YOURSELF: T-Shirt Weaving. I have a lot of t-shirts.

Long sleeved, short sleeved, too small, too big…. I especially have a lot of oversized t-shirts that I like to wear as tunic dresses. Because I have quite a few, I find it difficult to style them without being repetitive. So, inspired by books such as Generation T and Youtube tutorial experts like itsblitzzz and secretlifeofabionerd, I decided to try my hand at some t-shirt reconstruction. I designed the weaving pattern myself, it is quite simple and if repeated a few times creates an interesting chevron stripe pattern on the sleeve. Hope you enjoy this tutorial, feel free to comment or message me with any questions.
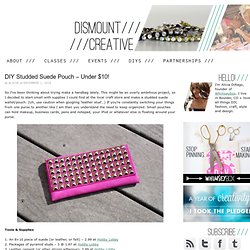
Huzzah! Vintage. DIY Studded Suede Pouch – Under $10! So I’ve been thinking about trying make a handbag lately.

This might be an overly ambitious project, so I decided to start small with supplies I could find at the local craft store and make a studded suede wallet/pouch. (Uh, use caution when googling ‘leather stud’…) If you’re constantly switching your things from one purse to another like I am then you understand the need to keep organized. Small pouches can hold makeup, business cards, pens and notepad, your iPod or whatever else is floating around your purse.
Tools & Supplies 1. The size of my pouch was determined by the size of the piece of suede I used so play around and see what you like, especially if your piece of leather is a different size. Step 1: Cut your suede Download the pattern. Step 2: Glue The leather cement I used did an excellent job, although I’m sure that one of the many other glues and epoxies I had would have worked, too. Step 3: Embellish There are tons of ways to decorate your pouch, or you could leave it plain. Grampo e linha. Já faz um tempinho que detectamos uma onda de pulseiras de corrente decoradas com trabalhos em crochê e linhas nas lojas mais bacanas de acessórios.

O trabalho é supervalorizado porque muitas vezes o material da pulseira é de ouro, e o trabalho artesanal também tem o seu valor. Quem virou febre da modinha lá fora e vende suas peças no Net-a-Porter é o designer Aurélie Bidermann. As joias são feitas com materiais nobres, e as correntes são todas de ouro 18k. Vale a pena o investimento, mas se você não pode arcar com o precinho, encontramos um site que ensina a fazer o passo a passo da pulseira sensação. Separe a sua tesoura, linha de bordar trançada e grampos de cabelo. I Spy DIY. DIY Rope Bracelet. Climbing rope?

Bracelets? Count us in. Inspired by Miansai‘s colorful, stackable and adjustable rope bracelets, we were determined to add another do-it-yourself bracelet to our growing collection. With some colorful rope and an S hook from the hardware store, making this bracelet is as simple as mastering the versatile sliding knot. We must warn you though, this project is extremely easy and addicting! Before you begin, seal the tips of the cord by burning them with a lighter.
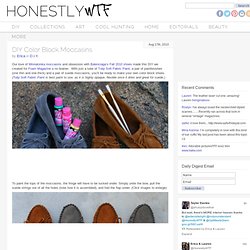
Coil the cord twice around towards the left loop. Repeat the same steps on the other side. Trim and re-burn the tips if necessary. Try making the bracelets with leather cord too. (top image from here; rest of images from Honestly…WTF) DIY Color Block Moccasins. Our love of Minnatonka moccasins and obsession with Balenciaga‘s Fall 2010 shoes made this DIY we created for Foam Magazine a no brainer.

With just a tube of Tulip Soft Fabric Paint, a pair of paintbrushes (one thin and one thick) and a pair of suede moccasins, you’ll be ready to make your own color block shoes. (Tulip Soft Fabric Paint is best paint to use, as it is highly opaque, flexible once it dries and great for suede.) To paint the tops of the moccasins, the fringe will have to be tucked under. Simply untie the bow, pull the suede strings out of all the holes (note how it is assembled), and fold the flap under. (Click images to enlarge) Start by making a test patch near one of the holes, as this part will be covered and it’s a great way to get comfortable with your brush and paint. Let dry for at least 2 hours and reassemble the fringe to reveal your new pair of SICK color block mocs! Gray to white - bleaching jeans.
How to Ombre. 35 Amazing Uses For Old Pallets.