

Sewing 101: making a pouf. Add a burst of color to your room with this crafty pouf!

At 17” wide and 10” deep, it’s large enough to serve as floor seating or a foot stool. (And if you have pets, I have a feeling they may want to make this their new favorite spot!) This project is a little challenging to sew, but it’s not too difficult, so if you’re comfortable with the basics of sewing, give it a try. You can make a colorwheel effect with a range of solid colors, or choose a variety of patterned fabrics for a louder patchwork effect. Medium-weight cottons work well for this design (check out quilting shops for great selections of solids and prints).
I love the idea of making a set of these poufs in a range of sizes, for a sculptural stack of cushions that will become a room element in their own right. CLICK HERE for the full how-to after the jump! Finished Dimensions: 17” diameter by 10” tall. Upcycle: T-shirts to Summer vest tutorial. Flax & twine.
FamilyFun Crafts, Activities, Recipes & Other Ideas for Kids & Parents and More Family Fun. Etched Glass Projects. I made an etched glass vase for a friend’s wedding recently (and of course one for me) after seeing this idea from Martha Stewart.
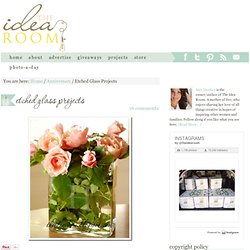
I eventually want to label some canisters by etching the glass and am on the lookout for some inexpensive glass jars. You can etch anything that is glass with this Armor Etch cream and it is so easy to use. You will need the following: 1. Armor Etch (found at craft stores); I bought mine with a 40% off coupon (of course) at Roberts since it is fairly expensive (about $7 full price). 2. First start by making sure your glass surface is clean. Now that the contact paper is on your glass, take your stencil and center it. Remove the contact paper where you want your glass to be etched (in this case it was the letter H). Paint the etch cream over the glass you would like etched (the letter H). I have also found that you can reuse the etching cream, so when the time is up, I scrape it back into the bottle. 3115stumbleupon. Crafts.
The Idea Room Inspiring Mothers, Women and Families You are here: Home / Crafts Crafts 3 Comments Crafts (Linkup closed) powered by InLinkz 120 297stumbleupon969 October 30, 2011 · Filed under: Tagged with Amy Huntley is the owner/author of The Idea Room.
Copyright Policy Feel free to use an image...as long as you link back to this blog. This work is licensed under a Creative Commons Attribution-NonCommercial-NoDerivatives 4.0 International License. Blog Contributors: our sponsors: my home tour Disclosure of Material Connection: I received one or more of the products or services mentioned in some of my posts for free in the hope that I would mention it on my blog. This work is licensed under a Creative Commons Attribution-NonCommercial-NoDerivatives 4.0 International License. Feb. 2009. Experimenting with paper/fabric ornaments. I hope one and all had a great Thanksgiving!
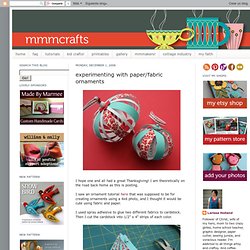
I am theoretically on the road back home as this is posting. I saw an ornament tutorial here that was supposed to be for creating ornaments using a 4x6 photo, and I thought it would be cute using fabric and paper. I used spray adhesive to glue two different fabrics to cardstock. Then I cut the cardstock into 1/2" x 4" strips of each color. Then I punched holes in the ends and threaded one end of alternating colors onto a piece of wire that I had looped and strung with one decorative bead. Rolled paper flowers {tutorial} Welcome to flower week – five days of simple and delightful flower projects.
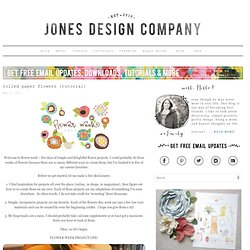
I could probably do three weeks of flowers because there are so many different ways to create them, but I’ve limited it to five of my current favorites. Before we get started, let me make a few disclaimers: 1. I find inspiration for projects all over the place {online, in shops, in magazines}, then figure out how to re-create them on my own. Each of these projects are my adaptation of something I’ve seen elsewhere. 2. 3. Okay, so let’s begin. Paper Flowers – Anyone Can Do That. Japanese Kusudama, this tutorial is featured on Craftuts Anyone can do that, I assure you.

The proof: I can, just take a quick look at my result below. And, believe me, I am neither meticulous nor particularly patient. You could even say I’m the opposite. Below you can see my very first attempt to create paper flowers. Simple Paper Flowers. DIY storybook paper roses. DIY storybook paper roses You’re going to love today’s DIY project so much that you’re going to want to start tearing pages out from old books tonight!
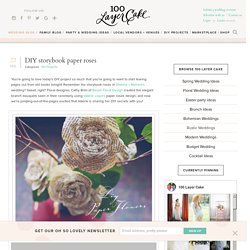
Remember the storybook roses in Shanna + Richard’s wedding? Sweet, right? Floral designer, Cathy Brim of Bloom Floral Design created the elegant branch bouquets seen in their ceremony using Valerie Lloyd’s paper roses design, and now we’re jumping-out-of-the-pages excited that Valerie is sharing her DIY secrets with you! How to Fold Paper Flowers.