
Cake postcard tutorial. Supplies Materials needed to make two cake postcards: 1 large sponge (yellow paints the best)Serrated knifeX-Acto or utility knifeSpray paint (brown, yellow, pink or white)1 tube acrylic latex caulk (brown, cream or white)Spray adhesive (3M Super 77 works great!)
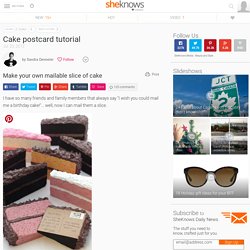
Cardboard, kraft paper or scrapbook paper Instructions Cut sponge into wedge shape With a serrated knife, using a sawing motion, cut a sponge into two, cake wedge shapes. Cut a center groove into sponge Using an X-Acto or utility knife, cut a section of foam from the center of the sponge. Paint the sponge wedges in desired color. Trace the slice of cake When the sponge wedges are dry, trace around them on a piece of cardboard, kraft paper or colorful scrapbook paper. Spray glue the postcards to the solid, flat sides of the sponge wedges. Using a caulking gun and your desired caulk, fill a plastic disposable piping bag with half of the caulk.
Pipe the center of the cake Pipe the icing on the top Note from the editor. 25 (more) clever ideas to make life easier. .
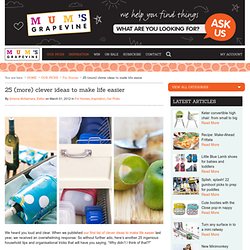
We heard you loud and clear. When we published our first list of clever ideas to make life easier last year, we received an overwhelming response. So without further ado, here’s another 25 ingenious household tips and organisational tricks that will have you saying, “Why didn’t I think of that?!” Source: chezerbey.com Got an empty kitchen shelf? Source: maillardvillemanor.com Wall mount cutlery trays and add a cup hook in each compartment for brilliant jewelery storage.
Source: apartmenttherapy.com Avoid messy dresser drawers by “filing” your clothing side-by-side instead of stacking items on top of each other. Photo: William Warby on flickr.com Has putting Toy Story on constant repeat finally taken its toll? Source: realsimple.com Packing tip: Protect breakables such as wine bottles or food containers with children’s inflatable floaties.
Source: whatiwore.tumblr.com Rather than bundling them in your drawer, loop tights over a coathanger and store them in your wardrobe. 101 Simple Handmade Gift Tutorials. These simple handmade gift tutorials will make any crafty person’s heart sing with joy!

You don’t need special skills or a bunch of time because these can all be done super fast! Simple and cute…that works for me! Oh, and think of all the money you will save making these gifts. {At least that’s the story I tell my husband…shhhh!} Videojug - Get Good At Life. The world's best how to videos plus free expert advice and tutorials. Rolled paper flowers {tutorial} Welcome to flower week – five days of simple and delightful flower projects.
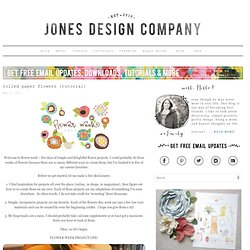
I could probably do three weeks of flowers because there are so many different ways to create them, but I’ve limited it to five of my current favorites. Before we get started, let me make a few disclaimers: 1. I find inspiration for projects all over the place {online, in shops, in magazines}, then figure out how to re-create them on my own.
10 Craft Room Organizational Tips — my blessed life™ - StumbleUpon. DIY. Wedding Trends for Stylish + Creative Brides - StumbleUpon. If you loved the beautiful DIY wedding this morning and Nata’s gorgeous paper flower bouquets, you are in luck as Nata is sharing how she crafted them with us!
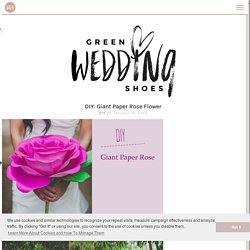
She was inspired by a template created by Morgan Levine on Martha Stewart (as was I in the flowers I created for this styled shoot). I just love that this basic idea has inspired different brides to create their own version of giant paper flowers – you might remember these equally awesome giant paper flowers from this wedding I shared last year. :) Thanks so much Nata for sharing how you created your giant pink paper rose + special thanks to Studio Castillero for the photos of the DIY + her wedding!
Materials (to make one giant rose) Step 1: Cut the petals. Free People Clothing Boutique Blog - StumbleUpon. UPDATE: This post originally ran on March 23 2011, but with summer winding down we wanted to bring it back up for some late summer inspiration!
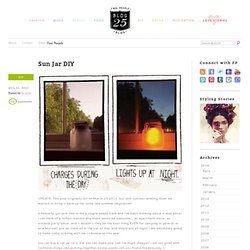
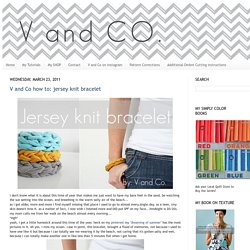
A fellow fp girl sent this to me a couple weeks back and i’ve been thinking about it ever since! I can think of a million reasons why these would be awesome… as apartment décor, as outdoor party décor, and – wouldn’t they be the best thing EVER for camping in general or at a festival? Just let them sit in the sun all day, and they’ll last all night! Haha.nu - the lifestyle blogzine - StumbleUpon. V and Co how to: jersey knit bracelet - StumbleUpon. I don't know what it is about this time of year that makes me just want to have my bare feet in the sand, be watching the sun setting into the ocean, and breathing in the warm salty air of the beach...as i get older, more and more i find myself missing that place i used to go to almost every.single.day. as a teen.
A Unique Wedding Invitation: Tying The Knot ~ Literally. Some people are just so creative!
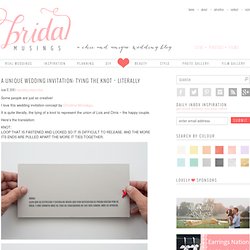
I love this wedding invitation concept by Christina Moralego. It is quite literally, the tying of a knot to represent the union of Lois and Chris ~ the happy couple. Here’s the translation: {Images via Behance } Craftgawker - StumbleUpon.