
Make Watercolor and Marker Style Portraits with Illustrator. With this tutorial, we are going to work through ways of creating digital portrait illustrations that have a unique and somewhat tactile feel of marker and watercolor.
This tutorial will focus on using a drawing tablet and Adobe Illustrator. There will be a focus on technique and technical settings, but the overall product will rely on your own personal style and taste. Preview Resources Portrait by Lillian Bertram (Creative Commons Share Alike – used here with permission) Step 1: Set up your Illustrator document Start with a print document of 8.5 x 11″. Step 2: Import the reference photo Import the photo you will be using as a reference (File > Place). Size it up or down as necessary—try to size it up to the artboard. Don’t sweat the resolution or pixelation of the image since the reference photo is only a guide. Since the artwork will be imported into the first layer, name it “Photo Reference” using the Layers panel.
Your work area should look like this: Step 3: Set up your work area. Separating Complex Objects from Background. Welcome to PhotoshopStar.com!
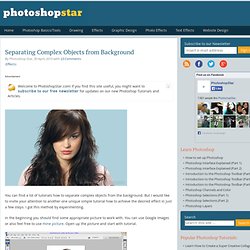
If you find this site useful, you might want to subscribe to our free newsletter for updates on our new Photoshop Tutorials and Articles. You can find a lot of tutorials how to separate complex objects from the background. But I would like to invite your attention to another one unique simple tutorial how to achieve the desired effect in just a few steps. I got this method by experimenting. In the beginning you should find some appropriate picture to work with. Apply Filter > Extract with similar settings to these: This is where we start to extract the image first of all zoom into the image with Zoom Tool so you can clearly see the outline and set the brush size to a suitable size and then simply draw around the outline of the woman’s hairstyle with Edge Highlighter Tool. After that create a new layer under and fill it with color of #aed2da.
Now we can see that we have some defects on woman’s hair. Now, move to the next step. We are done on this step. 15 Best Photoshop Light Effect Tutorials. 100 Best Photoshop Tutorials of All Time that Yield Professional Results. Photoshop tutorials are one of the most popular subjects on the web, as the digital art community continues to grow and new designers bring their unique skills.
However, quality Photoshop tutorials that teach you a useful effect, have a quality finished result and are well explained are harder to find, and with the large number of tutorial sites available, it can be hard to sort the quality from the mundane. In this massive roundup, we’ve collected the top 100 best Photoshop tutorials that have ever been created, that yield professional results, teach you a useful effect, are well explained, and will have you designing like a pro in no time.
These tutorials are collected from niche tutorial sites around the web, and range in age from creation in 2008 to a few tutorials that were created just last week. So, if you think you’ve seen all there is to see from Photoshop, guess again and check out this post. If you liked this post, check out our other design tutorial roundups: