
How To: Create a Paper Cut Map of Your Favorite City Just Crafty Enough. I have a thing for maps, especially city maps.

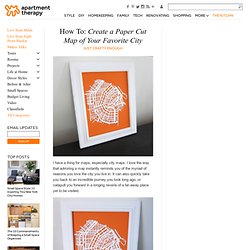
I love the way that admiring a map instantly reminds you of the myriad of reasons you love the city you live in. It can also quickly take you back to an incredible journey you took long ago, or catapult you forward in a longing reverie of a far-away place yet to be visited. Like most things, I think I'll enjoy this paper cut map even more because I'll have made it myself, so I plan to give this project a try. This bright orange DIY map of Amsterdam from Just Crafty Enough has inspired me and the steps look simple enough: 1) Find a detailed (but not too detailed) map of your city of choice. 2) Use a thin black marker and a ruler to emphasize the lines that you are going to cut out. 3) Scan the map (with your markings) onto your computer and flip the image (so that the correct side will be outwardly facing when you mount it.) 4) Grab your exacto knife and cut away! 5) Spray adhesive onto your freshly-cut map and mount it. Pendulum Painting - Martha Stewart Kids' Crafts.
Resources: Artist’s Tempera Paint available from DaVinci Artist Supply; all other tools and materials available from craft-supply and hardware stores.

Block Posters - Create large wall posters from any image for free! DIY Enlarged Photo Art « I’ve always struggled with how to fill large walls, and I swear that how all the walls in our house are…large and empty!

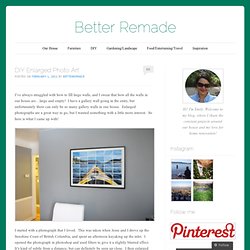
I have a gallery wall going in the entry, but unfortunately there can only be so many gallery walls in one house. Enlarged photographs are a great way to go, but I wanted something with a little more interest. So here is what I came up with! I started with a photograph that I loved. This was taken when Jesse and I drove up the Sunshine Coast of British Columbia, and spent an afternoon kayaking up the inlet. Once they were all laid out, I got my large piece of foam core. Once all the photographs were pinned to the foam core, I held it up vertical and pushed them all the way. Once they were all clipped down, I held it upright again and pushed the pins from the back so that the clipped ends were flush with the backside, and the photographs were sticking up about 1/4 inch off of the foam core. Then I carefully pried off the back section, so the edges were only paper thin. Kate’s log dome display jar. I just want to say that i envy all of you out there with a working fireplace. i have very fond memories of sitting around a crackling fire in maine, and watching my dad place freshly chopped firewood in a huge pile outside. that being said (anyone else watch curb your enthusiasm?)
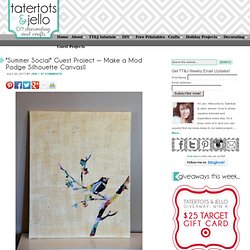
CLICK HERE for the full how-to after the jump! Materials: 1. wooden log (if you want to skip the sawing wood step, you can buy wood coasters at various places. i found these simple ones online) 2. saw (chop saw or a regular tooth saw and mitre box) 3. pencil 4. stemless wine glass, drinking glass, or a clean glass jar (this is depending on what shape you want your jar to be. i found stemless wine glasses had a nice domed shape, but a jar would also look nice. if you want to size these up, i recommend using mason or other food container jars or simple glass vases as cheap options) "Summer Social" Guest Project — Make a Mod Podge Silhouette Canvas. <div class="greet_block wpgb_cornered wpgb_shadowed"><div class="greet_text"><div class="greet_image"><img class="enable-pib-img-under" src=" alt="WP Greet Box icon" data-recalc-dims="1"/></div>Thanks for coming by!

Photoshop CS4: A Picture Worth a Thousand Words. I love Photoshop techniques that offer all kinds of possibilities for experimentation—and the following tutorial is a perfect example of one of those techniques.

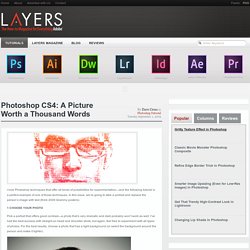
In this issue, we’re going to take a portrait and replace the person’s image with text (think 2009 Grammy posters). Pick a portrait that offers good contrast—a photo that’s very dramatic and dark probably won’t work as well. I’ve had the best success with straight-on head and shoulder shots, but again, feel free to experiment with all types of photos. For the best results, choose a photo that has a light background (or select the background around the person and make it lighter). Create a new document (File>New) in a size that’s smaller than your photo: the specifics don’t really matter. Switch back to the photograph. Then, press Command-J (PC: Ctrl-J) to copy the selected pixels onto a new layer.
Go back to the Select menu and choose Color Range again. Click the Create a New Layer icon at the bottom of the Layers panel.