
The BEST Play-Dough Recipe. Have you ever made play dough and it just fell apart??

Well… not this time. This recipe will make play dough that is seriously the closest thing to store-bought you’ll ever make. No falling apart or drying out (as long as stored in a sealed container). It will last up to 6 months.The secret to this recipe?? Two things: First, Cream of Tarter… it’s what helps the dough stay together. and Second, not a lot of salt… all that salt dries out your dough! Ready to make it? Ingredients: 1 C Flour 1 C Water 1/4 C Salt 1 TBSP Vegetable Oil 2 tsp Cream of Tarter Food Coloring (actual coloring or a kool-aid packet will do) Sparkles (If you wanna be a fun mom!) Pour in all ingredients. Stir until everything is mixed well. Once the mixture is (mostly) clump free. Stir. Stir, Stir Stir.Just keep stirring until the Play Dough is formed. Remove from heat, and knead by hand. Once cooled it’s ready to go. Craftgawker - StumbleUpon.
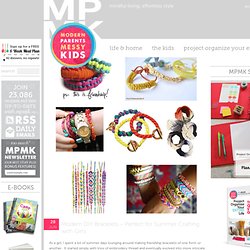
Modern Parents Messy Kids: Modern DIY Bracelets - Perfect for Summer Crafting with Girls. 28 Jun As a girl, I spent a lot of summer days lounging around making friendship bracelets of one form or another.
Hand Embroidered Cards. Look what I found in my desk drawer!

I made these embroidered cards so long ago and then just tucked them away in a drawer to be forgotten about. What a shame! I thought these cards would make a great DIY for the blog because they're easy and fun to make, and you probably have all the supplies on hand already. If you're anything like me you have waaaaay too many colors of embroidery floss tucked away somewhere. Crafting: Fabric Rosettes. I've been doing a lot of cooking and not as much Crafting here lately, but I'm back on track and have a fun little project for you that satisfies my love of both accessories and fabric.

It's also perfect for making Valentine's Day gifts for your friends and family or just for yourself! Today's tutorial shows you how to make fabric rosettes which can be used on brooches, hair clips, necklaces, home decor projects and more. What you'll need: fabric felt cardstock pins scissors iron craft glue (I use E9000) pin backs, hair clips, bobby pins etc buttons, beads, misc embellishments (optional) How to make a wrapped leather bracelet. Triple-wrap leather bracelet with blue tigereye beads Let me begin by stating the obvious – this style of wrapped leather bracelet is EVERYWHERE this season.
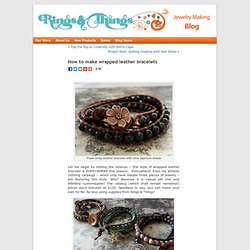
Everywhere! Even my athletic clothing catalogs – which only have maybe three pieces of jewelry – are featuring this style. Why? Because it is casual yet chic and infinitely customizable! Five different leather wrapped gemstone bracelets designs: green opal, mookaite, African turquoise, hematite and rhodonite The supply list is pretty short: 4-6mm round beads We used gemstone beads, but glass, crystal beads or pearls would also be lovely. Your source of daily updated funny pictures and gifs. - StumbleUpon. DIY Woven Chain Bracelet. Chain link bracelets, with colorful threads woven through them, have been popping up here and there.
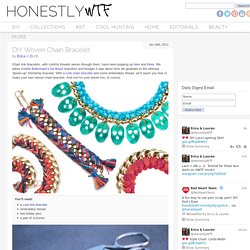
We adore Aurèlie Bidermann‘s Do Brazil bracelets and thought it was about time we graduate to the ultimate “grown-up” friendship bracelet. With a curb chain bracelet and some embroidery thread, we’ll teach you how to make your own woven chain bracelet. And one for your bestie too, of course. You’ll need:a curb link braceletembroidery threadtwo bobby pinsa pair of scissors Cut 2 sets of 15 strands of embroidery thread, with each strand measuring four times the length of the bracelet.
Lay the second color (blue) over the first color (coral). Repeat the steps until you reach the end of the bracelet. (top images from here and here, rest of images by Honestly…WTF) DIY Rope Bracelet. Climbing rope?
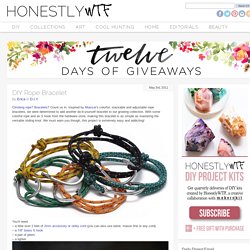
Bracelets? Count us in. Inspired by Miansai‘s colorful, stackable and adjustable rope bracelets, we were determined to add another do-it-yourself bracelet to our growing collection. With some colorful rope and an S hook from the hardware store, making this bracelet is as simple as mastering the versatile sliding knot. DIY Friendship Bracelet - Honestly WTF - StumbleUpon. For several months now, we’ve been receiving emails requesting a friendship bracelet DIY.
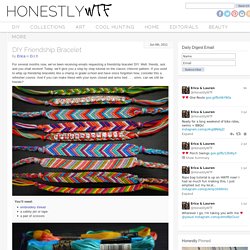
Well, friends, ask and you shall receive! Today, we’ll give you a step by step tutorial on the classic chevron pattern. DIY Braided Bead Bracelet - Honestly WTF - StumbleUpon. It’s been awhile since our last bracelet DIY.

I don’t know about you, but our wrists have been begging for another colorful addition for months now. So after playing with some materials that were already on hand, we’ve created a tutorial for a braided bead bracelet, which is a not so distant cousin of the hex nut and wrap bracelet. Because honestly, you can never have too many . . . You’ll need: Cut the waxed linen cord into a 26″ and 19″ piece. Tie a knot about half an inch down from the loops. Start braiding the strands. Push the bead against the base of the braid, and cross the left strand over the middle. Keep a finger at the base of the braid, holding the beads in their place and keeping the braid tight. Finish the bracelet with another inch of braided cord, measuring it against the wrist. Paper Toys - Paper Cut-Outs - PaperToys.com - StumbleUpon.