
Hardware. Playground - ArduinoUsers. :: Exhibition :: The place to share and show off projects Until someone finds a way to categorize what is here, be sure to remember that your browser has a "find in this page" tool (ctrl-F in Firefox) which can help you find what you are looking for!
Arduino user projects How Did I Improve My Central Heating Control with Arduino? - Before I started this project, my central heating was controlled with Danfoss TP7000 room thermostat only by switching heating pump ON-OFF. Then I heard about Arduino, get interested, and decided to make an advanced control system for central heating: weather compensated heating controller, room thermostat, web-based remote control for the whole system, and web logging.
Arduino - HomePage. ArduinoBoardDuemilanove. Overview The Arduino Duemilanove ("2009") is a microcontroller board based on the ATmega168 (datasheet) or ATmega328 (datasheet).
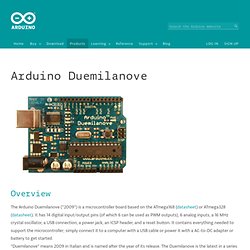
It has 14 digital input/output pins (of which 6 can be used as PWM outputs), 6 analog inputs, a 16 MHz crystal oscillator, a USB connection, a power jack, an ICSP header, and a reset button. It contains everything needed to support the microcontroller; simply connect it to a computer with a USB cable or power it with a AC-to-DC adapter or battery to get started. "Duemilanove" means 2009 in Italian and is named after the year of its release. The Duemilanove is the latest in a series of USB Arduino boards; for a comparison with previous versions, see the index of Arduino boards. Summary Schematic & Reference Design EAGLE files: arduino-duemilanove-reference-design.zip Schematic: arduino-duemilanove-schematic.pdf Power The Arduino Duemilanove can be powered via the USB connection or with an external power supply. The power pins are as follows: VIN. Memory AREF. Getting Started. Tutorials. Playground - HomePage. Playground - InterfacingWithHardware.
These topics cover the hardware and software setup required to connect an Arduino device with a variety of electronic parts, chips and devices.
A related topic not covered under this section is the shield, boards that plug directly into an Arduino's pin layout. Information on the creation and use of specific shields belongs in that section. Information on shields in general and their creation belongs here. See here for a table of shields and the Arduino pins they use. Arduino has limits on how much current can be sourced or sunk by its I/O pins. Navigation Output Input User interface Buttons,Encoders,Keypads Unified Input InterfaceText-based user interfacemicroBox Linux Shell look and feel for Arduino Phi_prompt user interface LibraryMenuSamplePhi_prompt glcd user interface Library This is being planned.
Communication General Common Pinouts Examples and information for specific output devices and peripherals: How to connect and wire up devices and code to drive them. Visual Audio Output Bar Codes. Software. Windows. 1 | Get an Arduino board and USB cable In this tutorial, we assume you're using an Arduino Uno, Arduino Duemilanove, Nano, Arduino Mega 2560 , or Diecimila.
If you have another board, read the corresponding page in this getting started guide. You also need a standard USB cable (A plug to B plug): the kind you would connect to a USB printer, for example. (For the Arduino Nano, you'll need an A to Mini-B cable instead.) 2 | Download the Arduino environment Get the latest version from the download page.
When the download finishes, unzip the downloaded file. 3 | Connect the board The Arduino Uno, Mega, Duemilanove and Arduino Nano automatically draw power from either the USB connection to the computer or an external power supply. Connect the Arduino board to your computer using the USB cable. 4 | Install the drivers Installing drivers for the Arduino Uno or Arduino Mega 2560 with Windows7, Vista, or XP: Plug in your board and wait for Windows to begin it's driver installation process. ShiftOut. Learning Examples | Foundations | Hacking | Links Started by Carlyn Maw and Tom Igoe Nov, 06 Shifting Out & the 595 chip At sometime or another you may run out of pins on your Arduino board and need to extend it with shift registers.
This example is based on the 74HC595. The datasheet refers to the 74HC595 as an "8-bit serial-in, serial or parallel-out shift register with output latches; 3-state. " Buy. Index. Reference.