
“I started writing and the result was something... Pébéo - Vitrail sur toile. Les médiums de transfert d’images. Tutorial: Duct Tape Dress Form + Giveaway! A while ago I introduced you to Jade, the turquoise duct tape version of me.

She was one of the first sewing aids I ever made, and unfortunately she isn't in the best shape anymore... A little bit lumpy, and she's gotten shorter over time. This isn't supposed to happen for a few more decades! I had to perform all kinds of cropping acrobatics with my garment pictures, and it was honestly embarrassing. So, a plan was born! My plans for a new dress form included the following improvements: 1.
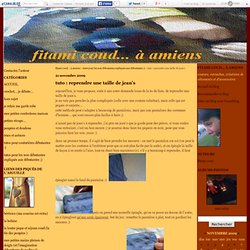
I was able to work with Duck Tape brands in order to find the best tape for the job, and they generously provided me with 5 rolls of their Original Duck Tape in white. But first, the tutorial! What You Will Need Duck Tape, (3 - 5 rolls) - I used just over 4 rolls for the total of 4 layers. 1. Tip: Do these steps prior to making the dress form, so you can start stuffing it right away after cutting off the tape. 2. 3. 4. 5. 6. 7. 8. 9. 10. 11. 12. 13. 14. 15. Finished! Duck Tape Giveaway. And Sew We Craft. Méthode Hong Kong. Outil à biais en carton. Tuto : reprendre une taille de jean's - fitami coud... à amiens. Aujourd'hui, je vous propose, suite à une autre demande issue de la to-do liste, de reprendre une taille de jean's. je ne vais pas prendre la plus compliquée (celle avec une couture rabattue), mais celle qui est piquée et surjetée...cette méthode peut s'adapter à beaucoup de pantalons, mais pas aux pantalons des costumes d'homme... qui sont encore plus faciles à faire ;) n'ayant pas de jean's à reprendre, j'ai pris un jean's que je garde pour des pièces, si vous voulez vous entrainer, c'est un bon moyen ;) je pourrai donc faire les piqures en noir, pour que vous puissiez bien les voir, yesss :) dans un premier temps, il s'agit de bien prendre les mesures : on met le pantalon sur soi (on peut le mettre avec les coutures à l'extérieur pour que ce soit plus facile par la suite), et on épingle la taille de façon à se sentir à l'aise, tout en étant bien maintenu (e). s'il y a beaucoup à reprendre, il faut épingler aussi le fond du pantalon :) ainsi qu'avec toutes les épingles 7cm à la ceinture,

Coworking place, Culture Textile, Showroom. Espace hybride. Partly Sunny Frock in Beehive PATTERN & INSTRUCTIONS. Finally, it's finished!

If you like the Partly Sunny Frock I posted about close to Valentine's day, here's the pattern. To get an idea of the variety of this dress I also made it in a yellow, white and black color scheme. Kinda springy. The pictorial how-to is below. If you want to make this dress just follow the instructions below. Materials (for a size 6 dress measurements waist: 27", bust: 33", hips: 36") If you want this in a larger size here is a great tutorial for enlarging a pattern.Pattern1 yard of main fabric for bodice and skirt8" of collar fabric12" of sheer fabric for yoke3 yards of piping (four if you're adding piping to waist)2 yards of bias tape for armhole opening and collar seam allowance20"-22" invisible zipperdisappearing ink markerStep 1:Measure 4"x4" square to be sure that the pattern printed correctly.
Step 2:Trace pieces of pattern onto material. Step 5:Line up the dart marks and sew together. Step 6:If you are adding piping this is where you should start.