
Hair Tutorial For French Braided Updo Bun. Renaissance Beauty Hair Style, Romantic Feminine Hairstyle Ideas. How To Style Maiden Braids. Last month I did a makeover story with Kelsie and had many requests for a maiden braid tutorial.

Yesterday she came in and we photographed these simple step by steps. Kelsie has extremely long and thick hair, but anyone with shoulder length or longer can do these braids (see my photo below for an example). Steps 1-2: Braid two strands on each side of a center part. Steps 3-5: Wrap braids around the crown of your head and pin in place with one pin each. Step 6: Arrange braids so that they cover the front of your head like a headband. Steps 7-8: Pull the rest of the hair into a ponytail and pin it into a cute messy bun. Step 9: Add final pins and spray.
The Beauty Department: Your daily dose of pretty. - THE LONG + THE SHORT OF IT. How To Use A Sock To Get Beautiful Curly Hair Without Heat. If you are a mom on the go with long hair you HAVE TO try this.

It will knock your socks off and have you wrapping your hair up in them! This is all about how to make your hair beautiful with no heat and no time. Curl your hair in your sleep with a sock. Yup, you heard me right. Have you heard of this sock bun? I was on Pinterest a while back and spotted this post about the sock bun which links you to her video on YouTube. Why? Because: It literally takes a minute to doNO heat at all – just a soft little sock in your hairNo product (for me anyway)You can sleep in it very comfortablyIt works Marvelously and is simple beautiful This is the sock bun before and after of my hair. Here are the step by step instructions on how to make this work. First steal a sock from your husband’s dress sock collection (that is what I did anyway). How To Style a Beehive. I'm so excited to share this hair tutorial!

Beehives can be intimidating, but they are actually pretty simple to style when you have the right supplies. The first time I tried this technique was in this video shoot and I've been a believer ever since. Hot Hair Trends: Try Hair Chalking for Color without Commitment - Beauty Schools Directory Blog. 1308839446234844.jpg (JPEG Image, 215x650 pixels) - Scaled (85%) How To Put Your Hair Up In A Cute Bun. Comb your hair carefully to eliminate any tangles or knots.Take some hair from the top of your head. 3.
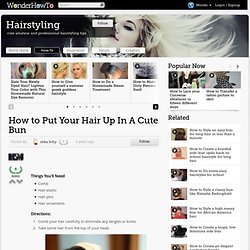
Tie off this hair with a hair elastic. 4. Don't pull off the ends. How To Style a Side Braid. Here's a brand new, extra magical hair how-to by Katie of Skunkboy. 1.Start with a dramatic side part. 2.
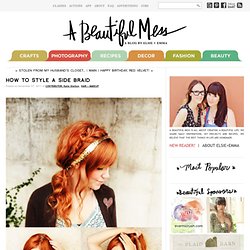
Separate a small section of hair on the side. This will be the beginning of your braid. 3.Taking that section, separate it into two smaller sections. 4. Using a fishtail braid method, begin braiding. 5. Continue the french braid until you reach behind the ear. Then finish your braid all the way down using the regular fishtail method. 6. How-To: The Cascade/Waterfall Braid. The waterfall braid also known as the cascade braid recently exploded as the new "trend braid" of the season.

The waterfall effect looks cool and complex, but it's easier to style than you think. Give this beautiful braid a try when Beautylish takes you through the how-to! Section Off The waterfall braid works best on straight or loose waves. Tag Archive for "wedding hairstyles" - The Beauty Department: Your daily dose of pretty. Photo/post/graphic design: Kristin Ess One of my all time favorite hairstyles for a wedding or for red carpet is the most super simple chic chignon (say that 3 times fast!).
In this tutorial we show future brides and bridesmaids alike how to keep their hair out of the way while maintaining a timeless, classic look for any event. This is one of those updos that really allows you to focus on the dress, accessories and overall beauty instead of being a major focal point. Let’s get started!
Sea of Shoes: HAIR HOW-TO. I am sometimes asked how I style my hair, and while my method is far from perfect, I thought I'd show you how!
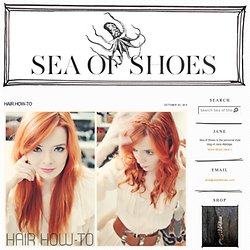
My hair is pretty straight and fine naturally and I always let it air dry. Since I go about three days between washes, I like to curl it on the first day and let it mellow out into some nice waves over the next two. Let's get started! If your hair doesn't hold curl very well then you may want to put a palmful of curling mousse in it when it is halfway dry. First I comb out all of the tangles and apply a liberal amount CHI Iron Guard Protection Spray to prep my hair. (though I want to upgrade to one of the fancy new ones from Sultra soon!) When I'm done curling the bottom section, I mist it with Bumble and bumble Spray de Mode and comb through the curl with my fingers.
Ahh!! If you want to dress it up a little, you can do a braided headband look! Find a spot on the opposite side of your head and pin it so that it blends in naturally with the rest of your hairstyle. Triple Max Tons: EASY HOLIDAY HAIR.