
Ovidiu Predescu's Weblog: Arduino Tiny Web Server - part 2. Update (December 30, 2010): Latest version of Arduino TinyWebServer: arduino-tinywebserver-20101230.zip.
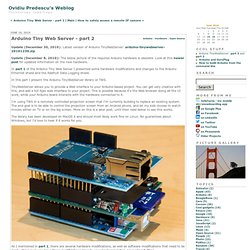
Update (December 8, 2010): The below picture of the required Arduino hardware is obsolete. Look at this newer post for updated information on the new hardware. In part 1 of the Arduino Tiny Web Server I presented some hardware modifications and changes to the Arduino Ethernet shield and the Adafruit Data Logging shield. In this part I present the Arduino TinyWebServer library or TWS. TinyWebServer allows you to provide a Web interface to your Arduino-based project. I'm using TWS in a remotely controlled projection screen that I'm currently building to replace an existing system.
The library has been developed on MacOS X and should most likely work fine on Linux. As I mentioned in part 1, there are several hardware modifications, as well as software modifications that need to be made. The library comes with few examples, look in TinyWebServer/examples. Basic web server. LT1372-1.png (PNG Image, 827×597 pixels) Open source electronic projects. Relays.pdf (application/pdf Object) LibraryTutorial. Learning Examples | Foundations | Hacking | Links This document explains how to create a library for Arduino.
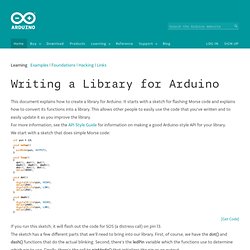
It starts with a sketch for flashing Morse code and explains how to convert its functions into a library. This allows other people to easily use the code that you've written and to easily update it as you improve the library. For more information, see the API Style Guide for information on making a good Arduino-style API for your library. We start with a sketch that does simple Morse code: int pin =13; void setup(){ pinMode(pin, OUTPUT);} void loop(){ dot(); dot(); dot(); dash(); dash(); dash(); dot(); dot(); dot(); delay(3000);} void dot(){ digitalWrite(pin, HIGH); delay(250); digitalWrite(pin, LOW); delay(250);} Blog » Arduino. Home Monitoring System Details. Little Bird Electronics. Arduino - Jonas Genannt. You can use Arduino with Ethernetshield to fetch temperatures over network.
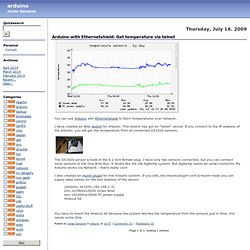
I have created an little sketch for Arduino. This sketch has got an "telnet" server. If you connect to the IP address of the arduino, you will get the temperature from all connected DS1820 sensors. The DS1820 sensor is build in the 6.2 inch female plug. I have only two sensors connected, but you can connect more sensors to the One Wire Bus. Practical Arduino: News. KMtronic: A range of relays - USB, RS232, RS485 and LPT relay. Playground - SolenoidTutorial. You can not drive a solenoid directly from your Arduino.
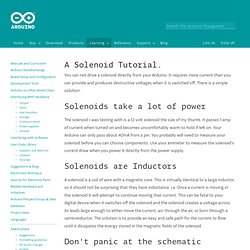
It requires more current than you can provide and produces destructive voltages when it is switched off. There is a simple solution. Solenoids take a lot of power The solenoid I was testing with is a 12 volt solenoid the size of my thumb. It passes 1 amp of current when turned on and becomes uncomfortably warm to hold if left on. Solenoids are Inductors A solenoid is a coil of wire with a magnetic core. Don't panic at the schematic Most of the schematic is test point labels and my extra protection circuitry for testing the bad configurations. The bypass diode The schematic shows a bypass diode, D1. The other protective device The IRF640 shown in this circuit operates as if it has a zener diode in parallel. It still generates a large voltage that I would have to be careful to isolate. Still, it's nice to know it's there and I did operate the circuit with only this mechanism while collecting some of the data shown here. The test fixture. Learn how to use electronic sensors.
Wiring ALPHA 1.0. Libraries. Board. Reference Language | Libraries | Comparison | Changes Looking at the board from the top down, this is an outline of what you will see (parts of the board you might interact with in the course of normal use are highlighted): Starting clockwise from the top center: Analog Reference pin (orange) Digital Ground (light green) Digital Pins 2-13 (green) Digital Pins 0-1/Serial In/Out - TX/RX (dark green) - These pins cannot be used for digital i/o (digitalRead and digitalWrite) if you are also using serial communication (e.g.
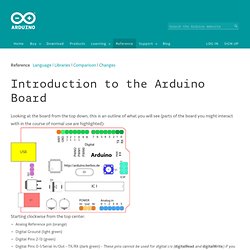
Serial.begin). Microcontrollers Digital Pins In addition to the specific functions listed below, the digital pins on an Arduino board can be used for general purpose input and output via the pinMode(), digitalRead(), and digitalWrite() commands. Serial: 0 (RX) and 1 (TX). Analog Pins In addition to the specific functions listed below, the analog input pins support 10-bit analog-to-digital conversion (ADC) using the analogRead() function.
Code. Xtal design labs inc. Arduino - Lilypad - SparkFun - Robots - Robotics - Parallax - Electronics. Arduino-json - Project Hosting on Google Code.