
New Maxscript Tutorial Series - Beginner to Intermediate by Kevin Harper. Skewmesh Tutorial. ZBrush 4R2 Beta Testing By: Nicolas Garilhe. Hi ZBrushers !

My name is Nicolas Garilhe and I'm glad to finally show my last work.As soon as I heard about the new features from this update, I knew I would make hard surface. My first idea was to see how far I could go inside ZBrush, and I finally realized that I was able to do everything I wanted, without any tiers software.Feel free to ask for more information if needed ! Subdivision Tips – Hard Surface Modelling IV.
Volvemos a la carga con varios trucos y formas de hacer las cosas con subdivs, y a base de comprender mejor el uso de pentágonos y triángulos.
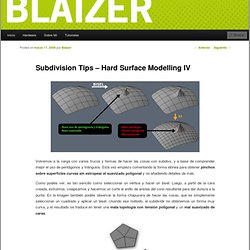
Esta vez empiezo comentando la forma idónea para obtener pinchos sobre superficies curvas sin estropear el suavizado poligonal y no añadiendo detalles de más. Como podéis ver, es tan sencillo como seleccionar un vértice y hacer un bisel. VRayFastSSS2 material. Working with layers in ZBrush by Gavin Goulden. Insomniac Games lead character artist, Gavin Goulden, breaks down his tips for working with layers in ZBrush...
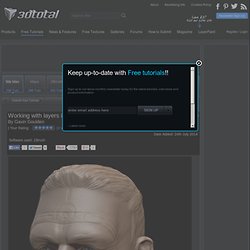
Chances are, if you have been sculpting for a while, you have had a moment where you have added details to your sculpt that you didn't like and had to remove them, only to then make your sculpt 'muddy', or ruin other details that you were happy with. You went a little too heavy with the wrinkles on a character's face, or added way too many pores to your character's skin. By working with layers, you can isolate these details, control the visibility of the information, and even remove the details entirely if you are unhappy with them; all without effecting the underlying details in your sculpt. Beyond just finer details, you can also have layers for posing, creating different body types, and blendshapes – which adds a ton of versatility to your workflow. Layers can add a level of control to your workflow and allow you to edit details on your model without harming your sculpt. Making of 'Victory!' by James Suret. Sculpting Clothing ZBrush Techniques with Richard Smith.
[Uartsy] Texturing & Rendering Realistic Skin [2014, ENG] ZBrush for Environments with Ben Mauro - Zbrush. Using masks for fine details by Gavin Goulden. In this quick tutorial, Lead Character Artist, Gavin Goulden will show you how to create fine detail in a face, like pores, wrinkles, and blemishes using a mask created from a texture in ZBrush When sculpting faces and skin, placement of details is very important, and that extra level of polish can really make your sculpture sing – but it can be tedious and time consuming.
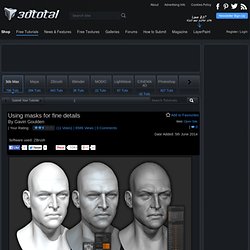
To help speed things up, and keep the details accurate, I like to use a mask based off of a grayscale texture that marks the peaks and valleys of the surface and allows you to push them in or out using Deformation > Inflate. This technique helps lay down a nice base layer of detail that is far more interesting than just surface 'noise' and allows you to build from that using normal sculpting methods. Adding a final pass of surface detail to your model can make a world of difference, but overdo it, or have unnatural details, and the effect is ruined Using masks to create fine details. Particle Flow Trajectory displayed with Splines. PFlow Trajectory displayed with Splines by Anselm v.
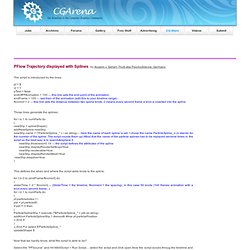
Seherr-Thoß aka PsychoSilence, Germany The script is introduced by the lines: pf = $ i2 = 1 pTest = false endOfPFAnimation = 100 –- this line sets the end point of the animation endFrame = 100 –- last fram of the animation (edit this to your timeline range) fIncrmnt = 2 –- this line sets the distance between two spline knots. 2 means every second frame a knot is inserted into the spline. Video Tutorial - Basic Head Rigging in 3ds max. This commercial video tutorial is created by artist Loocas Duber from Duber Studios in 3ds max and given to CGArena for celebrating 10,000 members.
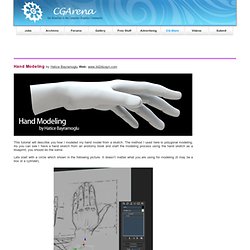
The length of this tutorial is 1 hour which covers all the aspects of head rigging and this is very informative tutorial. Must look or download for every CG enthusiastic. Hand Modeling in 3d. This tutorial will describe you how I modeled my hand model from a sketch.
Working with Modular Rocks. It's easy to unwrap and stitch the newly extruded border faces in max.
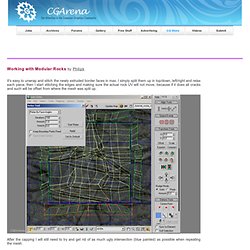
I simply split them up in top/down, left/right and relax each piece, then I start stitching the edges and making sure the actual rock UV will not move, because if it does all cracks and such will be offset from where the mesh was split up. After the capping I will still need to try and get rid of as much ugly intersection (blue painted) as possible when repeating the mesh. You will not get away from having quite some overdraw ingame working with these kind of meshes. It is simply a matter of how usable the set should be vs. having minimal overdraw. Artistic Rendering: The Way of the Samurai. In the present article you can find a theoretical material about artistic visualization. Now, we will talk about a creation of a picture, beginning from a modeling of the car. Very often the final result depends on the subject of rendering in it. You can find a guide on step-by-step modeling or detailed adjustment sequences on the internet.
Here we will talk only about the factors that really form the result. And it is not the software. Expert tips for perfect CG portraits. Realistic bump map. 1.
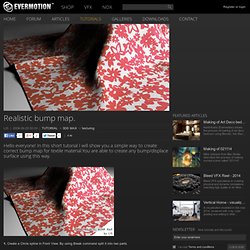
Create a Circle spline in Front View. By using Break command split it into two parts. 2. Grab bottom part and using snap, move it as you see on image. Weld connection points to get continuous spline. 3. 4. 5. Water Dripping. Hi, in this tutorial I'll show you how to create rain or water dripping effect in 3ds max using build in particle system Particle Flow.
This tutorial require basic skills of using 3ds max and Particle Flow. This isn't step by step tutorial, I just present you how my flow works. Maxscript by a practical example. Here we have two variables, SaveLocation and SaveFile. First we open a 'save file as' dialog with the command getSavePath. We save the in the variable SaveLocation. Making of Snow. All you need is some tree like this below: Once you have one select your tree, go to Editable Mesh in Selection window enable Ignore backfacing From the top of the scene select all polygons ignoring bottom side is the place where particles will ganerate snow.
Now create particles go to particle systems and pick PArray. Tip of the Week. Puddle shader. 3DS Max - Rigging Waves. Making Awesome Metal in UDK. Materials in UDK can be as simple or advanced as you want them to be. I tend to make mine way too complicated, and sometimes that’s not entirely what I want. Metals are always one of the trickier materials for people. In this short tutorial we’re going to go over making a metal texture for UDK. We’re going to be building this material in UDK: (available here) – We’ll make it free, so make a free account over at GameTextures, and download it to follow along! The first step, as with any of our textures is to get everything prepared for UDK. 1. 9. Simulate carpet bombing.