
Configuring the ESP8266 using an Arduino. This is a tutorial from BreakoutBros.com.
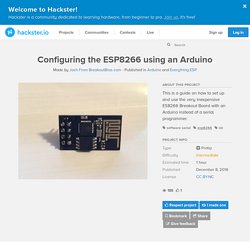
See the full tutorial here. A couple weeks ago we looked at an Internet of Things solution , the Particle Photon. After getting a lot of feedback from the community we got our hands on Riaspire ESP8266 WiFi board. IoT Motion Detector With NodeMCU and BLYNK. This is a very simple tutorial to show how ease is to implement an IoT project with NodeMCU and Blynk.
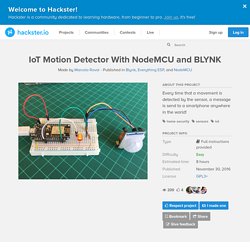
Any time that we a movement is detected by the sensor, a message provide by Blynk is send to a smartphone. Step 1: Bill of Material. Ultrasonic Range Detector Using Arduino and SR-04F. Want to Make a Tool that Measures Distance without using ruler,Then this Mini Project will be the best solution for it.Here we are Gonna make a Arduino Distance Measuring Device with a Ultrasonic Module similar to a Bat.So lets Get Started!!
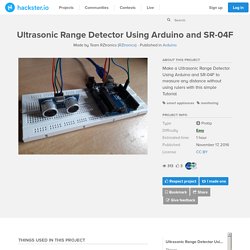
For More Tutorials visit- How Does a Ultrasonic Module Work? This Module consists of Two drums,one of which is a emitter that emits Ultrasound and other is receiver which receives the Reflected Ultrasound from the object.The emitter drum emits Ultrasound when we trigger the Module using the trigPin by sending a 10 Microseconds high Pulse. As soon as the Ultrasound is emitted through the emitter the Module makes the echoPin high. Emitted Ultrasound travels forward till it gets reflected by object and then travels Backward.The reflected ultrasound is detected by the receiver. When the reflected Ultrasound is received by the receiver,echoPin is made Low. we know that, Hackster. Charlie Chaser. Why did I do this?
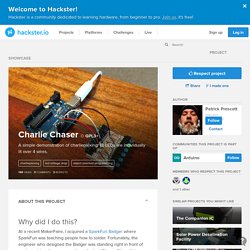
At a recent MakerFaire, I acquired a SparkFun Badger where SparkFun was teaching people how to solder. Fortunately, the engineer who designed the Badger was standing right in front of me to assist and answer questions. I asked Shawn, "How did you get so many LEDs to illuminate individually with only eight pins? " He went on to explain charlieplexing.
A few days later, I took the Badger and plugged it into my computer at work where it greatly reduces my productivity as I ponder the LEDs, microcontrollers, and other topics of electronics. Updating an Arduino and a PI with single git push. Micro-controllers are simple boards that can run C/C++ programs.

Owing to this simplicity they are easy to use and amazingly power efficient conversely this simplicity makes them incompatible with resin.io :( This is because the resin.io service relies on moving Linux containers around and these boards can't run Linux. However a couple weeks ago one of our users explained how he was using resin to update his Raspberry pi and an attached Arduino. I've expanded his explanation slightly to create this guide an Arduino update mechanism within the resin.io ecosystem. The basic workflows is this:
Interfacing Arduino with Raspberry Pi. Raspberry Pi is great tool for embedded engineers but it lacks ADC.
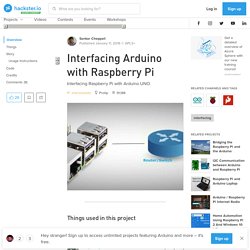
One more draw back is all its IO’s are 3.3V level. On the other side Arduino is good at sensing the physical world using sensors. To get benefits of both the systems one may want to interface them. We can divide this interfacing problem into two steps. There are many interface options available in both boards like UART, IIC and SPI. Adding Bluetooth to Your Arduino (+Light Sensor) We are a group of hackers working on a project that allows you to communicate with your Arduino project using an Adafruit nRF8001 Bluetooth module.

For another version of this guide, check out our blog at Step 1: Introduction Arduino is a cool platform because you can easily interact with your projects from your computer. But in 2015, adding the ability to control your project from your smartphone is necessary to creating a viable product. With wireless capability, the variety of projects you can do increases exponentially.
Step 2: THE BLUETOOTH BOARD We will be using the Adafruit nRF8001 breakout board, though there are several great bluetooth breakout boards and shields on the market. Once you have purchased your bluetooth board, you need to solder the included header pins into the holes on the breakout board. Of course this picture doesn't include the breadboard. Step 3: SPI, REQ, RDY, and RST Pins (Optional) CSEduino. Arduino TV out cable. Arduino boards are pretty useful, but lack an output screen.
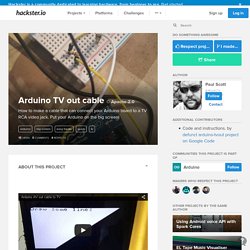
This projectlet allows you to write sketches that will output onto a TV screen via an AV Video cable. This is very much a beginner project that just about anyone can do! First off, you need to add the resistors inline to some hookup wire, according to this diagram Your RCA cable will have 2 wires in it, a ground wire and a vid wire. Generally the vid wire is sheathed in plastic and the ground wire is not.
Solder the 2 resistors to 2 pieces of hookup wire an then solder the ends of the resistors to a single hookup wire. Solder the unsheathed ground wire to another piece of hookup wire too. I used heatshrink tubing to make sure that everything was electrically insulated and to provide a little more strength in the solder joints. How to modify analog output range of Arduino Due. Getting Started With Arduino. Background If you’re reading this article means you want to do some crazy thing with some embedded device.
Before buying any device like Pi or Arduino first make sure that your idea for your project is clear. Once you know what you want build, like building printer or some crazy robot or crazy car then start think about your hardware, device and development language etc. As you might have noticed reading my recent blogs, I became pretty enthusiastic about the $4,- ESP8266 Wifi module which includes a programmable MCU allowing you to create stand-alone wireless awesomeness.

The only problem was, programming this beauty was a bit odd. That all changed this weekend! Some geniuses of the ESP8266 community managed to throw together a version of the Arduino Development Environment which natively supports the ESP8266. This allows you to use (most) of your Arduino code and upload it to your ESP8266 with the click of a button! Most of the common used features are supported right now. If you’ve got some ESP8266’s laying around, check out the ESP8266 Arduino environment on GitHub. May the wireless force be with you! 6ESP8266, arduino, development. Raspberry Pi Python Adventures: Framboise a la mode arduino.
C'est un jeu d'enfant Vous aimez le petit support en lego? J'ai trouvé quelques pièces, pas assez pour faire un boitier, mais assez pour faire un support. Mais, bon, mon Raspberry Pi s'ennuyait tout seul, il lui fallait donc un copain. Reference. Reference Language (étendue) | Librairies | Comparaison? Voir la référence étendue pour davantage de fonctions avancées du langage Arduino et la page des librairies pour interfaçage avec des types de matériel particuliers (afficheur LCD par exemple). Les programmes Arduino peuvent être divisés en trois partie principales: la structure, les valeurs (variables et constantes) et les fonctions. Arduino. Arduino - Exemple d'application permettant de faire clignoter une Led toutes les secondes. Arduino, et son synonyme Genuino[2], est une marque qui couvre des cartes électroniques matériellement libres sur lesquelles se trouve un microcontrôleur (d'architecture Atmel AVR comme l'Atmega328p, et d'architecture ARM comme le Cortex-M3 pour l'Arduino Due).
Les schémas de ces cartes électroniques sont publiés en licence libre. Cependant, certaines composantes, comme le microcontrôleur par exemple, ne sont pas sous licence libre. Le microcontrôleur peut être programmé pour analyser et produire des signaux électriques, de manière à effectuer des tâches très diverses comme la domotique (le contrôle des appareils domestiques — éclairage, chauffage…), le pilotage d'un robot, de l'informatique embarquée, etc. C'est une plateforme basée sur une interface entrée/sortie simple.