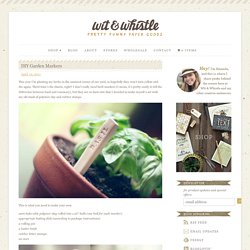

DIY Garden Markers « Wit & Whistle. This year I’m planting my herbs in the sunniest corner of our yard, so hopefully they won’t turn yellow and die again.

Third time’s the charm, right? I don’t really need herb markers (I mean, it’s pretty easily to tell the difference between basil and rosemary), but they are so darn cute that I decided to make myself a set with my old stash of polymer clay and rubber stamps. This is what you need to make your own: oven bake-able polymer clay rolled into 1.25″ balls (one ball for each marker) appropriate baking dish (according to package instructions) a rolling pin a butter knife rubber letter stamps an oven Roll each clay ball into a coil about 5.5″ long.
Use the dull side of your knife to trim one end into a point (the dull side won’t leave behind serrated marks), and shape the edges of each marker with the flat side of your knife. Stamp your garden markers, and bake them according to the clay package instructions. Martha Stewart Crafts. Magical Mason Jars. Portland has finally gotten a small taste or two of Spring this year, and with that I have my renewed love of gardening and putting everything into a mason jar.
They aren't just for preserves to me, once Spring and Summer hit, I want all of my drinks, gifts, desserts(spoiler alert for Friday Food Craft!) And more to be packed in a mason jar. As you can see, I like to doll them up on occasion and using scrapbook paper on the lid inserts is a great easy way to start your own love for mason jar decorating. I also like to make sticker labels, use a ribbon tie, etc. This is one you can really personalize and go nuts with, and the containers are reusable so you and your friends can pass them around forever if you want!
For the lids you see here, all I did was trace around the circle insert for my lids, cut out the circle inside the lines (you don't want it to end up bigger than the insert). Under The Table and Dreaming: Lemon Sugar Hand Scrub {for Mom} HOT CHOCOLATE ON A STICK recipe.
If you’re new here, welcome. I’m AmberLee, and since writing this post, I’ve opened up a little chocolate shop. I’d love to have you stop by, don’t forget to send me a hot chocolate flavor suggestion. Or say hello on facebook. I’d like that too. NOTE: If you blog this recipe, I’ll be thrilled and flattered. Oh how I love when the weather turns cold enough for hot chocolate. This idea is something I’ve been wanting to try for a couple winters now. Me in Venezuela, I’m the pudgy one in booties Enough of my life story, and on to a recipe for real, amazing hot chocolate. I’m glad I finally took the time to puzzle this through and do a little taste testing, because the recipe turned out to be so simple, and the results so delightful. First things first: what chocolate to buy (see a whole post dedicated to this here) The trick to making the best hot chocolate on a stick is using good, serious chocolate that melts easily. Barry Callebaut, Dagoba, Michel Cluizel, El Rey, Valrhona, Guittard.
Paper Gift Topper - The Crafts Dept. DIY Tiered Cupcake Stand Tutorial. If you’re new here, welcome!

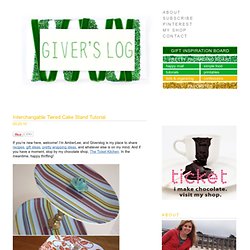
I’m AmberLee, and Giverslog is my place to share recipes, gift ideas, pretty wrapping ideas, and whatever else is on my mind. And if you have a moment, stop by my chocolate shop, The Ticket Kitchen. In the meantime, happy thrifting! UPDATE: Find a simple trick I discovered to make a single-layer cake stand out of any candlestick right here. At long last, here is the much-requested thrifted cake stand tutorial. Crafting MacGyver: Circular Logic - StumbleUpon. Tutorials. How to make gift bags from newspaper.
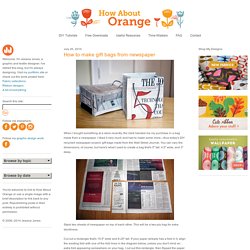
When I bought something at a store recently, the clerk handed me my purchase in a bag made from a newspaper.

I liked it very much and had to make some more—thus today's DIY recycled newspaper project: gift bags made from the Wall Street Journal. You can vary the dimensions, of course, but here's what I used to create a bag that's 5" tall, 4.5" wide, and 3" deep. Stack two sheets of newspaper on top of each other. This will be a two-ply bag for extra sturdiness. Cut out a rectangle that's 15.5" wide and 8.25" tall. Fold a flap 1.25" down from the top. Cut two pieces of cardstock or chipboard to 4.25" x 1", then glue them on the widest two panels just under the top fold. Put glue on the outside of the 0.5" tab and bring the left-most panel over to form the body of the bag, aligning the cut edge of the panel with the folded edge of the flap. Upend the bag so the 2" flap is now up. Put glue on both flaps and fold them inward to form the bottom of the bag. 36 Do It Yourself Gift Box Tutorials For Your Christmas Presents & ...