
Mooltipass Offline Password Keeper. SparkFun CryptoShield - DEV-13183. Tweeq Miniature Arduino Boards And Modules. Developers, hobbyists and makers that enjoy building projects using the Arduino programming platform may be interested in a new micro sized Arduino boards system called tweeq that has launched over on the Kickstarter crowdfunding website this week. tweeq are powerful open source micro-sized Arduino boards providing a wide range of tiny add-ons to help build and expand your Arduino projects.

Watch the video after the jump to learn more about the tweet project and see it in action. The tweeq Arduino Boards project are currently over on the Kickstarter crowd funding website looking to raise enough pledges to make the jump from concept to production. “Introducing tweeq cores. They might look tiny in the palm of your hands, but these little fellas boast a 32-bit micro-controller with loads of memory (up to 256KB!) All stamp modules are cascade-able thanks to the I2C bus line. Source: Kickstarter Filed Under: DIY Projects, Hardware, Top News. ESP8266. Note: This page contains information on using an ESP8266 module with an Espruino board.
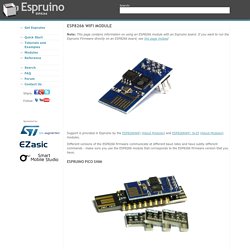
If you want to run the Espruino Firmware directly on an ESP8266 board, see this page instead Support is provided in Espruino by the ESP8266WiFi (About Modules) and ESP8266WiFi_0v25 (About Modules) modules. Different versions of the ESP8266 firmware communicate at different baud rates and have subtly different commands - make sure you use the ESP8266 module that corresponds to the ESP8266 firmware version that you have. Arduino/doc/ota_updates at master · esp8266/Arduino. Arduino/readme.md at master · esp8266/Arduino.
Arduino Ep.16 - Installation du module Wifi ESP8266. How to Clone Raspberry Pi SD Cards Using the Command Line in OS X. The Raspberry Pi runs from an operating system stored on a Secure Digital (SD) card and many different operating systems may be employed.
Storage is relatively inexpensive, can be created (flashed), recreated, written to and overwritten with ease. On the one hand, this is an advantage of the Pi. On the other, the experimental nature of the Pi means more time flashing SD cards. This tutorial shows you how to use a Mac to clone any Raspberry Pi SD card which is particularly useful when you have your OS set up just as you want it. The Raspberry Pi is somewhat different to the computing, to which most of us have been accustomed, of the last two decades. With almost two and a half million units sold–in little over a year since its launch–and with its focus on getting kids (adults?) Being able to experiment, play and break things is all part of the fun. Cloning is the process of making an exact copy. Open Terminal and enter the following command to locate your SD Card: Freematics – OBD-II Adapter for Arduino. This product works as a vehicle OBD-II data bridge for Arduino (literally all embedded platforms) with open-source Arduino library provided.
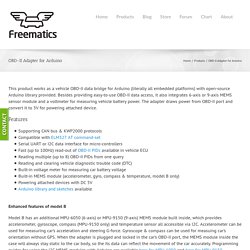
Besides providing easy-to-use OBD-II data access, it also integrates 6-axis or 9-axis MEMS sensor module and a voltmeter for measuring vehicle battery power. The adapter draws power from OBD-II port and convert it to 5V for powering attached device. Features Supporting CAN bus & KWP2000 protocolsCompatible with ELM327 AT command-setSerial UART or I2C data interface for micro-controllersFast (up to 100Hz) read-out of OBD-II PIDs available in vehicle ECUReading multiple (up to 8) OBD-II PIDs from one queryReading and clearing vehicle diagnostic trouble code (DTC)Built-in voltage meter for measuring car battery voltageBuilt-in MEMS module (accelerometer, gyro, compass & temperature, model B only)Powering attached devices with DC 5VArduino library and sketches available Enhanced features of model B.
PowerBoost 500 Charger - Rechargeable 5V Lipo USB Boost @ 500mA+ ID: 1944 - $14.95. PowerBoost 500C is the perfect power supply for your portable project!
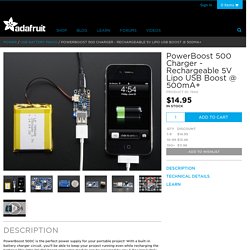
With a built-in battery charger circuit, you'll be able to keep your project running even while recharging the battery! This little DC/DC boost converter module can be powered by any 3.7V LiIon/LiPoly battery, and convert the battery output to 5.2V DC for running your 5V projects. If you need a 1A battery charger, smart load-sharing, and 1A iOS resistors, check out the Powerboost 1000C Like our popular 5V 1A USB wall adapter, we tweaked the output to be 5.2V instead of a straight-up 5.0V so that there's a little bit of 'headroom' for long cables, high draw, the addition of a diode on the output if you wish, etc.
How to Build a Portable Hacking Station with a Raspberry Pi and Kali Linux. My Slim 2AA Battery Node. Board releases(other colors might be selected when ordering) Version 2.0 (black) [order] Now designed in KiCad.
"Final release". I'm not developing it further atm, but I know others have some projects going.Version 1.4 (red) My latest version in Eagle. Known issues are wrong references due to panelization and broken circuit diagram links.Version 1.2 (blue) Some less convienient placed components and the panelized verision has a faulty via.Version 1.0 (green) The one described below in this first post. Working but not panelized and lacks a few features. Share stats and info The panelized versions 2.0, 1.4 and 1.2 have until today (2016-04-23) been shared 90, 13 resp 2 times at boardhouse. WoT with Arduino for Beginners: Part 3 - Connecting to the Internet via WiFi. Download WoT-Tutorial-Part3.zip - 11.5 MB In this multi-part tutorial we show how to develop Arduino-based apps for the Web of Things (WoT).
This third part shows how to set up a connection between an Arduino and the Internet via a WiFi network and use HTTP(S) to send data to a free cloud service like ThingSpeak. In the following parts of this tutorial, which will appear every 1-3 weeks, we discuss how to control actuators and connect them all together in a Web of Things (WoT) app. Using standard Web technologies, such as HTTP and Web Sockets, we can then access the data or provide commands to the WoT nodes. As a newbie, it is helpful if you already have some familiarity with C/C++ programming and Web technologies, such as HTML and JavaScript. LYT8226: an Arduino LED Bulb based on ESP8266 WiFi. Working with the ESP8266 is always a great experience, it becomes just a matter of getting the proper I/O and then in few minutes your module is running.
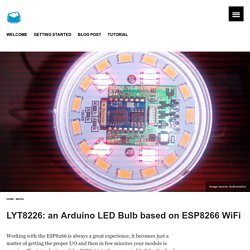
The introduction of the ESP8266 in the supported SoC for Souliss has open the world of smart devices to the DIYers and the very competitive price of this IC will spread it into consumer products. In the last few days we have started working with Authometion to support the new LYT8266, a variant of their RGBW LED Bulb that has an ESP8266 inside, so that you should program your sketches directly into the lamp (this is in contrast with the approach used with LYT88). Thanks to the Arduino cores for ESP8266 you can program this bulb directly from the Arduino IDE using OTA (Over the Air) programming, running Souliss you have direct access via SoulissApp or openHAB. LOAD YOUR SKETCH OverTheAir (OTA) Loading a new sketch has two option, using the cable or the air.
Make: DIY Projects and Ideas for Makers. Liquid Flow Meter - Plastic 1/2" NPT Threaded. Measure liquid/water flow for your solar, computer cooling, or gardening project using this handy basic flow meter.
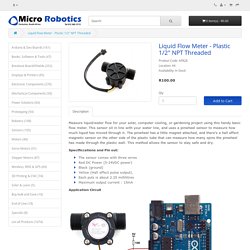
This sensor sit in line with your water line, and uses a pinwheel sensor to measure how much liquid has moved through it. The pinwheel has a little magnet attached, and there's a hall effect magnetic sensor on the other side of the plastic tube that can measure how many spins the pinwheel has made through the plastic wall. This method allows the sensor to stay safe and dry. Specificcations and Pin out: Using A Flow Sensor With Arduino. Using the Arduino Pro Mini 3.3V. Favorited Favorite 3 Introduction The original, true-blue Arduino is open-source hardware, which means anyone is free to download the design files and spin their own version of the popular development board.
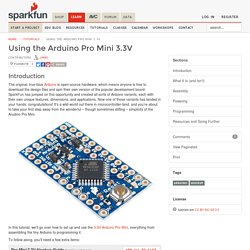
SparkFun has jumped on this opportunity and created all sorts of Arduino variants, each with their own unique features, dimensions, and applications. Now one of those variants has landed in your hands; congratulations! It’s a wild world out there in microcontroller-land, and you’re about to take your first step away from the wonderful – though sometimes stifling – simplicity of the Arudino Pro Mini.
In this tutorial, we’ll go over how to set up and use the 3.3V Arduino Pro Mini, everything from assembling the tiny Arduino to programming it. To follow along, you’ll need a few extra items: The FTDI Basic will be used to program (and power) the Pro Mini. Assembly of the Pro Mini also requires soldering. Suggested Reading This project tutorial builds on a few more conceptual tutorials. ARDUINO RF power & SWR meter -Use Arduino for Projects.
This sketch will readout RF power and SWR from any SWR bridge (for example ‘monimatch’ type). As this ‘monimatch’ type of bridge is frequency dependant, the meter must be calibrated for every band. Because my primary interest was for VHF/UHF/SHF, I have foreseen positions for 6m, 4m, 2m, 70 cm, 23cm and 13cm bands – but you can use the ARDUINO readout on HF as well. If you intend to build a HF or VHF bridge yourself, there are several designs available on the web : I recommend to take a look at the information here, here , here and there ! The meter will operate in 3 modes: display instantaneous power forward in Watt en dBm, display SWRdisplay PEP power forward (peak holding with decay)display instantaneous power forward in Watt, display SWR, and emit ‘beeps’ corresponding to SWR value: low tone beeps at slow rate for low SWR, high tones at fast rate for high SWR.
Breadboard and Program an ESP-01 Circuit with the Arduino IDE. ESP8266 Microcontroller/Wi-Fi Integrated Circuit A new microcontroller has captured the attention of professional designers and hobbyists alike, and it has the potential to be a force majeur in the internet of things. Arduino Multi Kamera IR Control Library for Nikon, Canon, & more. Library Discription: At the search, how to emulate my Nikon IR remote control, I found following site. bigMike. A first sketch was written fast and with best results. A friend of mine would like use the same easy system to control his Canon. I found the Canon timing and a lot of others at a thread here. Not just Canon, also Minolta, Sony, Olympus and Pentax. Bibliothekenbeschreibung: Auf der Suche im Web nach einer Möglichkeit meine Nikon Fernauslösung zu simulieren, habe ich folgende Seite mit den passenden Informationen gefunden. bigMike.
Adafruit Color Sensors. Your electronics can now see in dazzling color with this lovely color light sensor. We found the best color sensor on the market, the TCS34725, which has RGB and Clear light sensing elements. An IR blocking filter, integrated on-chip and localized to the color sensing photodiodes, minimizes the IR spectral component of the incoming light and allows color measurements to be made accurately. The filter means you'll get much truer color than most sensors, since humans don't see IR. The sensor also has an incredible 3,800,000:1 dynamic range with adjustable integration time and gain so it is suited for use behind darkened glass. We add supporting circuitry as well, such as a 3.3V regulator so you can power the breakout with 3-5VDC safely and level shifting for the I2C pins so they can be used with 3.3V or 5V logic.
Holux GPSlim236 connecting to Arduino. May 23, 2011 I recently replaced my Holux GPSlim236 with a Holux M-1000, so I decided to work out how to connect the 236 to an Arduino. Initially I pulled it apart and found the 7 test points on the left of the board. These turned out to be a serial interface, from top to bottom: Seeed Recipe - RePhone - Traceable Dog Collar. #include <LCheckSIM.h> #include <LGSM.h> Seeed Recipe - RePhone - Traceable Dog Collar. ESP8266 as WiFi Extension — Documentation Ubidots 1.2 documentation. Since the ESP8266 was announced, the maker world has been excited by its small size and cost.
For just $3 dollars a chip, you’ll get WiFi networking, processing and storage capabilities to power any Internet of Things project. Although the module can act as a microcontroller itself, this tutorial uses the ESP8266 as a WiFi extension for an Arduino board. Preparing your Ubidots Account¶ In your Ubidots account, create a Data source called “ESP8266” and then a variable called “My Variable”: Arduino-info - BlueToothCommandUtility. Modify The HC-05 Bluetooth Module Defaults Using AT Commands - TechBitar. Modify The HC-05 Bluetooth Module Defaults Using AT Commands - TechBitar. AltSoftSerial Library, for an extra serial port. AltSoftSerial emulates an additional serial port, allowing you to communicate with another serial device. AltSoftSerial is particularly useful when simultaneous data flows are needed.
More details below. AltSoftSerial is capable of running up to 57600 baud on 16 MHz AVR with up to 9 µs interrupt latency from other libraries. How to use ESP8266 ESP-01 as a SENSOR web client. I’m not going to explain in detail what is ESP8266 because if you have found this post I’m sure you already know it. But just in case, it is an awesome cheap board (less than 4$) with built-in wifi communication (802.11 b/g/n), and SPI, UART.
You can also use its processor to run your code. ESP8266 Developer Zone - ESP8266 Developer Zone. WiFi Module ESP8266 – 1. Getting started with AT commands. ESP8266 is an UART to WiFi module, a really cheap and easy way to connect any small microcontroller platform (for example Arduino) wirelessly to Internet. The ESP8266 is now one of the leading platforms for the Internet of Things. It’s super cheap, and super easy to work with. ESP8266 Community Forum. ESP8266 - NURDspace. "File:" cannot be used as a page name in this wiki. Building the gcc toolchain have a look at the github wiki. Carr3r - ESP8266 with FT232RL USB 2 Serial Adapter.
Hello there ESP8266, you've just got a new fan! Create IRremoteInfo.ino · z3t0/Arduino-IRremote@711ebd7. Backdoor uPWM Hack on Arduino for Infrared signals using UART. In this blog post we follow up on our recent article about generation of infrared PWM from the Photon’s UART where we suggested that it may be possible to achieve something similar with the Arduino.
In our previous attempt the Arduino was only able to generate PWM at 40 kHz and 33 kHz using the same approach. MPU-6050. ESP8266 Serial WIFI Module - ITEAD Wiki. Motor Control over BLE with nRF51822 and TB6612FNG – electronut.in. ESP8266 Arduino Code and Circuit/Schematic for Sending Commands. Modify The HC-05 Bluetooth Module Defaults Using AT Commands - TechBitar. ESP8266 - Flash NodeMCU, write lua script, and control a water heater. Schematic - rx5808-pro - Schematic of rx5808-pro - Deluxe 5.8GHz (rx5808 module) control based on arduino with TV out. Guidelines for Reliable Long Line 1-Wire Networks - Tutorial - Maxim. nRF24L01 Module Demo for Arduino. Wiki. Ultimate 37 in 1 Sensor Modules Kit for Arduino & MCU Education User + Free case. Visuino - Visual Development for Arduino by Mitov Software. Arduino-info - Brick-Temperature-DS18B20. ESP8266 based HomeKit accessories. Pulse Sensor - SEN-11574.
Netflix socks. Arduino tutorials 08092014. Sans titre. Blynk. MFRC522 Library Cheap RC522 rfid Reader Door Unlock Project. Arduino et Xively. Arduino. Arduino-Temperature-Control-Library/Single.pde at master · milesburton/Arduino-Temperature-Control-Library. DS18B20. Blog - PICing up 433MHz Signals for OSS Home Automation - Part 1. Blog - PICing up 433MHz Signals for OSS Home Automation - Part 1. Connecter des dispositifs sans fil à votre Arduino ou Raspberry Pi, Partie 1: Réception en 433Mhz / HackSpark, l'électronique facile !
Alib. Fingerprint Sensor. NRF24L01+ low power door/window sensor. Learn.adafruit. How to Use HC-05 Bluetooth Module With Arduino. ArduinoEthernetShield. Ranging Detector - Measuring Distance with Arduino. Teckel12 / Arduino New Ping. Add the RFID Reader to Your Keypad Entry System. How to Add and Test the LCD Display for Your Arduino Clock Project. Tutorials - Protostack. Arduino For Dummies:Book Information and Code Download. LinkIt ONE, la plateforme IoT de Mediatek. Controlling an LED with Arduino and Wifly Shield.