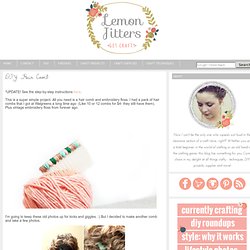

DIY: Hair Comb. *UPDATE!

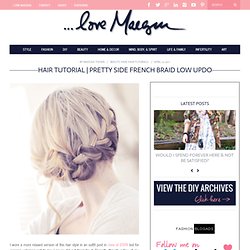
See the step-by-step instructions here. This is a super simple project. All you need is a hair comb and embroidery floss. I had a pack of hair combs that I got at Walgreens a long time ago (Like 10 or 12 combs for $4- they still have them). Plus vintage embroidery floss from forever ago. I'm going to keep these old photos up for kicks and giggles. :) But I decided to make another comb and take a few photos. I wrapped in a V-shape pattern. *Update: Forgot to mention that this layout is from Pugly Pixel. Pretty Side French Braid low Updo Hair Tutorial. I wore a more relaxed version of this hair style in an outfit post in June of 2009 but for reasons unbeknownst to me, I never did a tutorial for it.

Recently though, a few of my lovely readers have asked for it …so here it is. Enjoy! If you can’t see the video go to: Pretty Side French Braid Updo * * * it would be so pretty with flowers pinned in * * * * . . . wearing the braid out . . . . . . and a few days ago, I wore it more casually, with straight hair . . . My bro took these last four the other day …the ones above these four, I took …from the reflection in the mirror, which didn’t turn out as fantastic, for obvious reasons.
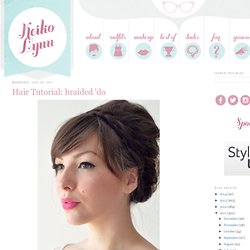
Have Fun! Find all my Hair Tutorials Here. Obsession : Fishtail braids. Hair Tutorial: braided 'do. I know I said I would post this hair tutorial yesterday, but obviously I'm a no good liar because today is not yesterday, it's today.

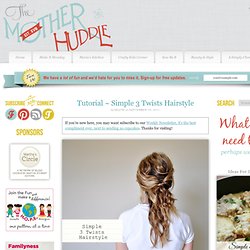
This hairstyle is basically the same thing as milkmaid braids, only modified to up the volume and lessen the big part in the back. Pigtails or regular milkmaid braids make me look like I'm balding, as I have a wicked scar in the back of my head. I would recommend doing this in a mirror and checking the back to make sure it's all neat and tidy as you go, because I did not and it's a little (or a lot) messy in the back. I redid it before heading out and it looked much better, so make sure you use a mirror! For full instructions, keep reading after the jump. What you need: dry shampoo or volumizing product (like the Sachajuan volume powder I often use) bobby pins brush If your hair needs added texture, you can use a dry shampoo. You should now have what is known as the Snookie. Divide the lower section into two parts and braid. Simple 3 Twists Hairstyle.
First, a little back story: I was on Pinterest (I know, big surprise) awhile back and Ms.

Ez from Creature Comforts pinned a fun messy hair-do, and mentioned she needed to learn how to do it. So I piped in that I should show her how. I have been wanting to do a hair tutorial for ages now, so this was the perfect reason to get it done. I was a hairstylist in my first life, and I am not too shy to say I was a pretty good one – I can’t say that about everything, so I will take it where I can ;). So here it is, my first hair tutorial, wahoo! It is best to start with 1-2 (even 3) day old hair that has a little wave to it. Next you will want a little lift through the roots.
So now we have the hair looking a little fuller, and the front styled the way we want it to look in the end. Split your hair into three sections, pulling the sides in front of your shoulders, leaving just one section in the back. Lift the back section up and backcomb at the base. Take the section and twist once like shown.