

DIY elastic empire waisted dress. Hair feathers flying high. Trendy Feather Hair Extensions Cause Rooster Slaughter. Elizabeth Neville, Global Animal Miley Cyrus setting a bad trend.

Photo Credit: Styleite Feather “hair extensions,” are roosting upon manes across the nation. A trend popularized by celebrities such as Miley Cyrus, adding plumage to one’s coiffure is now such a coveted fashion statement that one internet company even sells feather extensions for dogs. But, where do these lovely feathers come from? If you know fly fishing paraphernalia, and thought that these silky bits in people’s’ hair seemed strangely familiar… well, you’re onto something. According to an article on Bloomberg Businessweek, “A package of the most popular fly tying hackle for hair extensions, a black and white striped feather called grizzly saddle, would normally retail anywhere from $40 to $60.
Thousands of beautiful roosters are killed every week due to the increased demand for feather hair extensions. No Better Than Fur: Do You Know Where Your Feather Extensions Come From? EmailShareEmailShare I’ll get this out of the way, first: I was considering getting a feather hair extension a few months back, decided that I’d ruin it somehow and didn’t go through with it.

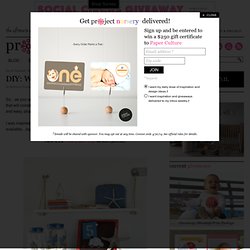
But, I think they’re gorgeous! So exotic and colorful… and a great way to add pizazz to your hair without commitment. We all want that, right? Log in. Project Nursery. So…as you can see this pregger mama has been quite busy with all sorts of DIY projects that will complete the room being shared by kiddo #1 and kiddo #2.
This project was quick and easy, plus it turned out really cute and was theme-appropriate for my lil’ surfer boys. Make-up Magnet Board. We all know with craft blogs that original ideas are often hard to come by, we find ideas we love and make them our own but we didn't come up with the idea ourselves.
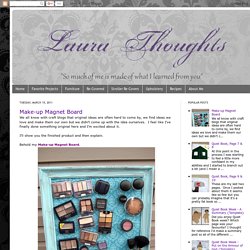
I feel like I've finally done something original here and I'm excited about it. I'll show you the finished product and then explain. Melted Crayon Art. Perhaps I should begin this post by introducing you to my mom, also known as Her Ladyship Craftiness…er, Her Royal Craftiness?

I’m still working on the title. Regardless, she’s the coolest, most creative and talented woman I know. She can make pretty much anything. At least once during high school, I borrowed a friend’s purse, brought it home to Mom, and she whipped one up just like it for me. Yes, I probably abused the power of being Her Ladyship’s daughter, and I no longer steal my friends’ purses, but the point is: my mom is awesome. If you follow Young House Love, Bower Power, Making a House a Home, or Style by Emily Henderson you know how timely her visit was, as today is the big reveal for the Pinterest Challenge. The supplies were pretty simple: canvas, crayons, and hot glue. Return on creativity: paint sample coasters. I've had this map coaster tutorial in my inspiration file for awhile.
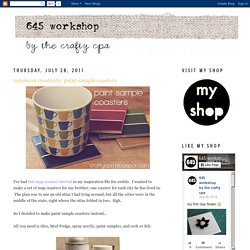
I wanted to make a set of map coasters for my brother; one coaster for each city he has lived in. The plan was to use an old atlas I had lying around, but all the cities were in the middle of the state, right where the atlas folded in two. Sigh. So I decided to make paint sample coasters instead... All you need is tiles, Mod Podge, spray acrylic, paint samples, and cork or felt.
My little apartment. Select a photo effect or try goodies application. The Minimalist - Summer Express - 101 Simple Meals Ready in 10 Minutes or Less. {coffee stencils} A Very Special Tea Time - Beyond Beyond. Trumpet blast – this is genius.

We have had a little thing about tea bag favours over the last few weeks and this is a glorious gem of an idea. All you need to do is make your own mini envelopes and attach them to tea bags and et voila you have a cutiful and perfect wedding favour. This project originally came from Maison Creative, but we think that it has got some serious wedding mileage. So why not treat your gorgeous guests to tea and a lovely note? Inspiration : bird tattoos + DIY temporary tattoos. I've been having a love affair with bird motifs since many years now, so my heart skipped a beat when I saw a flock of birds' tattoo for the first time.
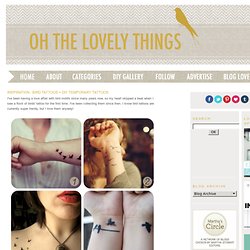
I've been collecting them since then. I know bird tattoos are currently super trendy, but I love them anyway! As far as I'm concerned, I'm not ready for a tattoo (I have a VERY low tolerance to pain), so as an alternative, I opted for temporary transfer tattoos! Yes, just like those we found as inserts in bubble gums when we were kids. You need : 1. 2. 3. 1. 2. 3. Seven Tips on Better Picture-Taking: for your Blog and Etsy Shop. 1.

Use the best quality camera you can afford. Honestly, you don’t have to have a super-expensive camera to get some really great photos for your blog or Etsy shop. Wildfox, Spring 2011 Lookbook. This Blog Linked From Here categories.

Love Boat. This year's fashion is inspired by a marine style, and attracts me a lot since I am a lover of the sea and travel overseas... some pieces of my shop, are inspired by just this style, like my new collection "Bon Voyage", with pendants that recall the life of a sailor, as the anchor, and the whistle... La moda di quest'anno si ispira al look marinaresco, e mi attrae molto visto che sono un'amante del mare e dei viaggi oltreoceano... Connecticut Wedding with Nautical Know How. Lovely and Gracious: My Save the Dates are out... have a look! DIY Love Birds on a Wire Seating Chart for Vintage and Bird ... Our next DIY project was created by Jessica.
Her lovebird seating chart display is totally steal worthy, jaw droppingly adorable. Note the birdy bride with a mini veil and the birdy groom with a top hat on each end of the pole :) What you’ll need: - Tray of home grown wheatgrass - 3 24″ balsa dowels - Balsa wood sign - Gold metallic string - Miniature clothes line clips - Guest’s names printed on paper - A pair of wedding birds from craft store - Black paint for sign Instructions: Step 1: Purchase wheatgrass kit online and follow instructions. Obsession : Fishtail braids. ...love Maegan: Pretty Side French Braid low Updo Hair Tutorial Fashion+Home+Lifestyle Blog.
I wore a more relaxed version of this hair style in an outfit post in June of 2009 but for reasons unbeknownst to me, I never did a tutorial for it. Recently though, a few of my lovely readers have asked for it …so here it is. Enjoy! If you can’t see the video go to: Pretty Side French Braid Updo * * * it would be so pretty with flowers pinned in * * * * . . . wearing the braid out . . . . . . and a few days ago, I wore it more casually, with straight hair . . . My bro took these last four the other day …the ones above these four, I took …from the reflection in the mirror, which didn’t turn out as fantastic, for obvious reasons.
Help. Radio - Listen to Free Internet Radio, Find New Music. Favorites from craftgawker.com. Birds of a Feather… « Hello friends! Hope your weekend was relaxing. Weekend Project: Rustic Coat Hanger. Many of you probably know Graça Paz of the blog aqui pelo campo or her flickr, xtmoveis or her etsy shop, xtmoveis.etsy.com and may have been following her and her family as they build and decorate their new home in the countryside of OPorto, Portugal. And as lovely as all that is, what I love about her is her innovative ideas with furniture, colour, painting her home, decorating et al. It's all so free-flowing and without inhibitions.
Gifts for the gardener who has everything... Gardener's Gift Box Spring means flowers. Where I grew up, spring is loud and obvious. Crocuses push their heads up through crusty snow; daffodils light up dark corners; dead looking trees send out plumes of bright green leaves. Clay Jewelry Dish / Holidays and Seasonal. Tutorial : DIY Friendship Bracelet. Bird and berries beach pebble necklace by birdahoy. DIY Photobooth Wall. Earring storage ideas. The Beauty of Mason Jars. Kitchen Table Scraps. It’s spring cleaning time, everyone! So what better excuse to sort through and organize your spices? Looking for spice storage can be extremely frustrating. Krylon I00810 Glass Frosting Aerosol Spray Paint, 12-Ounce.