
Setting up Apache on Snow Leopard (Easy!) – deployFX. Setting up Apache on Mac OSX 10.6 is a snap. Sure, there’s tools out there like MAMP , but why bother with the download when everything is already setup on your machine? Now to get started: Instead of storing all of my development code in the default public_html or sites folder on my machine, I’d like to store it in my code folder and just serve it from there. To be even cooler I want to setup some custom urls that are mapped to different sites on my local machine. For example I want to display the php site called . Override IP Mapping with the HOSTS file Every time you make a request to a website like , your computer must translate it to an IP address. . # open the hosts file (this file is owned by the super user, so you must open it using sudo) $ cat /etc/hosts ## # Host Database # # localhost is used to configure the loopback interface # when the system is booting. To add an entry for I’ll add a mapping at the bottom of the file $ dscacheutil -flushcache Apache Virtual Hosts That’s it.
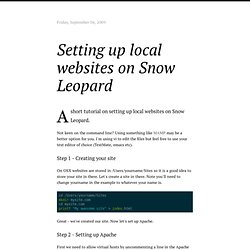
Setting up local websites on Snow Leopard - shapeshed. A short tutorial on setting up local websites on Snow Leopard.

Not keen on the command line? Using something like MAMP may be a better option for you. I'm using vi to edit the files but feel free to use your text editor of choice (TextMate, emacs etc). Step 1 - Creating your site On OSX websites are stored in /Users/yourname/Sites so it is a good idea to store your site in there. Cd /Users/yourname/Sites mkdir mysite.com cd mysite.com printf "My awesome site" > index.html Great - we've created our site. Step 2 - Setting up Apache First we need to allow virtual hosts by uncommenting a line in the Apache config file sudo vi +/'# Virtual hosts' /etc/apache2/httpd.conf Change to Include /private/etc/apache2/extra/httpd-vhosts.conf Save the file and exit Step 3 - Adding the virtual host Now we can add the virtual host.
4 How to Build MySQL Server with CMake. Compiling and Installing MySQL 5 on Mac OS X 10.5 Leopard or Mac OS X 10.6 Snow Leopard. January 24, 2011 Contents Introduction Building MySQL from source allows complete control over the installation configuration as well as giving you a better sense of how to administer the server.

These instructions will work with MySQL 5.1, as well as MySQL 5.0. See this document to build MySQL 5.5. If you are installing the pre-compiled MySQL binary package (DMG) you can skip just about everything in this document. This document assumes that the OS X developer tools (XCode 3.13 - Leopard) or (XCode 3.2.1 - Snow Leopard) are installed, that you are logged in as an administrator and using the BASH shell. These instructions also assume that you are installing MySQL from scratch for the first time. I have tried to make this document as concise and direct to the point as possible. Download the source code and unpack into source directory Download the MySQL source code Create the source code directory and unpack # Some of the commands used in this document require the BASH shell.
. # Exit dscl quit. Setting up Apache on Snow Leopard : Kev Chapman. I’ve upgraded both my Macs to Snow Leopard, and a few things have changed with the built in Apache webserver.

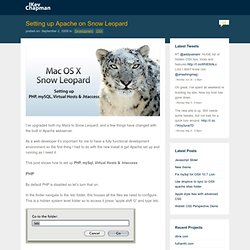
As a web developer it’s important for me to have a fully functional development environment so the first thing I had to do with the new install is get Apache set up and running as I need it. This post shows how to set up PHP, mySql, Virtual Hosts & .htaccess By default PHP is disabled so let’s turn that on. In the finder navigate to the /etc folder, this houses all the files we need to configure. This is a hidden system level folder so to access it press “apple shift G” and type /etc. Find the folder Apache 2 and open httpd.conf This is the main config file for Apache, I use textMate to edit these files but you can use any text editor. Go to line #115 and uncomment (remove the starting #) “LoadModule php5_module” Save the file, you will be asked to enter your password. After every change you make to the Apache or PHP config files you will need to restart the webserver.