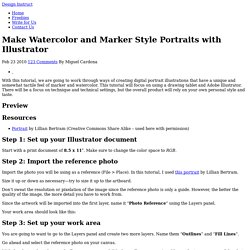

Make Watercolor and Marker Style Portraits with Illustrator. With this tutorial, we are going to work through ways of creating digital portrait illustrations that have a unique and somewhat tactile feel of marker and watercolor.

This tutorial will focus on using a drawing tablet and Adobe Illustrator. There will be a focus on technique and technical settings, but the overall product will rely on your own personal style and taste. Preview Resources Portrait by Lillian Bertram (Creative Commons Share Alike – used here with permission) Step 1: Set up your Illustrator document Start with a print document of 8.5 x 11″. Step 2: Import the reference photo Import the photo you will be using as a reference (File > Place).
Size it up or down as necessary—try to size it up to the artboard. Don’t sweat the resolution or pixelation of the image since the reference photo is only a guide. Since the artwork will be imported into the first layer, name it “Photo Reference” using the Layers panel. A Cow As Chinese New Year Zodiac For 2009 » LoonDesign. Chinese New Year is coming next 2 weeks.

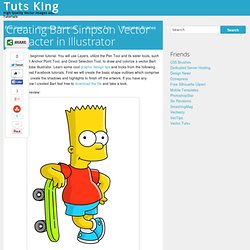
It is Cow year for year 2009 in Chinese zodiac. So, I do a tutorial on how to create a cow. Last year, I created a rat in Photoshop but this year, I am going to use Illustrator. I also include a Chinese New Year Newsletter/e-card for you. Feel free to download, put in your message and send it to your friends! Result Step 1 First of all, we start from skecth. Creating Bart Simpson Vector Character in Illustrator. This is a short beginner tutorial.

You will use Layers, utilize the Pen Tool and its sister tools, such as the Convert Anchor Point Tool, and Direct Selection Tool, to draw and colorize a vector Bart Simpson in Adobe Illustrator. Learn some cool graphic design tips and tricks from the following seven must-read Facebook tutorials. First we will create the basic shape outlines which comprise his body, then create the shadows and highlights to finish off the artwork. If you have any questions of how I created Bart feel free to download the file and take a look. Final Image Preview: Step 1: Start off by creating a new Illustrator Web Document to the size of 370 pixels (width) by 510 pixels (height), which is the approximate size of the Bart Simpson image.
Place the picture of Bart onto your artboard by clicking File->Place then save your file. Mputer Arts - Adding dimension to your characters. Creating a crazy cool logo. I’m a huge fan of typography and logo design, even though I havent worked on too many logo design projects I had the opportunity to express my love on a few, but at the same time, very pleasant ID projects.

One of them was in 2005 for a company called Zagora. When they hired us to create their ID design they said that they wanted something very unique and modern. Besides of that we spent like 4 hours talking about ideas and concepts in order to know exactly what we would have to do. In this post I will show you how we created the logo. I will skip the drawing parts, yes there were tons of drawings before going to the computer, because when they stole my computer and backups in 2006 they took all my photos of the drawings. This logo is pretty much a bunch of circles, I used a circle for the module and deleted some segments in order to create the characters.
Step 1 In Illustrator, using the Ellipse Tool (U) create a circle. Step 2 Step 3 Step 4 Step 5 Step 6 Change the stroke colors. Free Photoshop Tutorials @ PinkZAP.com » Spice up Pie Charts. First draw out a chart with the Pie Chart tool. First you put in the information for your chart, or import it from an excel file: Your chart will look like this at first. (You might have a legend, too.) I prefer colored charts instead of the grayscale default Illustrator makes.
Using the white arrow select a slice and choose a color from your swatches to change it. To make your chart 3d, select it first with the black arrow. Now your chart should look like this. Blog Archive » Tutorial: Transform, Style, Blend. 25 New Illustrator Tutorials That Will Make You A Master Of Vector Art. Just because you can usually get a similar effect in Photoshop doesn’t mean the end result will be as good as using Illustrator (depending on the project).

If you are like me (and I will bet most of you are) you will go ahead and use PS because you know it much better even though the final project will not be as good or as functional as it could be. Well it’s time to buck up and get this learning curve completely out of the way so you make the right choice next time. Below are some sweet Illustrator tuts that will leave you in vector heaven once your done. Adobe Photoshop is one of the most popular photo editing programs that has ever been created. However, you have to use the right tools for the right jobs. This tutorial teaches you how to make a portrait of William Shakespeare in Illustrator using text. Article Link Advertisement A very interesting tutorial, from Design Instruct, that takes you behind the scenes and shows you the illustration process from start to finish. Article Link.