

The 30 Minute $6 Dress Tutorial. Guest post by Rachael at Talk 2 the Trees.
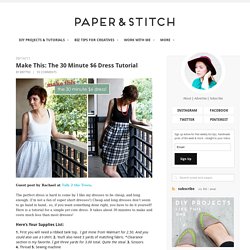
The perfect dress is hard to come by. I like my dresses to be cheap, and long enough. (I’m not a fan of super short dresses!) Cheap and long dresses don’t seem to go hand in hand.. so, if you want something done right, you have to do it yourself! Here is a tutorial for a simple yet cute dress. DIY 52 Things I Love About You.
Posted July 1, 2011 | 64 Comments Happy Friday, lovelies! Flip-Flop Refashion: Part 1 (Braided Straps) Summer is great.
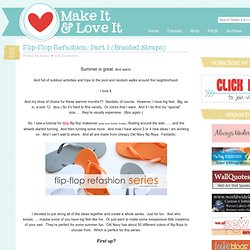
And warm. And full of outdoor activities and trips to the pool and random walks around the neighborhood. I love it. And my shoe of choice for these warmer months?? Sandals, of course. So, I saw a tutorial for this flip-flop makeover (great work Mother Huddle), floating around the web…….and the wheels started turning. I decided to just string all of the ideas together and create a whole series. First up? A quick and easy flip flop…….made with some braided knit fabric scraps, using the 5 strand braiding technique, shown here.
These soft braided straps streeeeeetch the perfect amount, right around the back of my heel……..keeping the flip-flop snug and in place. I added little loops of fabric to the sides, to keep the braided straps in place. These little sandals are so light, they’re soft and stretchy, and my favorite part……..they’re inexpensive. Wooden Piggy Bank, Photo, Glass. Holder for Charging Cell Phone (made from lotion bottle) My husband and I both have cell phones.

And both of us have phone chargers. And that means lots of obnoxious cords. You never know when one of us may be moving phone cords around, to give our phones an extra charge while we’re chatting away……… or trying to charge our phones up before running errands or something. Needless to say, those phone cords seem to be everywhere…..and are generally in the way and hanging all over the floor. ORGANIZATION STATION: HEADBAND HOLDER. Photos and post by Kristin Ess Tis the season for spring cleaning!
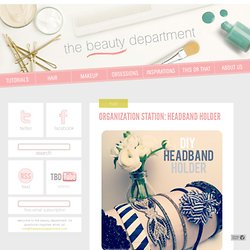
Last week we did a DIY on hair jars for the bathroom. This week it’s time to organize those pretty little headbands! This is the easiest project ever and hopefully one that will be as beneficial to you as it was to me and my messy drawers of headbands. Here’s 8 easy steps to making one of these helpful holders… Get a large roll of paper towels. Last but not least… Tags: accessory, bathroom, DIY, do it yourself, hair, head band, headband, headband holder, holder, how to, kristin, kristin ess, spring cleaning, the beauty department, thebeautydepartment.com Related posts: ORGANIZATION STATION: GET YOUR HAIR STUFF IN CHIC ORDER. Photos & post by Kristin Ess If you’re a girl on the go, you’re probably familiar with the magical mystical “bathroom tornado”.
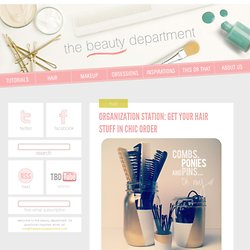
It comes through scattering everything everywhere, leaving no bobbypin unturned. Anthro-Inspired Mirror. You all know we love a good Anthropologie knockoff around here – so a couple of days ago when I was browsing online I came across this mirror.
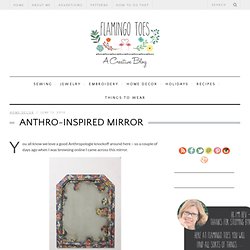
Oh I definitely need that. Hold the presses – did that say $498??? Huh. We can do better than that. :) So after scouring the thrift shops, cutting myself on mirror glass, and overcoming an unreasonable fear of Mod Podge, here is my version! (Bear with me here – taking a picture of a mirror is a bit tricky. Ready for the tutorial? You’ll need: A MirrorEasy Off Oven CleanerFabric (enough to cover the frame and the back of the mirror)Mod PodgeA Staple Gun or other framing tool I went searching for a method to removing silvering and came across a great tutorial at Mitzi’s Collectibles. I started with a frame that I found at the thrift store. Obviously not clean. Diy {magnets} I was cleaning out my craft space (or as my family jokingly calls it, "the factory") and I came across a few miscellaneous objects that I thought would be good to use for a project.
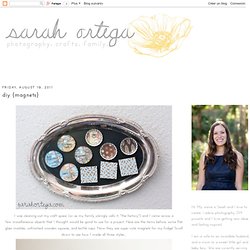
Here are the items before: some flat glass marbles, unfinished wooden squares, and bottle caps. Now they are super cute magnets for my fridge! Scroll down to see how I made all three styles... Glass marble magnet -Trace the marble onto the paper that you want to use. I used pages from an old US road map but you could use whatever you like. -Cut out the shape -Apply a thin layer of Mod Podge to the front of the paper and smooth it onto the glass marble. Glass Etching. Have you ever done any glass etching?
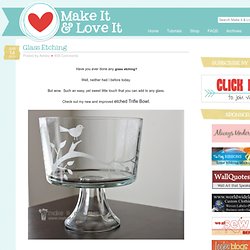
Well, neither had I before today. But wow. Such an easy, yet sweet little touch that you can add to any glass. Check out my new and improved etched Trifle Bowl. The perfect bowl for desserts of all kinds…..and even a great place for fresh fruit on the counter.