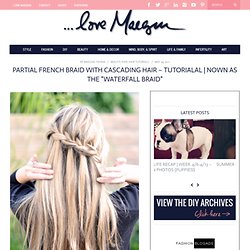

...love Maegan: * Partial French Braid & Cascading Hair Tutorial *also known as the "Waterfall Braid" Fashion+Home+Lifestyle. I’m not the originator of this hair style but I’ve gotten so many requests for it, I thought I’d give it a go for you.

I don’t know what it’s called either so I haven’t researched it and/or found any other tutorials for it …thus, this is my version of it, and I’ve dubbed it the Partial French Braid w/ Cascading Hair. The photos I’ve seen online show the braid a little more straight across the back of the head and mine sort of braids at an angle, similar to my side/low french braid up-do.
I’m sure this is 100% easier to do on someone else’s hair than your own but it goes pretty quickly once you get the hang of it …I mean, it’s my shortest hair video tutorial to date. That’s gotta mean something, right Enjoy. Note: Apologies in advance for the yelling of “NOOOO” towards the end, where I momentarily fear I’m going to lose my entire braid and have to start over. Have Fun! Find all my Hair Tutorials Here. Most favorited all-time. Re-purposing: Tshirts into 5-strand-braided-headbands. I was walking through Target a few weeks ago and noticed this little knit fabric headband that was not just braided together…….but woven.

I decided they were charging way too much for something that could be made with t-shirt scraps. And that means free. So there you have it. A nice and easy project to give my bad-hair-day head some love. (Or you may need one for working out. I kinda love it on my little girl . She always has little hair fly-aways that get into her face…….and this helps with that problem. It even works great with her hair down…..and keeps that hair tucked behind her ears. And yep, good for me too. Thanks little t-shirt scraps. Want to make your own? First, find some old t-shirts. Then, cut your fabric into long strips. Next, stack your 5 strips on top of each other and sew together at one end. Now, pull on each strip of fabric so that they kind of curl on the edges. But let me explain a little better. First, you’ll work on the left side. And that’s it. This post is sponsored by:
Everyday Mom Ideas: Scrap Paper Tree Centerpiece Tutorial (Featured guest blogger) Hi there! I'm Sharon from Two Girls Being Crafty, and I am so delighted to be today's guest blogger on Everyday Mom Ideas! Thank you so much, Julia, for having us. My co-blogger, Tristin, and I create fun and inexpensive crafts that anyone could do.