
37 brilliant Blender tutorials. Creating 3D art can be expensive.
But thanks to creatives developing free open source software, like Blender, everyone can get involved. In this article, we've rounded up the best step-by-step Blender tutorials from around the web. Improve your modelling, animating, rendering and compositing skills as you follow the projects and pick up tips from leading 3D designers in these video and text tutorials. Blender Crash Course. Let’s install Blender and Sensei Format.
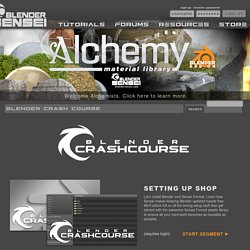
Learn how Sensei makes keeping Blender updated hassle free. We’ll attack full on all the boring setup stuff then get started with the awesome Sensei Format assets library to ensure all your hard work becomes as reusable as possible. (requires login)START SEGMENT ► Navigation means “moving around” and transformation means “moving, rotating and scaling” objects. We’ll learn how to do both efficiently. Cycles Blender Tutorial.
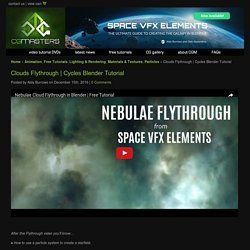
Clouds Flythrough | Cycles Blender Tutorial Posted by Aidy Burrows on December 15th, 2016 | 0 Comments After this Flythrough video you’ll know… ● How to use a particle system to create a starfield.
Ruelle Japonaise - Illustration avec Blender et Cycles. La scène est maintenant terminée.
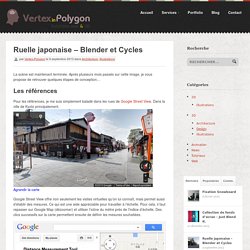
Après plusieurs mois passés sur cette image, je vous propose de retrouver quelques étapes de conception… Comment faire du MONTAGE VIDÉO avec BLENDER. 14 façons de mixer textures et shaders. 7 Ways to Get Rid of Fireflies In a Blender Render. Fireflies are those tiny burnt out pixels, that ruin an otherwise great Blender render.
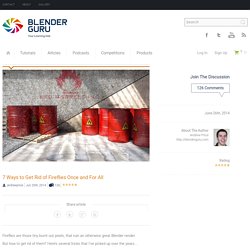
But how to get rid of them? Here’s several tricks that I’ve picked up over the years… 1. Free Tutorials. Trainz/Creating Normal Maps with Blender. Creating Normal Maps with Blender 2.5 for Trainz Assets[edit] Acknowledgments[edit] This tutorial was inspired by a number of discussions on the Trainz Content Creation Forum and the author's interest in creating normal maps for use in Trainz.
Game design and content creation tutorials for Blender, 3DS Max and more. Tutorials, training and educational resources for game making and development.
Who needs school for game design when it can be done online!. Learn content creation, game art production, models, texturing, level design and more using Blender 3D. Using the Blender tutorials and training available below, learn how to use Blender 3D for content creation, game making, design and development. Volumetric Lighting in Blender (VIDEO TUTORIAL) Want to impress the viewers with volume lights?

Watch this tutorial to discover how to create godrays, light shafts, thick fog and other stuff related to volumetric lighting. 8 minutes 34 seconds and you’ll know the tools, I guarantee. Tone Mapping Your HDRI the Wrong Way (You’ll Love It) (The waves whisper Alisssss, Alissssss… Who the f#ck is Alice?)

When it comes to defining high dynamic range imaging, Christian Block said it best. “High dynamic range imaging is a method to digitally capture, store, and edit the full luminosity range of a scene. “ Some don’t like the Velvet Elvis over-the-top look of the tone mapped HDR images. Some don’t like the photos failing to capture the full luminosity range. But everybody agrees on one thing. Textures (beta) - Blender Cloud. Creating The Goat Sorcerer in Blender - Tutorials, Blender. Pierrick Picaut presents you a huge tutorial on How To Create The Goat Sorcerer in Blender.
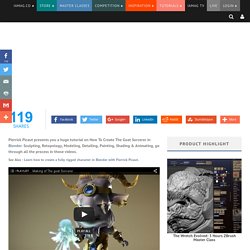
Sculpting, Retopology, Modeling, Detailing, Painting, Shading & Animating, go through all the process in those videos. See Also : Learn how to create a fully rigged character in Blender with Pierrick Picaut. Link to the Blender File. Sketchfab 3D Realtime preview of the final model: How to Make Snow. You can ski down it, make snow angles or throw it at someone’s face. Snow just makes everything awesome.
Maybe it’s due to growing up in QLD Australia (where it never snows), but I’ve been fascinated with snow all my life. And every Christmas I’m slightly envious of all the snow pictures that appear in my newsfeed from folks in Canada or the US :P. Create Rocky Environments in Blender Fast. Using a 3d scanned rock model and a realistic texture pack, Soady creates a realistic field full of rocks. This is my very first Blender tutorial. This is a simple and quick process but very effective. You can use many different objects as a group and work on the materials a bit more.
The purpose of this tutorial was not creating a beautiful render but showing my workflow for environment creation. I hope you create great things! How to Create Epic Steampunk Machine in Blender - Blender, Tutorials. Learn How to Create Epic Steampunk Machine in Blender, in this free video tutorial by Gleb Alexandrov. Love Tutorials, don’t miss our premium tutorials Section. FORMATION BLENDER. Prochaines formations Blender initiation à: >Video Design PARIS Du 30 novembre au 04 décembre 2015.
Blender Grease pencil :Animation with a moustache. Posted on August 6, 2011 7 CommentsFiled under Animation, Education Even if you are a regular Maya, 3dsmax or XSI user, I think you should check out the following videos as I am sure you will be able to find a use for Blender pretty fancy tools. The first one I want to demonstrate today is the Grease Pencil, a nice feature that allows you to draw on the 3d viewport and write notes but also make quick thumbnails animation!
Sorry for the low framerate, I realised it too late but will record an other animation example very soon. Blender 2.5 Grease Pencil Tutorial. Blender Sushi: Grease Scatter Objects, The Alternative Way. Archive « CGCookie. Workflow Zbrush – Blender – XNormal. Partons du principe que vous avez votre sculpt de prêt. Cela peut être un dynamesh ou un mesh « classique ».
La retopologie suivante est créée dans le but d’être utilisée directement dans un moteur temps réel. Elle ne sera pas subdivisée et difère donc d’une retopologie qui a pour but, par exemple, de recréer un maillage « propre » afin d’être subdivisée et accueillir la projection d’un sculpt (par exemple un dynamesh). 1 – Création de la topologie du modèle Low Poly Pour démarrer la topologie : Dans les subtools, cliquez sur « Append » et ajoutez la ZSphere. Tuts+ Create a Facial Animation Setup in Blender - Part 1. In this two part tutorial, you will learn how to create a basic facial animation setup for a character in Blender. The first part covers the introduction of Shape Keys and how to create basic expressions commonly used for animation. In the second part, we'll look at how to add drivers using bones and controllers. Download the Project Files for Part 1.
There are six expressions for six basic emotions - anger, happy, surprise, sad, fear and disgust. To draw or illustrate these emotions, we use the eyebrows, eyelids, and mouth. Shape keys are used where we need to animate the shape of an object by animating the vertices of the mesh, which are difficult to deform with bones. Make sure to apply the Mirror modifier before creating shape keys. While editing the mesh, we must also take care that the eyeballs are not edited, if it's not a requirement.
Some shape keys apply to the whole face. In Edit mode, press B to enable drag select and select all the left side vertices. Créer un visage de personnage cartoon avec Blender. Créer un personnage complet sous Blender. Particle Hair with MakeHuman and Blender - A Personal Journey In Learning. A recent post on Google+ inspired me to dash off this quick post. I’ll create a better tutorial on this later. Meet Wendy. She looks kinda silly with no hair. Let’s add some for her: First thing that needs to be done is to select the vertices we want to grow hair.
In edit mode you are going to see something like below left. Zoom into the facial/skull area so you can see what you are doing. Once you are here you need to go to the properties side bar and add a new vertex group. This is probably one of the most important steps. You’ll need to add a material for the hair.
Simple Aligner plus included Scripts. Blender Baroque (organic modeling and retopology). So, basically there are 4 ways of creating optimised complex organic objects, that can be combined during modelling process:= From Flat scratch. A polygonal tracery that usually is extruded. = From 3D mesh blank. it can be a box or skin modifier's result - with following topology refining. = From Sculpt/meta blank. With following retopology. = From Stripes.On my mind, first three were not flexible enough for describing all that complex surfaces of this model, even sculpting+retopology, that I were started from, tooks 1/3 of time for sculpting and 2/3 for retopo.
Flat scratch and 3D mesh blank gives too dense wire in cases if you need to refine some fragments for increasing detailing. So I've decided to continue this mirror table forcing forth way. Stripe (single polygonal quad loop) is the simpliest and most easy-controlled mesh structure. 51 Blender Shortcuts you need to know - Thibh. Blender has always been for me the best software in terms of speed and ease of use and that’s mostly true thanks to its incredible number of shortcuts. But that’s also something new user find quite difficult to learn. Interface - Is there a way to save composite node presets? Yes, they are called node groups. Compendium: Blender Modifiers Explained. Modélisation low-poly pour un rendu high-poly - News - Joël Bernis. L'utilisation massive du displace et des groupes d'objets Pourquoi s'embêter dans plein de détails quand on peut s'en affranchir ? Pourquoi modéliser les déformations d'objets quand on peut le faire faire par l'ordinateur ?
Débutez dans la 3D avec Blender. Depuis quelques années maintenant, la 3D a envahi notre quotidien : au cinéma (effets spéciaux, cinéma d'animation) à la télévision (publicité..), dans les jeux vidéo... elle est partout ! Mais alors, comment on fait de la 3D ?
Est-ce difficile, réservé aux professionnels ? BlenderKOPILOT. Tutoriels. Niveau : Introduction. Dahwar2713_Tutoriel Blender 2.5 Français. Etude-Blender. Etude-Blender de Fury Jin. Welcome to YouTube! The location filter shows you popular videos from the selected country or region on lists like Most Viewed and in search results.To change your location filter, please use the links in the footer at the bottom of the page. Le guide de blender - Tutoriels3d.ch. Tutorials - Free Source of 3D Tutorials on 3DTotal.com Ltd.
Blender-4d. Rassemblement de tuto sur Blender. Blender tutorial (FR) -modélisation de l'intérieur de maison - By Profiz. Blender Profiz. PouletFritesMayo boucher. ToutApprendre. Blender 2.69 - Animating a Curve and Depth of Field Focus. Great Blender tutorials and training. Magnetisme. Leather Couch.