
Simple 3 Twists Hairstyle. First, a little back story: I was on Pinterest (I know, big surprise) awhile back and Ms.
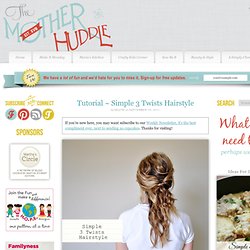
Ez from Creature Comforts pinned a fun messy hair-do, and mentioned she needed to learn how to do it. So I piped in that I should show her how. I have been wanting to do a hair tutorial for ages now, so this was the perfect reason to get it done. I was a hairstylist in my first life, and I am not too shy to say I was a pretty good one – I can’t say that about everything, so I will take it where I can ;). So here it is, my first hair tutorial, wahoo! It is best to start with 1-2 (even 3) day old hair that has a little wave to it.
Next you will want a little lift through the roots. So now we have the hair looking a little fuller, and the front styled the way we want it to look in the end. Split your hair into three sections, pulling the sides in front of your shoulders, leaving just one section in the back. Lift the back section up and backcomb at the base. Take the section and twist once like shown. PIN IT UP, GIRL - thebeautydepartment.com. Our email box is literally flooded with requests for updos so here’s a fun one to get us all going!
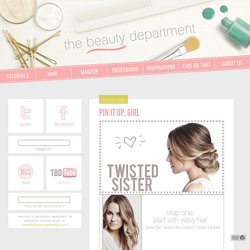
This is always a favorite for attending an event. This updo looks gorgeous on any hair color but particularly amazing with hilighted hair because it gives the hair lots of depth and dimension. For lack of a better word, I love the way it becomes “swirly”. Best thing is; it’s easy to do, gorgeous and keeps your hair out of your way for the night. I made this a printable tutorial, so all of the steps are next to the photos. Tools you’ll need: curling iron (to prep the hair with waves), sectioning clips, teasing comb or brush, clear elastic rubber band, bobby pins, light to medium holding hairspray (to mist over at the end). The Can-Do Updo. Photo 1- You Totally Got This: 4 Easy Braids For Rookies.
Feb 24, 2014 Even if you've landed your dream job and work in the coolest office ever, it's easy to fall into the business-as-usual rut when it comes to your beauty routine.
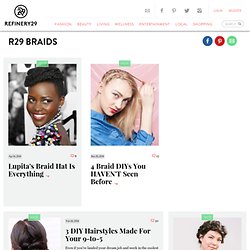
There isn't anything wrong with alternating…read Feb 18, 2014 If we ruled the world, our first decree would be to make daily braid wearing mandatory. And, we wouldn't expect any complaints — braids are just so darn versatile, we'd bet there's a variation out there…read Nov 22, 2013 It's not that we hate Emily Schuman because she's beautiful (although she is). ...love Maegan: Messy Rope Braids and Low Bun Hair Tutorial Fashion+Home+Lifestyle Blog.
These little rope braids are a fun way to add a little style with your own hair, creating a sort-of headband of sorts.
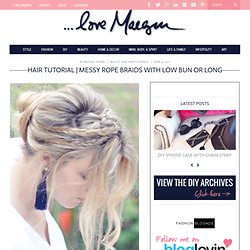
Your hair doesn’t need to be extremely long, but you do need some length to cover the top of your head with. If you have layers, you could instead create a tiny French Braid where the hair is shorter and closer to your head, if that makes sense. But it’s a fun and cute braided hair style that’s just a little different. I originally wore this style last Summer with two slightly larger braids Watch and Enjoy… * Notes: Instead of one large bun, create two or three little buns at base of your head OR swap the bun for a clean pony tail. Wear it Up… Wear it Down… * Just bobby pin them in place or use a pretty barrette * Click Here for my DIY Tassel Earrings shown above * Knot ponytail. Hair Tutorial: braided 'do.
I know I said I would post this hair tutorial yesterday, but obviously I'm a no good liar because today is not yesterday, it's today.
This hairstyle is basically the same thing as milkmaid braids, only modified to up the volume and lessen the big part in the back. Pigtails or regular milkmaid braids make me look like I'm balding, as I have a wicked scar in the back of my head. I would recommend doing this in a mirror and checking the back to make sure it's all neat and tidy as you go, because I did not and it's a little (or a lot) messy in the back. I redid it before heading out and it looked much better, so make sure you use a mirror! For full instructions, keep reading after the jump. What you need: dry shampoo or volumizing product (like the Sachajuan volume powder I often use) bobby pins brush If your hair needs added texture, you can use a dry shampoo.
You should now have what is known as the Snookie. Divide the lower section into two parts and braid. 10 Ways to Dress Up Your Ponytail. The Small Things Blog.