
Video. Video. Candy Cane Marbled Monogram Ornaments. Materials: 1 glass ornament 2 bottles of nail polish 1 vase/cup (large enough to fit half the ornament, but not too big) filled half way with filtered tap water I used Orly French White and OPI All Lacquered Up for these images. These nail polish brands seem to work the best for this technique. Do experiment with different nail polishes as all of them do not work the same for this. 1. Prepare your workspace. Polaroin - Online polaroid image creator. It's easy and for free! Sewing tutorial. Page corner bookmark for kids in Ideas for kids' crafts. Kids in the Kitchen: Slime! September is in full swing and we thought we’d celebrate by doing Back-to-School week!
My oldest kiddo just started pre-school and Kate is now the mother to an official kindergartner. This week we’re going to have *five* posts. Hear that? A post every single day of the week you lucky duckies.
Homemade Hand Scrub. Winter is here and if the cold, dry air has turned your hands into sandpaper like it has mine, you`ll appreciate this hand scrub that leaves your hands soft, smooth and smelling delicious!
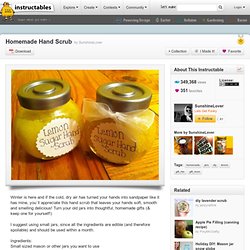
Turn your old jars into thoughtful, homemade gifts (& keep one for yourself!) I suggest using small jars, since all the ingredients are edible (and therefore spoilable) and should be used within a month. Bird and Text Collage Wall Art. [ Close Privacy Policy ] Privacy Policy / Your California Privacy Rights Revised and posted as of March 4, 2013 Prime Publishing, LLC ("Company," "we" or "us") reserves the right to revise this Privacy Policy at any time simply by posting such revision, so we encourage you to review it periodically.
Tips Week: Day Four « Stamping and Stuff. So how many of you ran out and bought those CUTE frames at the Target Dollar Spot??

I have lots, lol! For some reason, I like doing these frames with two sheets of paper. I don’t know why! Anyway, I thought I’d do a little tutorial on altering a frame using two papers and some ribbon. How To Make a String Tree Wall Mural Home Hacks. 12 sided calendar. Download a 12 sided calendar Download a dodecahedral calendar.
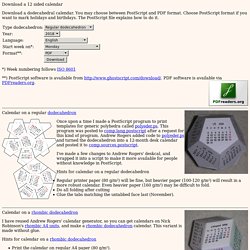
You may choose between PostScript and PDF format. Choose PostScript format if you want to mark holidays and birthdays. The PostScript file explains how to do it. *) Week numbering follows ISO 8601 **) PostScript software is available from PDF software is available via PDFreaders.org. Calendar on a regular dodecahedron. Perfect Summer Bangle. Here's a fun tutorial on how to make a message bangle that's one-of-a-kind, done in the sun, waterproof and weatherproof.

Even after several trips to the beach, it won't fade or wash off! Essentially, it's the Perfect Summer Bangle. Used in this tutorial: Inkodye Red Prepare. Soap Making Recipes and Tutorials. Tiny Polaroid Magnets.
Hi there!
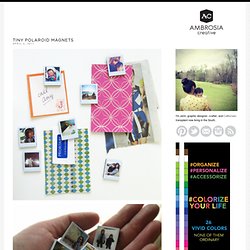
It’s felt like forever since I’ve last blogged, and has felt like an eternity since I’ve done anything crafty and nifty. Since my morning sickness has gone into full speed (yes, we’re expecting our third this fall!) I haven’t felt like myself. But nothing like inspiration to wake one out of a reverie — or nightmare, in my constantly sick state. I came across these DIY Pantone chip magnets on How About Orange and wanted to do something similar. You will need: Cardboard (mine was the backing of a sketchbook — much thicker than the back of a regular spiral bound notebook) or 2-3 sheets of white cardstock or poster board spray-mounted together to use as a sturdy backing to the magnetsOpaque white marker (necessary only if your cardboard is not white) Craft knife Metal straight edge/ruler Clear packing tape or frisk film.
Step 1: Download a Photoshop file of the Polaroid frames below. Step 2: Print out photos onto photo paper. Step 4: Trim out photos with craft knife. 487 Comments. Water Balloon Luminaries. A fun and easy project with a beautiful payoff.
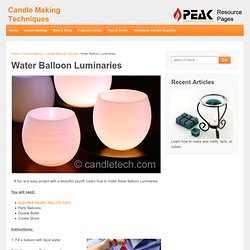
Learn how to make these Balloon Luminaries. You will need: High-Melt Paraffin Wax (IGI 1260)Party BalloonsDouble BoilerCookie Sheet Instructions: 1. 2. 3. 4. 5. 6. 7. 8. How to make a glow lantern. How to Make Leaf Skeletons. I wanted to share with you a project from one of my readers who shares with us how to make leaf skeletons.

I LOVE this! I have several leafs in various forms displayed in my home and knew I needed to make some of her leaf skeletons to add to my decor. I love how a pattern of leaves can enhance the beauty in your home. So I asked Heather if she would mind sharing her project with you. You can find more great projects from Heather at her blog The Other White House.
I have spent hours and tried various ways of making these. 30 Fun DIY Crafts To Keep You and the Family Busy During the Holidays. Giant Paper Rose Flower. If you loved the beautiful DIY wedding this morning and Nata’s gorgeous paper flower bouquets, you are in luck as Nata is sharing how she crafted them with us!

She was inspired by a template created by Morgan Levine on Martha Stewart (as was I in the flowers I created for this styled shoot). I just love that this basic idea has inspired different brides to create their own version of giant paper flowers – you might remember these equally awesome giant paper flowers from this wedding I shared last year. :) Thanks so much Nata for sharing how you created your giant pink paper rose + special thanks to Studio Castillero for the photos of the DIY + her wedding!
Materials (to make one giant rose) Step 1: Cut the petals Cut 5-6 teardrop petals and 15-6 heart-shaped petals from the petal colored crepe paper. IMPORTANT: Crepe paper is directional so it matters which way you’re cutting the paper. Repeat until all of your petals are cut.