
TUTORIAL] Book Page Necklace. I introduced this necklace a while back and sold a couple at the facebook sale, but since my shop is going in a different direction, I've decided to share the tutorial for this necklace.
![TUTORIAL] Book Page Necklace](http://cdn.pearltrees.com/s/pic/th/mandipidy-tutorial-necklace-20547858)
MATERIALS NEEDED: 30" of chain 2 pages from an old book 1 piece of poster board Glue 1 quarter Scissors Varnish Matches Pearls Jump rings Lobster Claps [1] Cut two pieces of chain, 15 1/2, and 18 inches long. [2] Attach the two chains at both ends with small jump rings: [Should look like this] [3] Rip out 2 pages from an old book. DIY Book Clutch Roundup. Olympia Le Tan (images via) If you're a bookworm like me, once you saw these bibliophilic accessories, your heart probably became all-flutter.

DIY yourself one, and when people ask you why you're carrying around a book on a Saturday night out, let them think your a literary genius. True Blue Me & You: I'll Try Not to Waste Our Time. Bleach Painting on Textiles D.I.Y. Today Jill of Lune is going to share the next part of our textile printing series, how to paint with bleach.
Map Pendants. A while ago, my dad unearthed an old pocket diary and – since it was dated 2005 – was going to put it out for recycling.
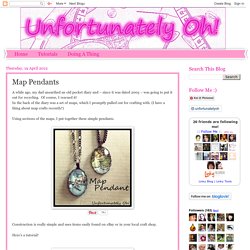
Of course, I rescued it! In the back of the diary was a set of maps, which I promptly pulled out for crafting with. (I have a thing about map crafts recently!) Using sections of the maps, I put together these simple pendants. Construction is really simple and uses items easily found on eBay or in your local craft shop. The DIY: JAPANESE STAB BINDING MINI NOTEBOOKS. I saw this technique online a while ago and finally got around to making a few little notebooks.

I'm not gonnnnna lie... explaining this technique is really tedious and confusing but once you understand it, it makes sense. Scarf Knot Master List. DIY : Front knot tied crop top // Tee-shirt noué devant. A DIY lover can never DIY enough plain tee-shirts.

EASIEST.THING.IN.THE.WORLD. Here is another idea inspired by my early years as a Spice Girl wannabe this year’s crop top trend. It’s amazing what you can do with a pair of scissors, a bit of a tie here and a knot or two right there ! Here we have a simple man’s tee-shirt (again, from Gap !) Turned into a cute top in four steps ! Designer's fashion blog: Tutorial: 12 awesome ways to knot a belt. 12 awesome ways to knot your belt Yesterday I went to a friend's art exhibition and I was wearing a my "I understand your crazy art" navy blue dress with belt.

The skinny belt was too long and I spent some time on the internet looking for cool ideas to knot my belt. Didn't really find something new. So tonight I played around with my belts and created some new ideas. Sewing Tip: Shirring/Smocking with Elastic Thread. Shirring is an old technique, I know.
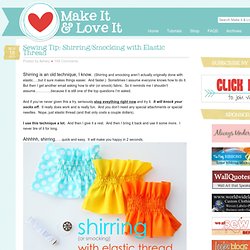
(Shirring and smocking aren’t actually originally done with elastic…..but it sure makes things easier. And faster.) Sometimes I assume everyone knows how to do it. But then I get another email asking how to shir (or smock) fabric. How To Tie Dye Your LEGS. I am about to show you how to tie dye your legs... or leggs really.

Yeah, they're just stockings, but the result is still the same. I now have 3 different crazy pairs of tights that each were made from old clothes and food coloring. Pop Champagne: DIY: Fringe Net Tank. I saw this tank at Planet Blue a while ago and loved the style, so I decided to convert this tank dress into something like it.

Summer Threads. Hi guys! While I’m away getting in trouble in Montana, I asked my friend Jessica from Wayside Violet to share a tutorial for my Summer Threads series. I love her idea and will be on the look for a comfy tee while thrifting here. Thank you so much, Jessica! Hi! True Blue Me & You: I'll Try Not to Waste Our Time. 1 Minute Necklace & a Mini Fairy Garden. Sprinkles in Springs. DIY dipped hem tank top « By Hand London. For those of you lucky enough to be experiencing an actual Summer, as opposed to us Londoners who seem to be stuck in some kind of dreary climatic Groundhog Day, here is the quickest of DIY refashioning projects - no sewing required - to transform a plain old tank top into a sexy dipped hem crop top perfect for those hazy Summer barbecue Sundays.
You will need: an old tank topfabric scissorstailors chalkstuds or embellishments (optional) Step 1 Fold your top in half lengthways so the folds run down the centre front and centre back. Mark a curved line shorter at the front of the top, dipping slightly lower at the back. Step 2 (optional) If you're happy with just the dipped hem, you're done! 6 Ways to DIY a Scarf Into a Shirt — No Sewing Required. It's no secret that I have a thing for scarves. I love coming up with new ways to tie them and new ways to wear them — but one of my favorite times to wear scarves is actually in the summer. Scarves are so much more than a winter accessory, they're a year-round necessity. With their pretty prints and breezy materials, scarves can be your go-to wardrobe piece this summer with the right tying techniques!
(click each image below for step-by-step instructions) Side-Shoulder Bow With a rectangle scarf, find the middle of the longest side of your scarf and rest it against one side of your stomach. Miss Make: Star Wars Dress + Sewing with Sheets. If you're me and you have tickets to a Dodger game on a stadium-endorsed Star Wars night, well then, you seize and abuse that opportunity to make a themed dress.
Even if you don't really know what Star Wars night is. Even if there are only approximately two other people dressed up. Even if, clearly, they should have made the players use bats that looked like lightsabers, but didn't. Finger Knitting How-to. You know how I just wrote about how I like getting a handmade gift more than just about anything. Well, this is anything.
Sitting on the couch on a lazy Sunday, knitting with my kids . . . that beats gift-getting for sure. It is a gift itself. We just sat there side-by-side, for about an hour, feeling the warmth from each other’s bodies, listening to music from my computer and basking in each others company as the sun streamed through the windows. Ahhh . . .the experience was so delightful, it was hard to peel myself away to take the photos. Galaxy Print DIY. True Blue Me & You: I'll Try Not to Waste Our Time. Home-made water-colour paints!! This HOMEMADE PAINT is made with cornstarch, baking soda, corn syrup and vinegar, and costs just pennies to make. It’s a wonderful and inexpensive paint for toddlers and preschoolers. The paints dry into solid watercolour paint pucks that will last indefinitely.
DIY. Saw this on Pinterest and I had to DIY it. You can too. Grab your scissors and let's go. Back Front Inspiration From Urban Outfitters. True Blue Me & You: I'll Try Not to Waste Our Time. Galaxy fabric – MAKER OF WORLDS. So, long and slurred story short, I finished this blog post earlier, came home and drank a bunch of beer to celebrate the fact that it’s Friday and screw everything that has been irksome and difficult about this week, and now my will to write a cohesive introduction has been almost entirely annihilated*. So here’s the abbreviated, slightly buzzed version of what I might have said: SPACE. Space is cool. I am cowardly and would absolutely suck at being an explorer of any kind (especially in space, what with the terrifying lack of oxygen & all), and I also probably know less about space and what it is and how it works than a baboon’s backside does.
True Blue Me & You: I'll Try Not to Waste Our Time. C.w.frosting: Polka Dotted Skinnies. Anthropologie-Inspired Pin Dots. {she made it} jersey weave sweatshirt. Mermaid Dress DIY from Kate.