
Tutorial Magazine. 35 Creative Portrait Effects Photoshop Tutorials. Photoshop « Layers Magazine Layers Magazine. Fonts2u.com. 70 Professional Fonts For All Design Life Situations. Choosing the right fonts for your design is very important.

This gives your viewers an impression on what you promote or convey. Choosing of fonts can also be an art, and fonts can also be in style. In this article, I will give you the best fonts you can download and use to make your designs look clean, professional but stylish. The fonts you will see below are the fonts we can consider as clean, professional but stylish. Now, scroll down and enjoy downloading! 1. By: Shawn Griswold To download Gris font, click here. 2. By: Lauren Thompson To download Champagne & Limousines font, click here. 3. By: haef To download Capsuula font, click here. 4. By: Gabriel Mark Perida To download Gabriel Serif font, click here. 5. By: eM-Vii aka Manuel Viergutz To download Hand Times font, click here. 6. By: The League of Moveable Type. Handpicked free fonts for graphic designers with commercial-use licenses.
How to Create a Glossy, Colorful Text Effect. In the following tutorial you will learn how to create a glossy, colorful text design in Illustrator CS5.
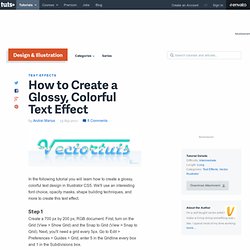
We'll use an interesting font choice, opacity masks, shape building techniques, and more to create this text effect. Step 1 Create a 700 px by 200 px, RGB document. First, turn on the Grid (View > Show Grid) and the Snap to Grid (View > Snap to Grid). Next, you'll need a grid every 5px. You can also open the Info panel (Window > Info) for a live preview with the size and position of your shapes.
Step 2 Pick the Type Tool (T), click on your artboard and add your text. See what you can come up with, the font isn't that important. In this text the only shape that is not aligned properly is the "V. " Step 3 Disable the Snap to Grid and enable the Smart Guides (Command + U), then focus on the "V". Reselect all the shapes created so far and go to Object > Compound Path > Make. Step 4 Step 5 Select "Text" and make a copy in front (Command + C > Command + F).
Quickly Build an Abstract Background of Colored Bars. Oftentimes there's a need for a quick but unique design.

In this tutorial, I'll be showing you a short but attractive way to create a graphic for backgrounds, wallpapers, greeting cards, designs, and all that other good stuff. You will learn a simple Photoshop trick that you can easily manipulate for your daily needs. Step 1 First off, let's start by creating a new document and applying the oh-so-obligatory clouds (Filter > Render > Clouds).
Step 2 Now that we have our base to work with, apply Mezzotint (Filter > Pixelate > Mezzotint) with type "Long Strokes. " Design a Colorful Illustration Using Patterns and Shapes. A good friend and amazing artist Bram Vanhaeren and I decided to collaborate on an illustration to then create a tutorial for all the readers at Psdtuts+.

We came up with a cool illustration that incorporates patterns, coloring, as well as 3D shapes. The most important thing about this is that it is all extremely simple to create so it shouldn't be that difficult for anybody. There are a lot of new techniques here that I guarantee you'll be using, so check this one out! Final Image Preview Take a look at the image we'll be creating. Introduction This tutorial is simple to follow and will give you some great techniques and results. To start yourself off you will need to find 2 essential stock photographs to use in this illustration.
You want something simple that will not overpower what you will have going on over it. The final step in preparation is to get the main stock images you will be using. Step 1 Step 2 Step 3 Now I adjust the colors of my model because she is looking a bit too dark. Digital Art for Beginners. Photoshop is an excellent tool for manipulating photographs but it can also be used as a means to create stunning digital art.
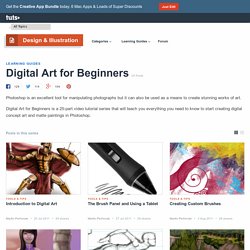
This tutorial is part of a 25-part video tutorial series demonstrating everything you will need to know to start producing digital art in Photoshop. Digital Art for Beginners, by Adobe Certified Expert and Instructor, Martin Perhiniak will begin by teaching you how to draw in Photoshop. At the conclusion of this series you will know all you need to produce your own concept art and matte paintings in Photoshop.