
Photoshop Quick Tip: Create a Dragan Style Portrait Effect in 5 Steps. If you’re a photo buff of any level, you’ve most likely heard of or seen the amazing work of Andrzej Dragan.

His portraits have a very high contrast and color style all their own. The effect is stunning and eye catching. It reveals a lot about the subject that the naked eye doesn’t get to see. A similar effect can be created in Photoshop with just a few simple steps. Lets take a look. Here’s a look at what we’ll be doing with this portrait. Step 1 First up, lets add a Levels adjustment layer, and adjust the levels to something close to what I have below. Step 2 Now lets add a Hue/Saturation adjustment layer and take the saturation down.
Step 3 Now lets add a Curves adjustment layer to further adjust the contrast and highlights. Step 4 Now we’re going to increase the sharpness considerably using the High Pass Filter. Now set this layer’s blending mode to Overlay. Step 5 For this final step we’re going to bring out some of the details in his face using the dodge and burn tools. Related Posts. Tilt-Shift Photography Photoshop Tutorial. This tutorial will walk you through how to create a tilt-shift image in Photoshop. It has been produced using Photoshop CS2 on a PC. Once you finish your tilt-shift image, make sure you upload your image for everyone to see. You should also check our our gear page to find all of the latest gear you need to create tilt-shift images. Gear PageSubmit Your Images Step 1: Photo Selection When choosing a photograph for the tilt-shift effect, bear in mind that you want to give the impression of a miniature model.
For this tilt-shift photography Photoshop tutorial, we are using a picture of Times Square during a typical day: Even before the tilt-shift effect has been applied, it’s not too hard to imagine the scene as if it were a model. To find an appropriate image, we suggest you browse through the flickr tilt-shift fakes pool. Step 2. Open the image in Photoshop and enter Quick Mask Mode by pressing Q on the keyboard, or select the Quick Mask icon as shown in the Tool Palette below: Custom Wallpaper Tutorial. It's very simple.

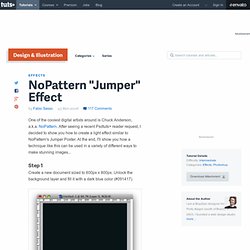
Just follow the steps and you will be fine. NoPattern “Jumper” Effect. One of the coolest digital artists around is Chuck Anderson, a.k.a.

NoPattern. After seeing a recent Psdtuts+ reader request, I decided to show you how to create a light effect similar to NoPattern's Jumper Poster. At the end, I'll show you how a technique like this can be used in a variety of different ways to make stunning images... Step 1 Create a new document sized to 600px x 800px. Step 2 Create a new layer, fill it with black, and change the Blend Mode to Color Dodge. After that, duplicate that layer and move it to the left, so you will have two layers, one next to the other.
Create a Rocky Text Effect with Space Background in Photoshop. Create a Rocky Text Effect with Space Background in Photoshop In this Photoshop tutorial, I will show you the steps I took to Create a Rocky Text Effect with Space Background in Photoshop.

This is an intermediate level tutorial so some steps can be tricky, but why not have a try :) Along the way, we will be using some selection techniques, warping tool, refine edge filter, image adjustments and layer blending options. We will only be using one stock image for this whole text effect. Here is a preview of the final effect I have for this tutorial: (click to enlarge) PSD File Download To complete this tutorial, you will need the following stocks: Space Brush Rock Step 1 Create a new document sized 900px * 1270px with black background. Create a new layer and use a font of your choice to type a letter on the centre of the canvas: Load the rock texture into Photoshop, and go back to our letter layer and load its selection: Step 2 Levels Curves Brightness and Contrast Step 3 Step 4. Awesome digital bokeh effect in Photoshop.
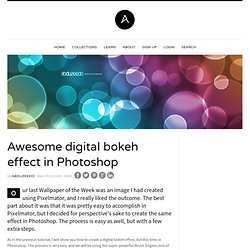
Our last Wallpaper of the Week was an image I had created using Pixelmator, and I really liked the outcome.

The best part about it was that it was pretty easy to accomplish in Pixelmator, but I decided for perspective's sake to create the same effect in Photoshop. The process is easy as well, but with a few extra steps. As in the previous tutorial, I will show you how to create a digital bokeh effect, but this time in Photoshop. The process is very easy and we will be using the super powerful Brush Engine, one of the coolest things in Photoshop.