background preloader

Awesome digital bokeh effect in Photoshop

Awesome digital bokeh effect in Photoshop
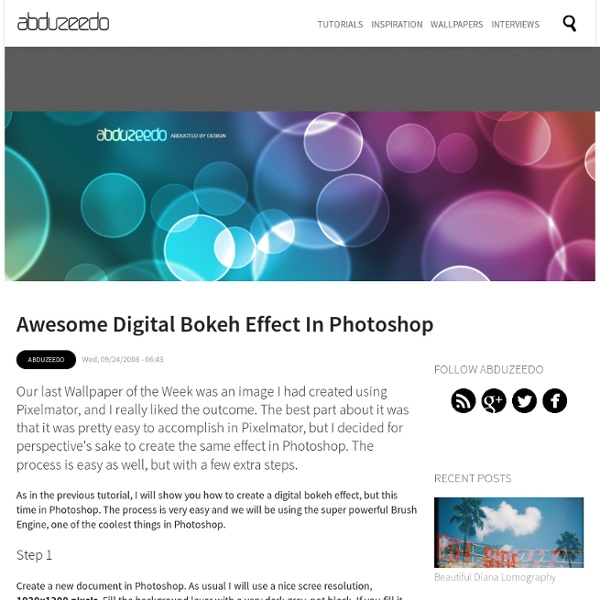
Our last Wallpaper of the Week was an image I had created using Pixelmator, and I really liked the outcome. The best part about it was that it was pretty easy to accomplish in Pixelmator, but I decided for perspective's sake to create the same effect in Photoshop. The process is easy as well, but with a few extra steps. As in the previous tutorial, I will show you how to create a digital bokeh effect, but this time in Photoshop. Step 1 Create a new document in Photoshop. Step 2 Select the Ellipse Tool (U), and create a circle. Step 3 Select the ellipse and go to Edit>Define Brush. Step 4 Go to Window>Brushes (F5). Step 5 Before we start painting our bokehs let's create a new layer and fill it with a colorful gradient. Step 6 Let's create a new Folder in our Layer Palette. Step 7 Go to Filter>Blur>Gaussian Blur. Step 8 Create another layer and paint more brushes. Step 9 Create another layer and repeat the previous step, this time however use a much smaller brush. Conclusion Video Tutorial

10 Guides des meilleures éclairage Photoshop Conception Technology Network | Conception graphique et de la technologie האור הוא דבר שהעין האנושית מאוד אוהבת. יש איזשהו דבר מרהיב בדבר המנצנץ הזה. הדוגמא הטובה ביותר היא ביום העצמאות- מדינה שלמה עוצרת את נשימתה וצופה במשך רבע שעה במופע זיקוקים (זה כמובן לא כולל את החצי שעה הנוספת אחרי שכוללת את הדיבורים וההשוואות בין הזיקוקים של השנה לשל שנה שעברה/לשל עיר אחרת). אחד מהאפקטים שאני יותר אוהב להשתמש בהם בפוטושופ זה אפקט הLighting, האפשרויות בו בלתי סופיות והתוצאות מדהימות. 1. כניסה למדריך! 2. כניסה למדריך! 3. כניסה למדריך! 4. כניסה למדריך! 5. כניסה למדריך! 6. כניסה למדריך! 7. כניסה למדריך! 8. כניסה למדריך! 9. כניסה למדריך! 10. כניסה למדריך!

22 Professional Photoshop Image Enhancing Tutorials Adobe Photoshop is the premier tool for digital artists when it comes to professionally enhancing images. Whether you’re a beginner just learning the ropes or an advanced user looking for unique techniques to add to your Photoshop arsenal, you’ll find some tutorials here that you’ll surely want to bookmark. In this article, you’ll discover plenty of tutorials that deal with enhancing images, adding unique and impressive effects, and recreating digital replications of popular traditional photography techniques. 1. You can learn how to apply the Cross Processing film-developing technique digitally to your images by reading through this quick and educational tutorial that leverages the powers of the Curves tool in Photoshop. 2. Take your ordinary digital photos and simulate the Lomo Photography effect (also known as Lomography) that will apply a dreamy and surreal effect onto your images in this tutorial that uses a Levels Adjustment layer among other Photoshop techniques. 3. 4. 5. 6. 7. 8.

28 Free High-Quality Fonts at DzineBlog Learn how to earn $125 or more per hour as a freelancer - Click Here Looking for hosting?. We recommend MediaTemple for web hosting. Use Code MTLOVESDESIGN for 20% off In this post we have collected 28 free high quality fonts. Amazon.com has some great books on fonts that you may also want to check out. Color Lines Free Font Free font VAL Deibi v1.0 – free font CODE free font Glide Font St Marie Dekar free font Pacifica™ FREE FONT Infinity Banda typeface Hyperbola Matilde Free Font Piron Free Font GOTA Free Font HERO Free Font Aston font Tipografía Gratis: Spatha Serif My Fair Cody Pompadour Numeral Set Melbourne Tipografía Gratis de Junio: Musa Ornata Arvo Tipografía grátis: Knema Lintel Teardrop – Free font Free font by Superfried Lato About brantwilson Brant Wilson is a staff writer for the DesignMag network.

Tutoriaux Effets Divers ~ Pseudo Fractale Pseudo Fractale Passez votre curseur sur le texte en vert pour une infobulle en image Créez un nouveau document 500 x 500 px. Fond Noir. Allez dans Filtre > Rendu > Halo. Allez dans Filtre > Esthétiques > Soufflerie. Dupliquez votre calque. Allez dans Filtre > Déformations > Coordonnées polaires. Allez dans Image > Réglages > Teinte/Saturation [Ctrl+U]. Faîtes la même chose pour le second calque, en changeant la couleur, par ex. Note : Choisissez les couleurs qui vous plaisent, bien sûr. Tapez [Maj+Ctrl+E] pour fusionner vos calques. Dupliquez le calque et passez-le en mode Eclaircir. Maintenant, vous pouvez dupliquez le calque à volonté, le faire pivoter, l'étirer... A vous de jouer ! ~ Graphisme Delphine © 2006 ~

Inspiration Gallery #103 - Various quotations & From up North Most designers seek inspiration in the initial stage of a project to get their creative juices flowing and/or to get updated with the latest trends in graphic design. In this post I would like to share some of the great designs that have inspired me in some way and hopefully something will inspire you as well. Do you still think of me? Nobody dies a virgin… When life hand you lemons… Design is thinking made visual The next war… Do what you love…

28 Free Slab Serif Fonts at DzineBlog Learn how to earn $125 or more per hour as a freelancer - Click Here Looking for hosting?. We recommend MediaTemple for web hosting. Typography plays a huge role in any design. 28 Free High-Quality Fonts 15 Beautiful Free Web 2.0 Fonts Hellforge aldine Legion Slab Typeface About brantwilson Brant Wilson is a staff writer for the DesignMag network. Swirl Mania in Illustrator & Photoshop There are lots of ways to create swirls in Illustrator, you can even download vectors from sites such as bittbox and dezignus, and if you are using Photoshop you can download brushes with those sorts of symbols. However in this tutorial I will show 4 ways to create swirls, and by mixing them you will learn some very powerful techniques that will allow you to easily make tons of different styles of swirls and crazy sperm vectors. 1st Way - Arc, Circle, and Path tool Select the Arc Tool and create an arc. You can change the arc's properties by holding the mouse button and pressing the UP and DOWN keys for the angle of the arc, SPACE to move it, and ALT to change the center point. Now create an ellipse using the Ellipse Tool (L). After you create the arc go to Object>Path>Outline Stroke. 2nd Way - Blend Tool(W) Create 2 circles, one will be the start and the other the end points of our swirl. The spine is the path along which the steps in a blended object are aligned. 3rd Way - Spiral Tool

Word: Original Design Project for Each Book of the Bible | ChurchCreate If you’ve got something awesome to share then I really don’t mind if you think it comes off as “self promotional.” If it’s awesome then it’s awesome! [UPDATE: Check out the full Old Testament here!] For example, Jim LePage dropped me an email a while back and I didn’t mind a bit, because after he had spent some time describing his vision and project I was hooked. The design project is called “Word” and is where he’s creating original designs for each book of the bible. He tries to post a new one every Friday and adds a reflection to each one. Check these out: Pretty sweet, right? Got a favorite? Related Saturday Sunday Share #21 As I posted up Saturday Sunday Share last week, I thought Saturday Sunday Share had come to an end. In "CMS"

Related: