
Learn Photoshop, get help and support. Tutvid. Photoshop Smudge Painting. Sensor Dust Easy Removal. Beginners Adobe Photoshop. By: Adeniyi Agidee Adobe Photoshop CS5 tutorials is very help for beginners and people who are using it for the time and teaches people how to mainly use and ways and tools that i can use to make anything look presentable and professional.

By: Ali AlZahrani Very nice lessons. 6 Places to Learn Photoshop for Free (or Almost Free!) Adobe Photoshop is one of the most widely used software packages in the world.

It’s hard to imagine the world without Photoshop, and its remarkable image editing tools have been used in everything from Hollywood blockbusters to Internet memes. As powerful as Photoshop is, it can be a little intimidating. Adobe has done a great job of making the software more accessible to newcomers, but it’s still a complex program. How To Make A Photo Collage In Photoshop Short Version. Creating a Post Card in Adobe Photoshop CC. Photoshop CS6 example: Crate simple postcard (beginners) 10 Creative Photo Manipulation Adobe Photoshop Tutorials. The best of creative Adobe Photoshop Tutorials, mostly about photo manipulations, mixed media and retro poster style.
Check out new tricks, techniques that you can learn and apply it to your own designs. These tutorials are the best from great sites such us digitalartsonline.co.uk, designstacks.net, psdvault.com, spoongraphics.co.uk and photoshopstar.com. Hope you like it!!! Advanced compositing techniques Visit tutorial. Thenewboston. Learn the Basics of Photoshop in Under 25 Minutes.
PhotoshopCAFE. Adobe Photoshop CS5 - How To Remove The Background Of An Image. How to Clean Up a Self-Portrait in Photoshop » Design Festival. Whether it’s for a high fashion magazine, an advertisement for a new product, a marketing promotion, or just for your new Facebook photo, we all end up retouching photos on occasion.

With a few Photoshop techniques, you can change a boring, flawed photo into something much more eye-catching and professional. Your subject may not be a model, but you can still create a pristine picture that you can be proud of. Today, we are going to cover some basic photo retouching techniques that enhance an image without making it appear unnatural. We will be brightening our overall image, correcting the subject’s skin, removing some unwanted objects, and making a few other enhancements. Digital Photography: Creating a digital sandwich image. Creative Nature Photography - Orton Imagery. Text and photography copyright Darwin Wiggett.
All rights reserved. Early in my career as a professional photographer, I came across an article by Michael Orton in Popular Photography that literally stopped me in my tracks. The images included with the article were landscape and nature photos unlike anything I had seen before. The photos were painterly, ethereal, and romantic. The article went on to explain how to create these artistic images in a step-by-step process. Armed with this new technique, I excitedly created ‘artistic’ images that went beyond being a pure document of nature and instead seemed to express mood and emotion. Film Technique For Orton Imagery, you must use slide film. Here are a few tips to get the best results: You should use a tripod so the camera doesn’t move between exposing the sharp and the out-of-focus image, otherwise the two images won’t be in ‘register’ with each other.
Digital Technique. Simulating an Orton Slide Sandwich. There are many ways to simulate an Orton slide sandwich (a technique created by the Vancouver Island photographer, Michael Orton).
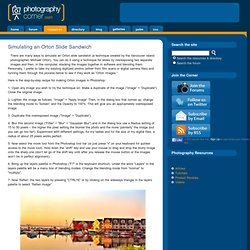
You can do it using a technique for slides by overexposing two separate images and then, in the computer, stacking the images together in software and blending them. Personally, I prefer to take my existing digitized photos (either from film scans or digital camera files) and running them through the process below to see if they work as “Orton Images.” Orton Imagery - Photography Tactics. Last Autumn, I stumbled across a series of steps in Photoshop which produced some absolutely stunning results.
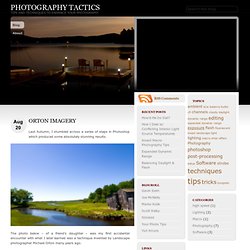
The photo below – of a friend’s daughter – was my first accidental encounter with what I later learned was a technique invented by Landscape photographer Michael Orton many years ago. The technique essentially uses multiple layers – each slightly over exposed – one sharp, the other blurred. In the case of Nia – above – my blurred layer was sepia toned, giving her a wonderful golden glow. Over the past 9 months I have worked with the technique quite extensively. While not always well-suited for photos of people, I have been able to produce some stunning landscape images, dripping with rich tones and vibrant highlights. If you want to learn more about the intricate details behind the history of Orton’s effect and see some amazing examples of the results, I encourage you to check out Marko Kulik’s Podcast interview w/ Michael Orton. Before & after And the result can be seen above! Photoshop Killer Tips. Photo Editing, Photo Sharing.
Splash of Style » How To Create Photo Diptychs, Triptychs & Montages. Creating a photo diptych, triptych, or montage is very easy using one of your favorite photo editors.

This tutorial will be using Photoshop Elements 6 (Mac) but most any graphics/photo editor will do. Note: a diptych is a fancy way to say a montage (or collage) of two photos, a triptych is three photos. Flickr has several groups for dips and trips and other montages. For examples of diptychs that I have created, check out some photos on my flickr stream (tagged w/ diptych) Let’s create a two photo diptych first.
Open two photos in your graphics editor Open two photos in your favorite photo / graphics editor. If you are having trouble getting your photos to view side-by-side, make sure the “cascade windows” view option is selected. What are the photo’s measurements? View the exact measurements of both photos. If "inches" are displayed instead of pixels, change the "rulers" setting to "pixels" in preferences Mac: Photoshop>Preferences>Units & Rulers Windows: Edit>Preferences Resize the canvas.
Five Minute Upgrade: Learn to customize Photoshop for speed and creativity. In five minutes, you can easily upgrade Photoshop to make it easier for photographers to use.

Most photographers spend a lot of time in Photoshop. We do our best to learn tips and tricks on how to use Photoshop to create various effects, but if you’re still using Photoshop on its default settings and preferences, you’re totally missing out. Today I made a list of a few customizations I always make to Photoshop when I install it on a computer. These quick changes you can make to Photoshop will make your digital image editing faster, nicer, and you will experience fewer instances of the program crashing.
Five Minute Upgrade #1: Set up your cache levels. How to Install Photoshop Brushes, Styles, Shapes and Other Content. There are hundreds of Web sites (including this one) offering free Photoshop brushes, layer style effects, actions, shapes, patterns, gradients, and color swatch sets.

Here's what you need to do with these files to get them working in Photoshop, along with links to where you can find these free goodies. Brushes Place the *.abr files into: Program Files\Adobe\Adobe Photoshop X\Presets\Brushes where X is the version number for your version of Photoshop. Sharpening in Photoshop. Article and Photography by Ron Bigelow www.ronbigelow.com Photoshop CS or Photoshop CS2 Used in this Tutorial One of the determinants of final image quality is the how well an image is sharpened. In fact, as the print size is increased for any given image, the quality of the sharpening becomes ever more important. Yet, it is not uncommon for photographers, who spend thousands of dollars to get the best equipment available in hopes of getting very high quality images, to lose some of that quality at the end of the process by using less than ideal sharpening methods. For many, the issue of sharpening starts and stops at Unsharp Mask (USM).
It is important to set the purpose of this article up front. USM. What is Sharpness In practical terms, we understand the concept of sharpness. Sharpness is actually determined by two factors: resolution and acutance. Figure 1: Acutance Acutance has to do with contrast. This brings up an important aspect of sharpening. Why is sharpening Needed.