
Crystal Egg Geodes - Martha Stewart Holidays. Geodes can be grown without using egg dye.
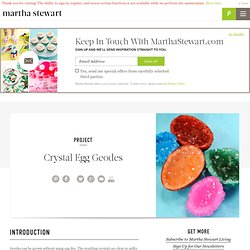
The resulting crystals are clear to milky white, like quartz. While large chicken eggshells are suggested in this process, larger eggshells can be used. Simply increase the size of the plastic or glass container and double or triple the amounts of dye (1 packet), alum (3/4 part), and water (2 parts) used to create the growing solution. This Easter craft from Jim "Figgy" Noonan doubles as a science project, offering an opportunity to show kids the crystallization process at work. To make a fluorescent variation for Halloween, substitute the water and egg dye solution with glow water. Resources: If you don't want to blow your own egg or would like to try a larger eggshell, pre-blown shells are available from The Eggery Place. Woven Chain Bracelet. Chain link bracelets, with colorful threads woven through them, have been popping up here and there.
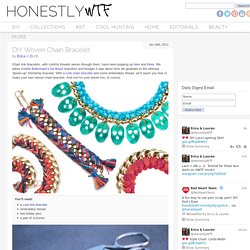
We adore Aurèlie Bidermann‘s Do Brazil bracelets and thought it was about time we graduate to the ultimate “grown-up” friendship bracelet. With a curb chain bracelet and some embroidery thread, we’ll teach you how to make your own woven chain bracelet. And one for your bestie too, of course. You’ll need:a curb link braceletembroidery threadtwo bobby pinsa pair of scissors Cut 2 sets of 15 strands of embroidery thread, with each strand measuring four times the length of the bracelet.
Lay the second color (blue) over the first color (coral). Repeat the steps until you reach the end of the bracelet. Sewing Patterns, Projects, Skills, Tutorials – For People Who Sew. Hula Hoop Rug. Upcycled Sweater Boots. Block Posters. Most gawked- craftgawker.
Cut Out. Corset Tutorial. Marabou Feather Vest. Summer Feather Hair Accessories. Hey there, It's Promise again with a new fashion DIY.

Your new summer hair accessory? Well,... mine at least. So fresh and earthy. This is a really easy DIY using items that are probably already in your home… And thats exactly the way I like it. haha. Summer bracelets DIY. When M. came home from her camp with school, she showed me this yellow bracelet she made with 'scoubidoo' strings.

One of her friends taught her how to make these and of course I wanted to have a go at it too. Instead of scoubidou string I used strips of fabric for one and leather - what did you think?! - shoelaces in offsetting colors for another one. I believe both resulting bracelets look really nice. The possibilities in terms of material to braid with are endless. So, in case you 're in need of a fun summer project here's a how-to in 16 pictures with a short description below. This is what you'll need for an adult size leather bracelet. Steps: 1. This is the kind of craft you could easily do with kids - have them cut strips of fabric, no need to worry about the strips being straight and regular, and teach them how to braid.
Faux Curled Rosewood Wreath. Shabby Chic Dangly Earring Display. This fun little shabby chic earring stand, made from an altered picture frame, is a great way to hang and display all your beautiful, dangling earrings.

I had the idea for this project after we talked about my love affair with dangly earrings and how to display them. I don’t know about you, but I just love seeing them all hanging in a row! :) The next day I made this earring frame, and it was so quick, easy, and inexpensive to put together, I knew I had to share it with you! :) I spent a grand total of $5.34 on this project. Cost: Less than $10 Time: 30 mins Supplies: picture frame, 12′ of picture wire, acrylic paint & brush, staple gun (or nails/tacks, etc) Fabric Clutch. T-Shirt Refashion: Jersey Necklace.
Sometimes I feel like I ride on the coattails of creative people.

Back in January as I was surfing my favorite blogs, I came across this post on Ultra Vroom about cardigans and fabric necklaces. I instantly fell in love and had to have a fabric necklace for my very own. I week or so later I remembered the large stash of white jersey hanging around the basement and hap-hazardly made my own version of Annie‘s fabric necklace. If I remember correctly, I wore that necklace for 4 days in a row. I didn’t really take it off until Penelope bumped her mouth on the table and bled all over me (Penelope is ok, BTW). At-home screenprinting. 16 Headband Tutorials. As a busy mom of three little boys, I don’t always have time to do my hair.
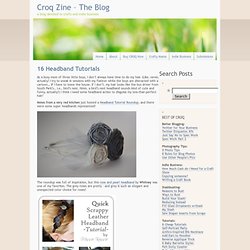
(Like, never, actually! I try to sneak in sessions with my flatiron while the boys are distracted with a cartoon… IF I have to leave the house. If I don’t, my hair looks like the bus driver from South Park’s… i.e., bird’s nest. Hmm, a bird’s nest headband sounds kind of cute and funny, actually!)