

3 Simple Homemade Lip Balms - Your Lipsve Never Been Yummier. Three Amigo Lip Balms Waiting for a homemade lip balm to set up is a little like developing a Polaroid.
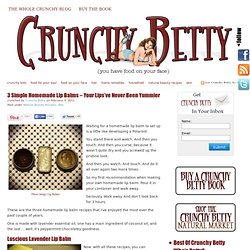
You stand there and watch. And then you touch. And then you curse, because it wasn’t quite dry and you screwed up the pristine look. A ModernTake on the Doily - $850 Lamp for less than $50. A Modern Take on the Doily $850 Lamp for less than $50?

Yes Please! Hello Pretty people! We are so excited to share a project we did this past weekend. A few months ago, I came across a ceiling lamp, I absolutely loved. It was $850, and I just couldn’t justify the spend, being it was simply made of doilies. How to Make a Chandelier (Part 2 (With Friends)) I'm not going to lie to you, this chandelier is both time + labor intensive.
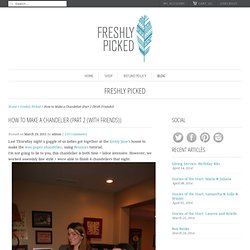
However, we worked assembly line style + were able to finish 4 chandeliers that night. 1. Tear off your wax paper into long pieces. Friendship Bracelets. Macraméd friendship bracelets were all the rage when I was growing up in the eighties.
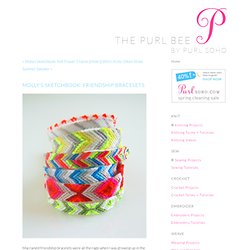
All the girls at my school would obsessively make them for one another in a dizzying variety of colors, widths, and patterns. It's amazing, thinking back, that such young girls could make such beautifully intricate accessories. I, of course, tried my hand at making them as well. I would ride my bike down to the five-and-dime store and pick out the most sophisticated color combinations of embroidery floss I could find, but when it came to the actual macramé I never got beyond plain stripes. There was nothing wrong with plain stripes, except that the other girls seemed so much more advanced with their diamonds and chevrons. Fast forward 20 years: Purl Soho started carrying DMC Cotton Embroidery Floss in every conceivable color (including fluorescents! Making friendship bracelets is a surprisingly easy craft, and best of all, in the end you'll have a bunch of cute summer bracelets to give to your pals.
{Valentines day} pixel-y popup card. I‘ve been scratching my head trying to come up with a card for my hubby {AKA the non-romantic type}.
I finally decided to make this pixely popup heart card! They are really minimal (which I love) and take about 20 minutes to make (that includes the card, insert and envelope). Glossary. TipJunkie Decorating. Anthro-Inspired Book Stack Necklace - JEWELRY AND TRINKETS - StumbleUpon. One of my favorite bloggers posted about this necklace available on Anthropologie's website a few months back.
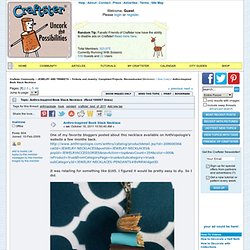
It was retailing for something like $165. I figured it would be pretty easy to diy. HOW TO: Create a Home Made Wax Seal (16 Pics) Tutorials for Recycling Books - StumbleUpon. We rode bikes around our neighborhood this weekend and stopped at all the garage sales we found along the way. I love doing this because it's like exercise and shopping in one! Jewelry Organizer (and a giveaway) - Create-Celebrate-Explore - StumbleUpon. UPDATE PART 2: My Jewelry Organizer won the Elmer's Spring Creation Contest.

I'm absolutely thrilled. Aside from receiving a visa gift card for winning, I also had the privilege of drawing 3 more winners from the comments via random.org to each receive an Elmer's DIY kit. The winners were: April, Barbara (VinoLuci), and Bestie. UPDATED: This giveaway has closed. The winners as drawn by random.org are wendyp, JulieB and Miranda Taylor. Remember when I made the jewelry organizer for Marisol's bedroom? Good Life Eats - StumbleUpon. Bookmarks | 26 comments I don’t really use real bookmarks.

I’m not sure why. They’re not expensive, or hard to make, but I tend to just pick up whatever to mark my pages. Old receipts, scraps of paper, a pencil, etc. But I don’t ever dog ear my pages. The Sweetest Occasion - StumbleUpon. Hi there, it’s Jenny from Hank + Hunt with a fun and super easy diy today!
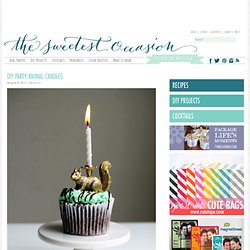
As soon as I thought of making these I got a huge kick out of naming them Party Animals. Hilarious, but if you hear groaning…it’s coming from my house. Regardless of how cheesy the name is, these turn out awesome. Your kid’s favorite animal holding that birthday candle minus those red eyes that are oh so typical for plastic creatures, awesome. TUTORIAL: Coffee Stirrer DIY Wall Art - makeanddogirl.com - StumbleUpon. Last week, I posted a preview of the simple, inexpensive wall art my mom and I created.
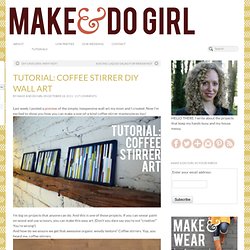
Now I’m excited to show you how you can make a one-of-a-kind coffee stirrer masterpieces too! I’m big on projects that anyone can do. And this is one of those projects. If you can smear paint on wood and use scissors, you can make this easy art. How to With Laura: How to Salvage a Rainy Day. Rainy days can be the worst. Rainy days past have ruined my plans and, worse, my hair. It’s cold and grey and cute dogs can’t parade freely about towns on their walks. You’re forced to wear close-toed shoes so nobody can see the really cool nail polish you finally bothered to slather on your toes.
But it’s not necessarily all bad. Rainy days can be the best. Inspiring DIY / clementine candle. Restoration House: Family Room Spring Refresher... Water Balloon Luminaries : Candle & Soap Making Techniques - StumbleUpon. A fun and easy project with a beautiful payoff. Learn how to make these Balloon Luminaries. You will need: High-Melt Paraffin Wax (IGI 1260)Party BalloonsDouble BoilerCookie Sheet Instructions: Craftgawker - StumbleUpon.
How To Style a Hair Bow - A Beautiful Mess - StumbleUpon. Love bows? We do too! Learn to make a pretty bow with your own hair so you can feel extra fancy. Enjoy..... 塑料勺子做滴花花 来自小小艾在堆糖网的分享. Home craft room — Todays Creative Blog - StumbleUpon. Decorative Paper Lanterns - Martha Stewart Crafts - StumbleUpon. GIVERSLOG. Most favorited all-time - page 2. Crafty - StumbleUpon. Before & After: Crazy Beautiful Toy Kitchen. 23.2K Flares23.2K Flares × LOOKING for more DIY play kitchens? Click here for a roundup with lots more projects, photos and ideas, including a DIY toy workbench for a little boy! And if you like this post, Subscribe to Green Your Decor for more DIY projects and green ideas! I like to think of myself as pretty crafty.
StumbleUpon. Vintage Wanna Bee: HOW TO MAKE A FB TIMELINE COVER... So, you know how facebook is always super annoying and changes their layout constantly? Crafty / DIY canvas with lighted branches...fabulous. Make-up Magnet Board - StumbleUpon. We all know with craft blogs that original ideas are often hard to come by, we find ideas we love and make them our own but we didn't come up with the idea ourselves.