
Logic Levels. Favorited Favorite 25 Introduction We live in a world of analog signals. In digital electronics, however, there are only two states – ON or OFF. Using these two states, devices can encode, transport, and control a great deal of data. Logic levels, in the broadest sense, describes any specific, discrete state that a signal can have.
Covered in This Tutorial What is a logic level? Suggested Reading This tutorial builds on basic electronics knowledge. What is a Logic Level? Put simply, a logic level is a specific voltage or a state in which a signal can exist. Logic 0 or Logic 1 Digital electronics rely on binary logic to store, process, and transmit data or information. The strength of a signal is typically described by its voltage level. Active-Low and Active-High When working with ICs and microcontrollers, you’ll likely encounter pins that are active-low and pins that are active-high. For example, let’s say you have a shift register that has a chip enable pin, CE. TTL Logic Levels References. Installing Arduino IDE. Introduction This tutorial will walk you through downloading, installing, and testing the Arduino software (also known as the Arduino IDE - short for Integrated Development Environment).
Before you jump to the page for your operating system, make sure you’ve got all the right equipment. What you will need: A computer (Windows, Mac, or Linux)An Arduino-compatible microcontroller (anything from this guide should work)A USB A-to-B cable, or another appropriate way to connect your Arduino-compatible microcontroller to your computer (check out this USB buying guide if you’re not sure which cable to get). An Arduino Uno. Installing Arduino IDE. Introduction This tutorial will walk you through downloading, installing, and testing the Arduino software (also known as the Arduino IDE - short for Integrated Development Environment).
Before you jump to the page for your operating system, make sure you’ve got all the right equipment. What you will need: Logic Levels - learn.sparkfun.com. Blocks. This article is about the programming blocks.
For account blocks, see Ban. Blocks are puzzle-piece shapes that are used to create code in Scratch. The blocks connect to each other like a jigsaw puzzle, where each data type (event, command, reported value, reported boolean, or script end) has its own shape and a specially shaped slot for it to be inserted into — this prevents syntax errors. Series of connected blocks are called scripts. There are twelve categories of blocks: Motion, Looks, Sound, Pen, Variables, List, Event, Control, Sensing, Operators, PicoBoard, and LEGO WeDo (although there are some other categories and blocks in some Scratch modifications).
Guides/pdfs/SketchITPlayIT.pdf. Start Making! an Intel Labs Initiative. Glow Doodle. A Showcase for MaKeyMaKey Creations. SketchITPlayITGuide.pdf. Start Making! an Intel Labs Initiative. MaKey MaKey Piano-2 on Scratch. Guides/pdfs/SketchITPlayIT.pdf. Guides/pdfs/MakeyJourney.pdf. Guides/pdfs/MaKey-a-WeAVE.pdf. MaKey MaKey Advanced Guide. Introduction Previously on Getting Started with the MaKey MaKey we discussed how to make your standard banana space bar.

But what if you want to make a full-on banana piano, and the default MaKey MaKey key presses don’t fit your needs? Among its many magical characteristics, the MaKey MaKey is easily reprogrammable, so you can customize the key-mapping to fit your project. In this tutorial we’ll show you how to use Arduino – the most popular embedded development environment out there – to reprogram the MaKey MaKey and modify which inputs press which keyboard or mouse control.
We’ll also talk a bit about that mysterious output header, which you can use to turn the MaKey MaKey into more than just an input device. Please Note: This tutorial only applies to Makey Makeys purchased from SparkFun or a SparkFun Distributor that have the SparkFun logo printed on the board. Suggested Reading Beyond that tutorial, here are some related tutorials we’d recommend reading as well: What is an Arduino? MakeyMakey improv with plants. Bananamaphone - Beau Silver. MaKey MaKey Quickstart Guide. Introduction Welcome to the world of Makey Makey!

A world where everyday objects are much more than they appear. Bananas are more than just a curvy fruit --- they're keys to a virtual piano. Play-Doh isn't just a child's toy --- it's the controlling force behind Pacman's up/down/left/right. And your simple pencil drawings are a portal to Portal. Be prepared to look at everyday objects in a whole new light. Materials Required. HOW TO: Quick Start, Software. Setup | Materials | Software | Troubleshooting Setup 1) Plug in USB Small side of USB cable plugs into MaKey MaKey, big side plugs into computer. 2) Close Popup Window Your computer may ask you to install drivers or do other setup.
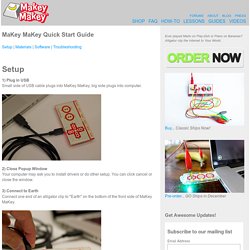
You can click cancel or close the window. 3) Connect to Earth Connect one end of an alligator clip to "Earth" on the bottom of the front side of MaKey MaKey. 4) Connect to Yourself Hold the metal part of the other end of the alligator clip between your fingers. 5) Connect to "Space" and Try It While you're still grounded, touch the round "Space" pad on the MaKey MaKey. Virtual Chamber Music - Pentatonic Piano Duet. GUITAR. PIANO. The Original Best Piano App Online. Drum Kit. MaKey MaKey Piano-2 on Scratch. Carrot Piano (A MaKey MaKey Project)