
Sheep it Render Farm. Ground and Foliage Shader & Texture Pack. CG Cookie has partnered with Gametextures.com to bring you some of the best tile-able textures around.

This pack includes 40 textures, ready to drop right into your project. Each texture includes all the necessary maps to create stunning surfaces ideal for outdoor elements like rocky ground, grass, sand, snow, ice, and more. Included Texture Maps: Diffuse color, Gloss map, Height map, Normal map (including standard and inverted Y), and of course a Specular map. Custom Materials per Texture Each texture includes a fine-tuned material specific to that texture, which is ready to use. Advanced Shader Node Group for Customization Would you like to tweak the included materials or create your own?
Blender 101: The Modifier Encyclopedia. There’s too many settings and functions in Blender to remember what each one does.

And Google searches often raise more questions than they answer! Introducing the Blender 101 series! The series where we focus on a specific area of blender and show you what each function does. First up… by Anderson Baptisa Ahh the ever growing modifier panel. Blendermada - Blender Material Database. 13 Ways to Reduce Your Render Times. Nobody likes waiting for hours whilst their render finishes, but most people do.

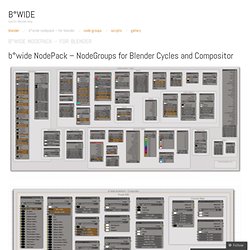
Little do they know, they can cut these render times in half with a little bit of tweaking. By default, the big CPU sucking features are turned on default the blender devs want to ensure that you get the best looking renders. However when you are still working on the scene and don’t need to see the final image yet, it makes sense to turn these off. B°wide NodePack – for Blender. Here is my hand picked selection of NodeGroups i’ve created over the past 2-3 years.

There’s everything, from simple little Tools, Materials, UberShaders to Compositing. Some are made quickly, on some i spent countless hours. With this first release i’ve put together some information about every NodeGroup. Not too much, but mainly what the NodeGroup is supposed to do. Blenderpedia. » Procedural wood. The next entry in this series is a much improved version of my procedural wood.

This is how the current version looks: The node setup as of version 1.6: » Procedural rust. The first entry in this Surface Knowledge series will be the now fully procedural metal rust material.

This is how it looks: The node setup is a large and complex one, so I will post it here and answer any possible questions in the comments section: I will point out, though, that the topmost ColorRamp node is the one governing the amount of rust in the material, so play with it to set the rust to your content. Also depending on your scene and model you may want to adjust the scale value in the rust node group. Here is a link to the blend file for those who want to try the material themselves (I will probably do further improvements to it in the future, hence the versioning in the name).
» Procedural orange skin. Just as I announced in my previous post, here is a new entry in the Surface Knowledge series available for download.

This is how the shared material looks like: Here is a look at the node setup: » Procedural Stippled Finish. You might have noticed the stippled finish in the background wall I used for my last scene.

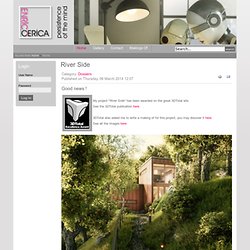
Stippled finish paint was very popular back in the eighties, so I created this material to get an old fashioned feel that would fit the vintage hardware portrayed in the scene. For the creation of this material I relied solely on procedural textures, so I have decided to release it as part of my Surface Knowledge series of fully procedural materials. Home. River Side Details Category: Dossiers.

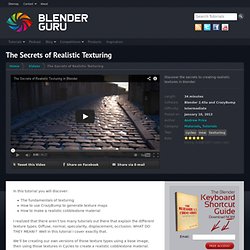
Gallery - Painter loft. Chocofur! / Furniture. The Secrets of Realistic Texturing. In this tutorial you will discover: The fundamentals of texturingHow to use CrazyBump to generate texture mapsHow to make a realistic cobblestone material I realized that there aren’t too many tutorials out there that explain the different texture types.

Materials, render engines and more. Blender: some useful default settings « blair willems. As this is now two years old, I have rewritten this article for Blender 2.69. When you first install Blender, it is generally set up pretty well with options enabled that allow new users to familiarise themselves with Blender quickly. Over time however, I have found a few small tweaks to make to the default set up, so that each time I start Blender, or create a new blend, everything is configured how I prefer it. This post will go through each one of these options, and explain what they do and why I opt to use them. Some people will disagree with some of these, and you might have something you think I should add to this list (I have actually left off a couple I think might be useful only to a small number of people ) Getting Started First of all, open up Blender as you would to start a new project, don’t make these changes with a project open, or saving the default settings at the end will include your current project, and boot this every time you open Blender.
User Preferences Interface Tab. Blend Swap. Main Page. CG Cookie. Blender Tutorials Downloads Videos & Education – Blender Cookie. Virtual Aircraft: A book about programming. Sebastian König. "Fly" - Blender Modeling Timelapse. Blender Time. Blender tutorials, tips, tricks and articles! Blender 3D Tutorials : CG Masters. Arroway Textures (EN) Basic Sculpting in Blender 2.5. Blender Fundamentals: First drop of videos now available to the public.
DVD training 7: Blend & Paint - Blender Store. Created by David Revoy, art director of Sintel and author of the Chaos and Evolutions training DVD. On this DVD training - with over 2 hours of videos - David Revoy explains step-by-step his 3D paint-over techniques. De training starts with an introduction to Blender 2.5, to provide 2D artists with not much 3D experience a quick overview of the key features of Blender. It introduces the basics of the UI, modeling meshes and setting up light and rendering. This render is then taken to MyPaint and GIMP for further processing, importing and setting up several layers and showing how to efficiently add detail, texture and more dramatic lighting with manual paint-overs and layering techniques.
The main theme of this training is to end up with a big high-detail 6K picture of a science-fiction environment, with space ship, a city, plants and trees, and several characters. For this training, a basic knowledge of Gimp and digital painting is recommended. BenSimonds.com.